Spiced spinach sesame seed sourdough flatbreads…

My flatbreads served with a plate full of leftover roast vegetables, ajvar, zaatar and tahini

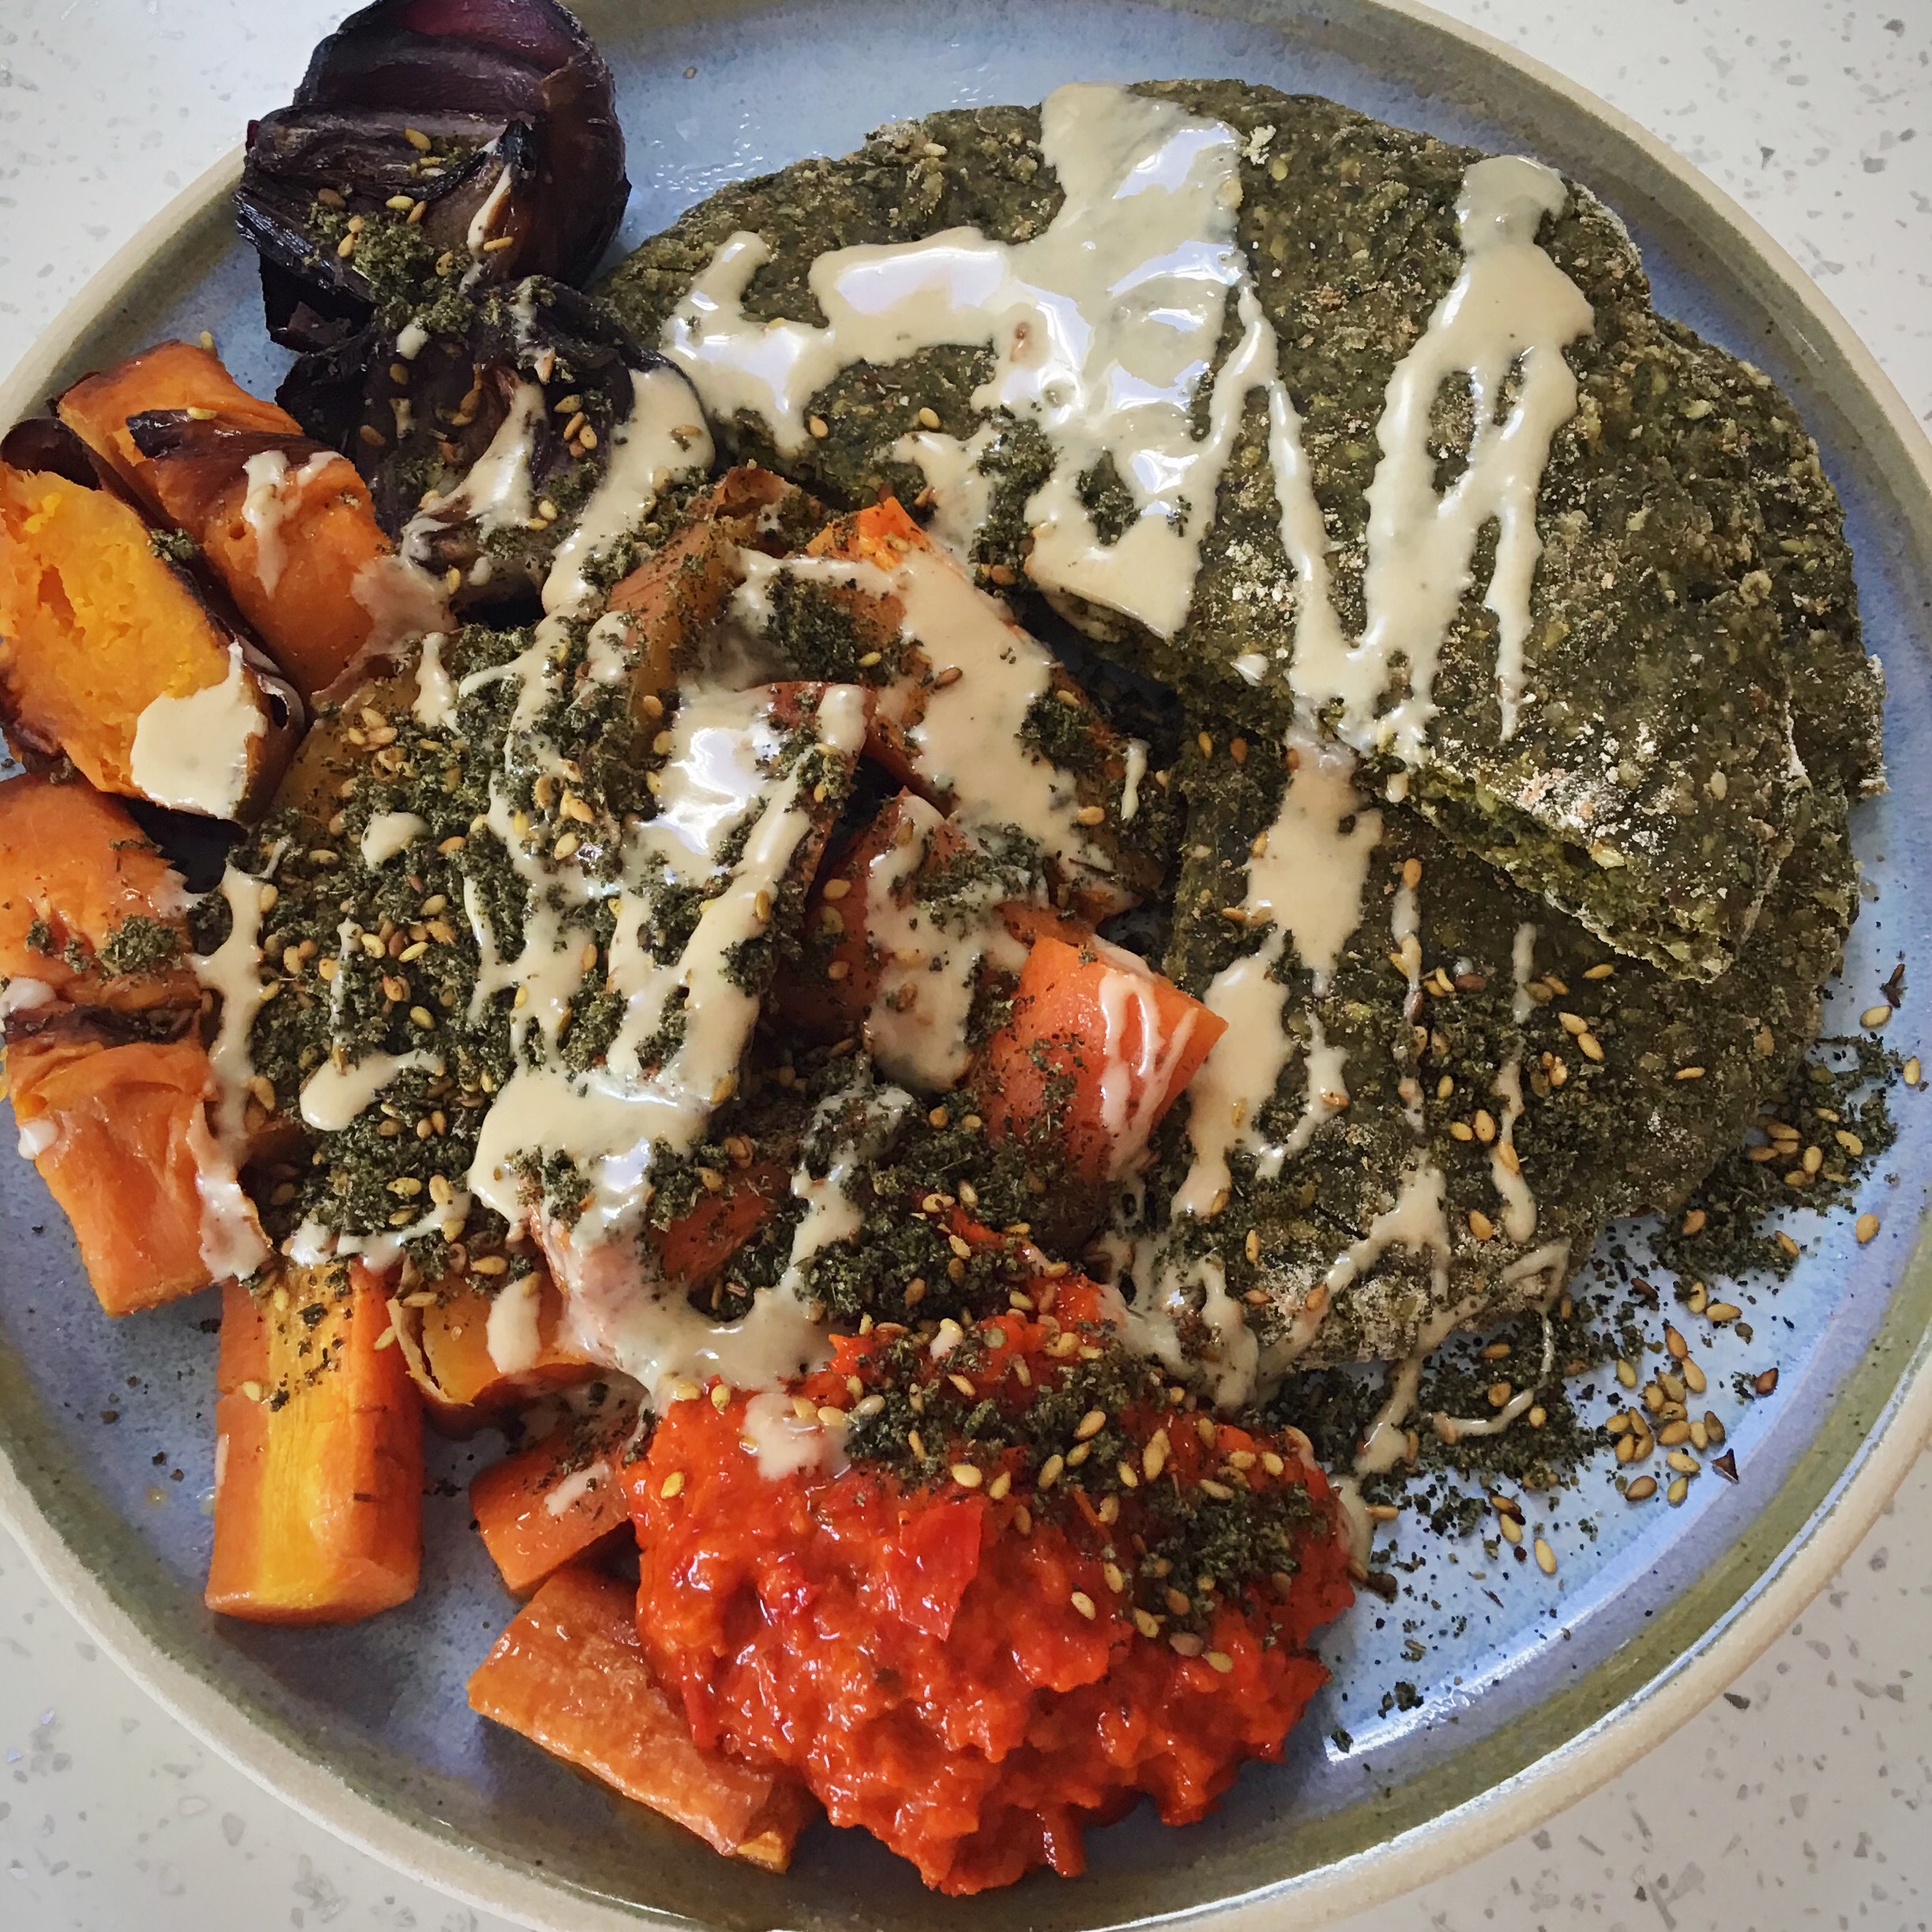
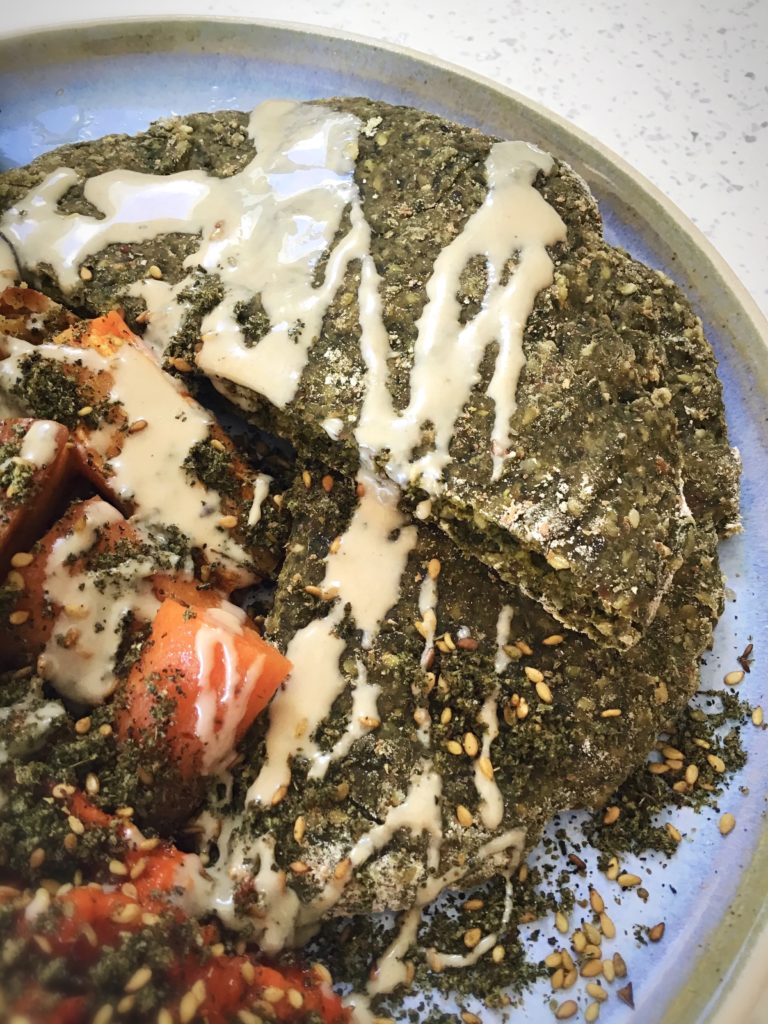
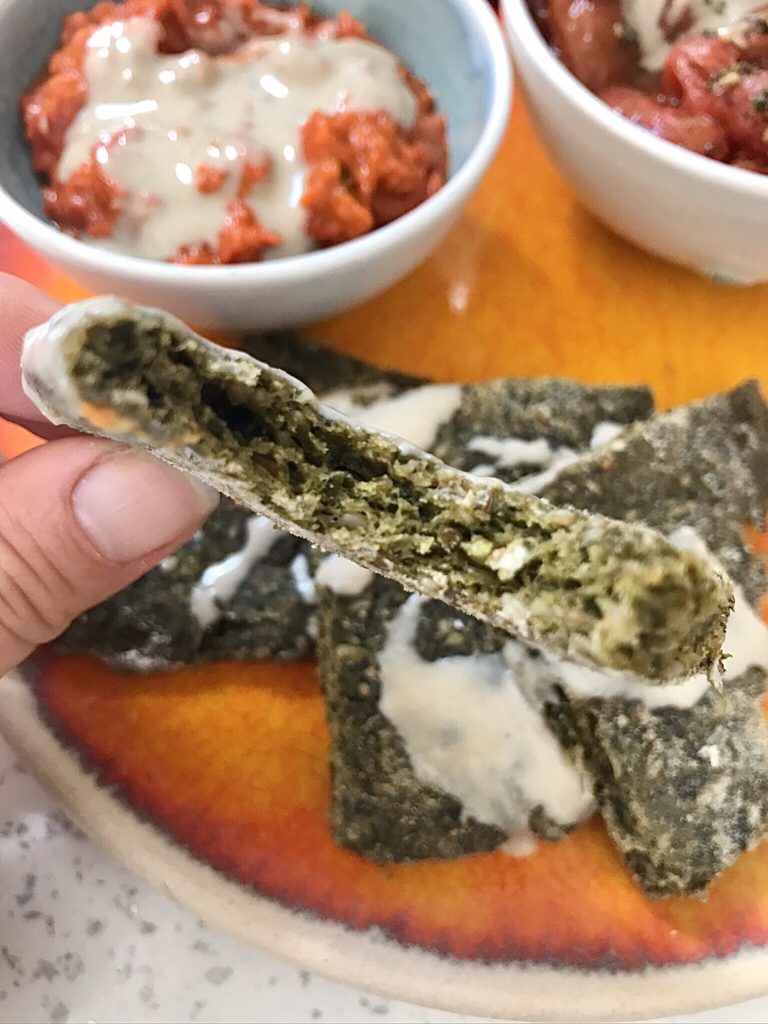
I do like a ‘chuck it all in a bowl and see what happens’ kind of creation, which is what these were…I’ve made many spinach flatbreads in the past, but this was the first time adding some starter. It adds an extra flavour and of course, all that sourdough goodness we love!

These are also packed with great healthy ingredients and are a great way to get kids eating spinach! You can use them as flatbreads or make bigger rounds and use them as a pizza base.

Equally great the next day, the flavours continued to develop

This recipe can serve as a basis for something you might fancy making, you can swap out the ingredients for things of your choice or just follow it as it is. I’ve included the spices I used, feel free to swap these for your favourites, an Indian inspired spice mix works well too.

Ingredients

200g starter (this can be discarded starter, unfed, or fed for the purpose)

250g baby spinach leaves

150g flour of your choice, I used buckwheat flour

50g toasted sesame seeds

3 tablespoons tahini or olive oil

3 garlic cloves, peeled

2 teaspoons tabil spice mix (toasted even amounts of coriander, cumin and carraway seeds, ground)

2 teaspoons pul biber chilli flakes

2 teaspoons paprika

Salt and pepper to taste

All in the bowl

Method

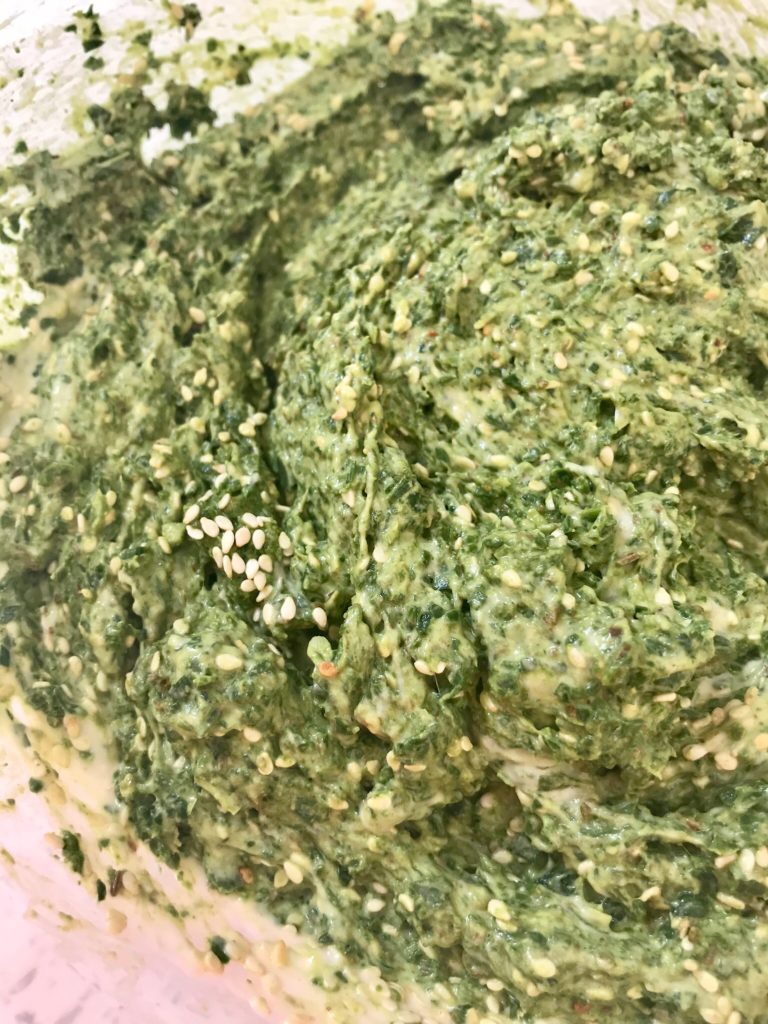
In a blender whizz up the everything expect the sesame seeds, starter and flour. Run it until the spinach and garlic are finally chopped.

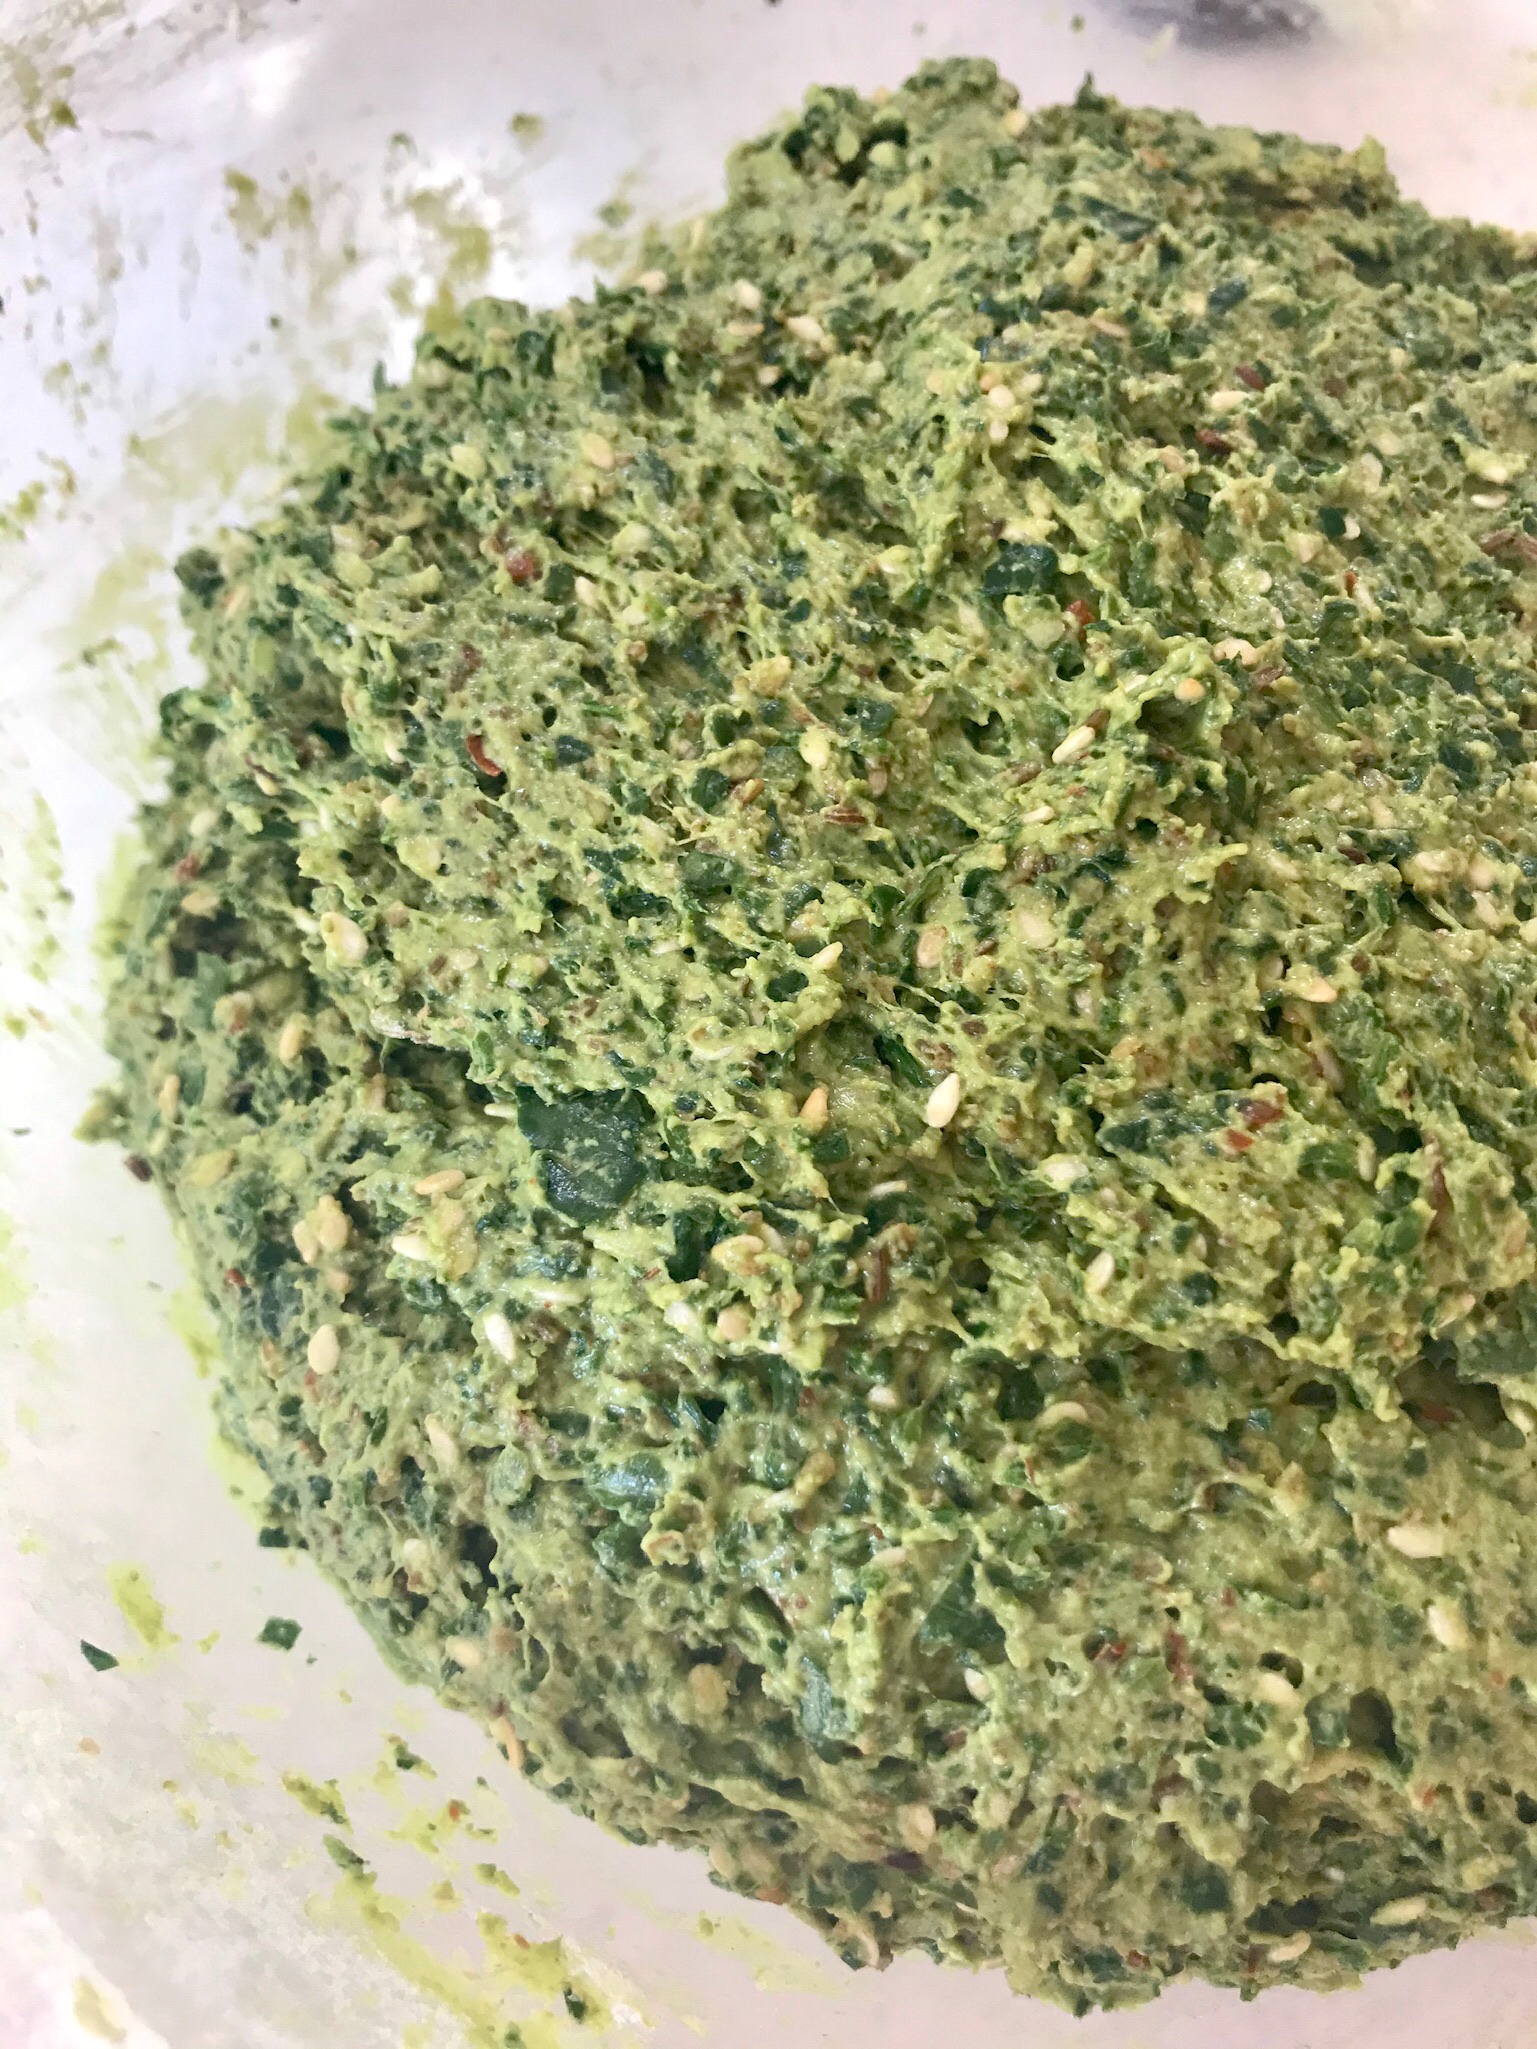
Scoop it all into a mixing bowl, stir in the seeds, then fold in the starter and flour.

Cover the bowl and leave the dough to settle and develop.

Now you can leave the dough for an hour, or several or overnight. The longer you leave it the more the flavour will develop, it may even prove and little and puff up.

When you want to cook your flatbreads, heat your oven to 180C fan/200C non fan.

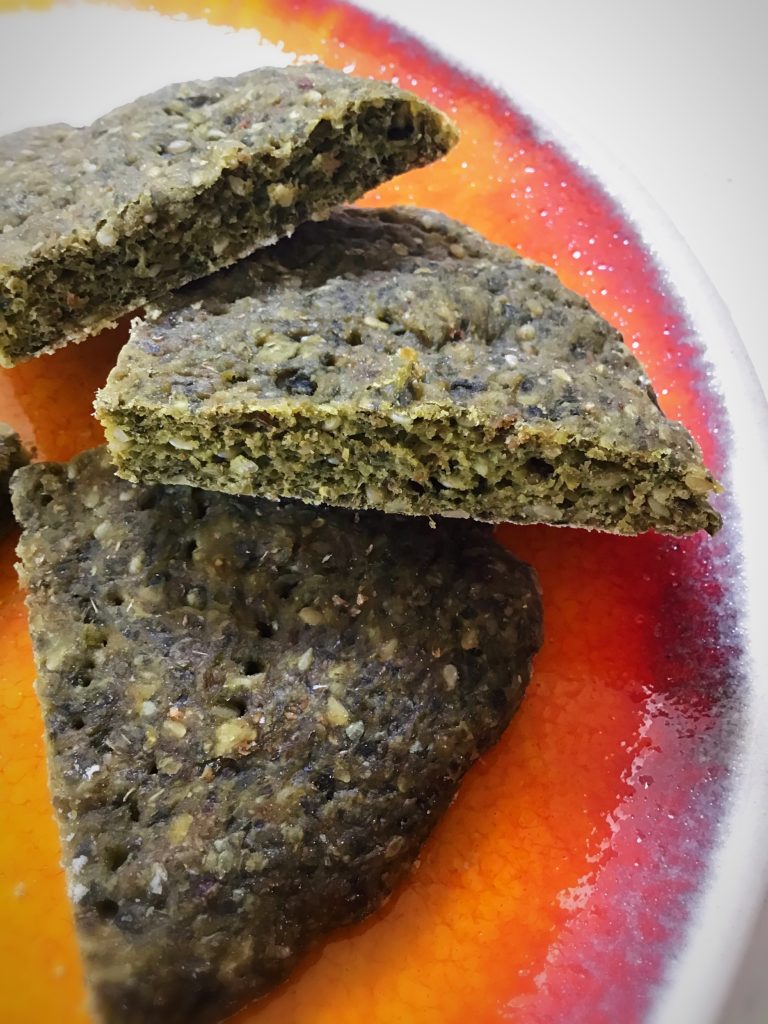
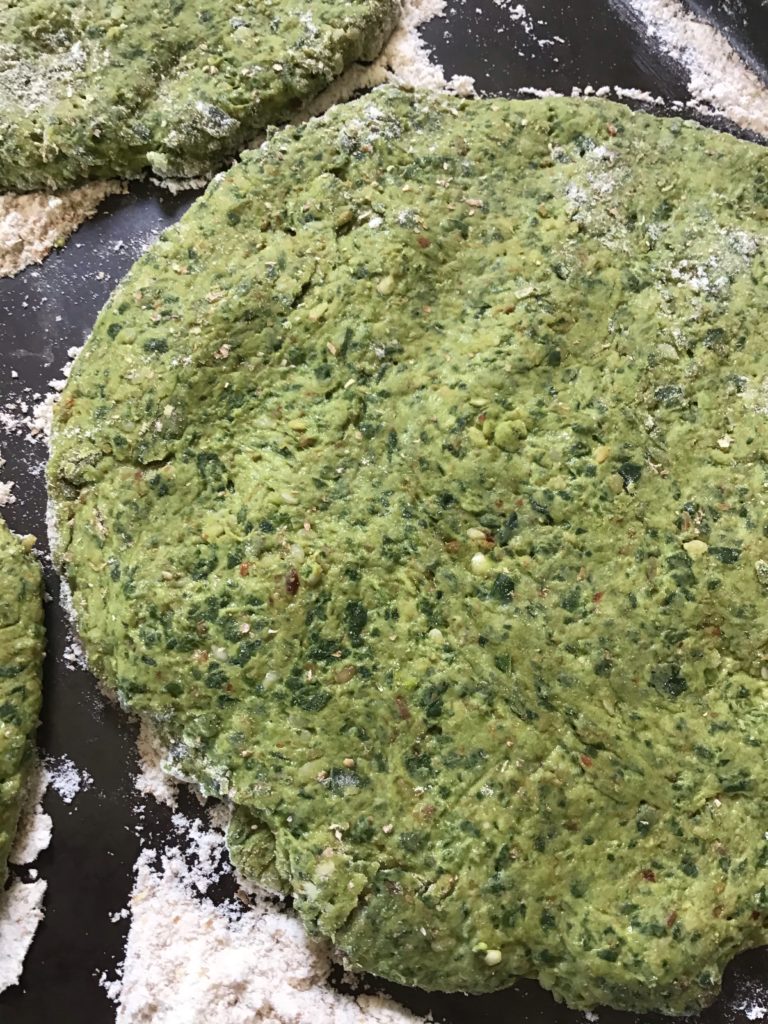
Turn the dough out onto a floured surface and break off portions. Shape them into round then flatten them out to 1/2cm thick.

Place them onto a oven tray. Either bake immediately or cover and allow them to prove again for an hour before baking.

The uncooked dough is such a great colour and smells amazing

Bake for 10-15 minutes until slightly puffed and darker in colour.

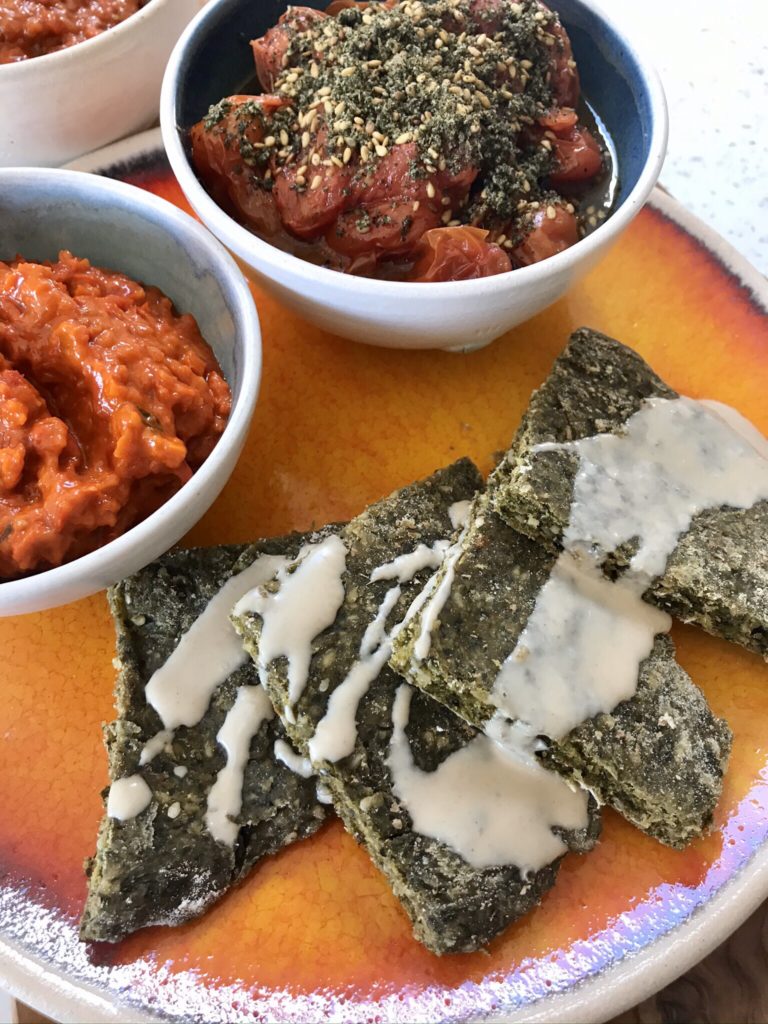
Eat warm or store for later, they’re even better after 2-3 days, and can easily be reheated in a toaster.

Enjoy!

I hope you like them!

More top tips…

Some more top tips for you and answers to the questions I am most often asked..

Give your starter time, it may look like it’s doing nothing, but it’s building strength, stick with it

If your starter is thin with tiny bubbles, add extra flour to thicken it up, it needs the extra food

If your starter has a layer of murky liquid in the top, it’s not ruined, it’s just hungry. Feed it! And make sure you are not keeping it anywhere too warm, the heat will make it constantly thin and weak

Don’t keep your starter in the oven with the light on, it’s too hot, it will work too fast and always be too thin and weak

The flour you have made your starter from does not need to match the flour in your dough

Follow the process steps and allow your dough time to do its work

Don’t leave dough on the oven overnight with the light on, it will over prove and be spoiled

Check out all of the info on my site about flour, weather, scoring, storing, the FAQs, baking times takes, there’s lots of free info there for you

Check out the equipment list, and..

If you don’t have a banneton, line a similar sized bowl with a clean tea towel and sprinkle it with rice flour

If you don’t have rice flour, grind some uncooked rice, it’s the same thing

You can use any covered oven proof pan just make sure it’s big enough

Sourdough is a wonderfully slow process, let it happen and enjoy it, it will be worth it

Watch your dough and not the clock

Give your dough time to double overnight; depending on the temperature overnight this may take shorter or longer than my usual times stated in my master recipe

If your dough is soft and spreads, use 25g less water in your dough next time

If you dough spreads when you turn it out in the pan, but bakes up to a lovely loaf, don’t worry about the spreading, enjoy your loaf

Always my biggest and most important tip:

If it tastes good IT IS GOOD!

Don’t focus on looks and holes and scoring, they don’t make it taste any better, enjoy what you’ve created, it’s amazing x x

Bee pollen sourdough…

A cake that is being cut into it.

I was very lucky recently to be sent some bee pollen by one of my very kind Instagram followers. I’ve had bee pollen before, but not like this, this one is a vibrant yellow with lovely fat granules. Sourdough loves bee pollen, it loves the natural wild yeast and sugars that it brings to the party.

For this loaf I played with a new starter adding bee pollen to it from the beginning, and you’ll see from the photos in the grid below that it went a bit wild! It was very exciting to wake up to. Once I’d stirred it down and fed it again the next morning, it was still active and bubbly and ready to use within an hour.

This is what I used to make this loaf, however, you do NOT need to make a new starter yourself. If you would like to see how much starters like bee pollen, feed up your starter, split some out into a new bowl and feed it for a couple of days with your usual flour and water and a good amount of bee pollen before giving it a go. Or if you fancy making a new starter with some, then go for it! I didn’t measure out the bee pollen, I used a dessert sized spoon amount each time I added some.

To make my loaf, I used my master recipe, exactly as it is (link on the left of your screen) with this bee pollen boosted starter. You can also add the bee pollen to your dough instead.

A close up of some food in a bowl

For this loaf I used my 28cm long oval banneton and baked in my 30cm long oval pan from a cold start for 55 minutes. It’s all in my recipe 👍🏻

A piece of bread with some kind of crust

And this was inside the cut loaf. You can see the yellow tint from the bee pollen. Although bee pollen is sweet it does not make your loaf sweet using this small amount, but it does make the sourness more mild, and really produces a great texture, really fabulously chewy! It was a lovely loaf to eat.

A baked dish with some type of crust on it

If you do try it, I hope you like it!

A piece of bread with many holes in it.

My hazelnut cacao chocolate chip sourdough muffins..

A close up of some chocolate muffins in paper cups

Introducing my hazelnut cacao choc chip sourdough muffins!

A close up of some chocolate muffins in paper wrappers

I recently whizzed up some hazelnut cacao butter by blending roasted peeled chopped hazelnuts with cacao powder, a squeeze of honey and a little rapeseed oil.

A grinder with some kind of food on it

I only added a small amount of honey to take the edge off the bitter cacao powder as I don’t like overly sweet things, but it can easily be made sweeter for other tastes. You can also use cocoa powder instead of cacao.

I ended up with quite a lot of it so I thought I’d play with some. Consequently these muffins are packed with it!!

A muffin sitting on top of a table.

Healthy, protein packed, sourdough beauties!

This is what I mixed up:

50g active starter

300g hazelnut cacao butter

200g oat milk

200g plain flour

2 teaspoons baking powder

2 eggs

I added a handful of chocolate chips to half of them.

I made half of them without the choc chips or added sugar, for me to test some, but you might prefer things sweeter than I do so feel free to add sugar or honey to the mixture.

A muffin sitting on top of a paper wrapper.

I mixed the ingredients all together well but careful to not over mix it.

Spooned the mixture into 12 muffins liners.

Baked at 200C fan/220C non fan for around 18 mins until a sharp knife came out clean.

They came out with lovely crunchy tops and soft interiors. For me, they tasted better later and the next day once cooled and the flavours had developed. The sponge stayed soft and lovely even the day after that. I was definitely happy with these.

A close up of some chocolate muffins in paper cupsA close up of some chocolate muffins in paperA person holding a bite of chocolate muffin.

Look at that light fluffy sponge! So lovely!

Feel free to substitute the oat milk for milk of your choice, plain flour for white spelt flour or all purpose flour, and my hazelnut cacao butter with hazelnut cocoa butter or hazelnut for a really sweet hit! You could also increase the amount of starter for more of a sourdough flavour, and reduce the amount of flour and milk. Have a play!

Happy Baking!!!

My sourdough cheese soufflés….

A close up of some baked dessert in white dishes

This idea has been floating round my brain for a while now and this week I finally tested it out and this was the outcome….beautiful airy cheese soufflés, rich from the eggs and with the flavour of cheese, but with the added tang of sourdough. SOOOOOO a good! Tasty, light, textured, perfect morsels. For me, a total winner!

As this was pure experiment – let me clarify, I have never ever made any form of soufflé, sourdough or otherwise before this – I only made a small amount of batter so feel free to increase it. This made 4 small soufflés, in 8cm (internal) diameter pots.

The idea came from thinking about the light bubbly airy nature of sourdough starter mixed with the light airy nature of a soufflé. In my mind it made perfect sense! And luckily the result was fabulous, even if I say so myself! I immediately ate 3 just to be totally sure 😆😆😆😆

A small bowl of food on top of a table.

Small but perfectly formed and so very tasty!!!!!

It was so exciting to watch them cook as they grew very quickly, and very well! I was dancing round my kitchen in excitement.

A close up of some food in bowls

I am so happy with the outcome, I hope you love them too if you try them. I know they could have risen more evenly, I know they’re not ‘perfect’ in the world of soufflés, but I don’t care! It worked and they taste so good, to me they’re perfectly beautiful sourdough cheese soufflé babies!

Here’s what I did…

Ingredients

100g bubbly active starter

100g whole/full fat milk

100g grated medium/mature cheddar (depending just how much you love cheese!)

2 eggs, separated into yolks and whites

Butter to grease the pots

Ground almonds, 4 tablespoons (use finely grated Parmesan or breadcrumbs for a different finish)

A bowl of food on top of a blue plate.

Method

Preheat the oven to 180C/360F fan assisted/convection or 200C/390F non fan/non convection, and place an oven tray inside to preheat.

Grease your ramekins, or small ceramic pots, with butter, then sprinkle ground almonds/almond flour into each pot and tap it around to create a layer inside each pot, covering the base and up the sides.

In a medium bowl, make the batter by adding the starter, milk, egg yolks and cheese. Stir it all together well.

In another clean bowl, whisk the eggs whites until they just hold their peaks.

Gently scrape the whisked egg whites into the batter.

Using a metal spoon, gently fold the eggs whites into the batter, using a figure 8 action, or cutting and stirring round the bowl. Do this carefully to mix them in whilst protecting the air that you’ve whisked into the whites. Do not over mix. This is crucial.

Gently spoon the batter into the prepared bowls filling them evenly and to the top of the pots if possible.

‘Top hat’ each one by running a cutlery knife, or clean finger nail, around the edge of each pot, just the very tip of the knife, so that the mixture doesn’t stick. (I didn’t do this very well hence the uneven growths!)

Place the pots onto the preheated tray in the oven.

After 15 minutes turn the oven down to 160C/320F fan assisted/convection or 180C/360F non fan/non convection, and bake for another 15 minutes.

DO NOT OPEN THE OVEN UNTIL FULLY BAKED. If you do they will collapse.

Serve immediately.

They may start to collapse quickly but it’s all part of the fun!

A bowl of food with two pieces of bread on top.

Voila! My new creation! Welcome to the world sourdough cheese soufflés!

I am sharing my soufflés with everyone at the weekly Fiesta Friday link party this week – join in the fun!

Sourdough Uzbek flatbreads…

A bowl of food with some kind of hair brush

I’ve been wanting to try making ‘Lepyoshka’ Uzbek flatbreads ever since I saw my friend Sally make them and, of course, I wanted to convert them to sourdough. So this week I did!

A close up of some bread in a bowl

I purchased the stamp from this Etsy seller a few weeks ago especially; they’re so lovely, it would be easy to fill your cupboard with them!!

A pastry with a star design on it
A bowl of bread with a wooden handle.

I was very happy with my first attempt, you can just about see the pattern created by the special stamp, but moreover, with the addition of yoghurt in the dough they tasted great. They were lovely immediately from the oven, still good a few hours later, and then again just as tasty the next day when heated up again in the toaster.

A close up of some bread on a rack
A close up of some bread with cheese

To make them I made a stiffer dough than usual by using a mix of wholemeal and white flour, plus the yoghurt in place of water. I used a 0% fat Greek yoghurt (just because that’s what I had available, I’d use full fat next time) so it added a real tang to the flavour, and an almost cheesy taste once baked.

A round pastry with a star design on it.

To use the stamp and stop it from sticking to the dough I dunked it in water for each use, then firmly pressed it into the dough and pulled directly back up and out again.

For these I used up lots of young starter, from the starters I’ve been playing with in my kitchen recently, and less yoghurt, but you don’t need to. You could use less of your established starter and more yoghurt to create the same consistency in the dough.

A close up of some bread rolls on the table

Ingredients

300g young starter

100g thick Greek yoghurt

200g strong white bread flour

50g strong wholemeal flour

20g olive oil

1tsp salt

Method

I used my usual master recipe process to create and build up the dough, then placed the bowl in the fridge overnight for it to develop, as well as to protect it from the warm night.

The next day I let the dough come back up to room temp, sprinkled the counter with water then turned the dough out onto the counter and cut it into equal(ish) portions.

I rolled these into balls, flattened them out with my fingers and pressed them into rounds.

I placed each round onto a tray lined with parchment paper and I then used a spoon to flatten out a circle in the middle into which I pressed the stamp.

I then placed them in a cold oven, turned it up to 220C fan and baked them for 17-18 minutes.

A close up of some food in a bowl

The result is a lovely soft edge with a crunchy thinner stamped middle.

I will definitely be making these again, and adding them to my courses 🙂

A baked dish on a rack with cheese.

Leftovers loaves…

A close up of some food on foil

You know how it is, you open your baking cupboard and you’ve got various bags of flour, with various amounts left, but not enough for an entire dough…

A loaf of bread with some type of cheese on it

So the only thing to do is to throw them all together and hope for the best?! That’s what I did this week. And these loaves were the outcome..

A loaf of bread in a bowl on wax paper.

A loaf of bread in a bowl with some potato chips.

These include portions of strong white bread flour, malted multigrain flour, khorasan flour and a seeded flour mix, all thrown together in various quantities to make up my normal 500g amount of flour for my master recipe.

A loaf of bread with many different toppings.

A loaf of bread with many different types of food.

As you can imagine, I was happy with the outcome!

A piece of bread is on top of foil.

A close up of some food on foil

I love seeing how the activity in Star and then the dough after it’s overnight prove translates into the dough…it never ever gets boring!

Happy Baking!

The story of this week’s course…

A blue plate topped with cookies covered in nuts.

This week I had a lovely lady in my kitchen who had travelled especially from Dubai, in the United Arab Emirates. It’s such a compliment that she wanted to come and share my kitchen, and that she follows my baking from so far away.

It was also very close to my heart to welcome her to my home; I lived in Dubai as a child and I have a long connection with the UAE having had parents living Dubai and then Abu Dhabi across 30 years, as well as living there myself full time for 5 years prior to that. It is a place that holds a special piece of my heart and formed many of my food tastes as well as creative influences.

It was a joy to talk to someone who remembers the Dubai that I remember from the 1980’s and to listen to her speak Arabic is a sound I always love!

A close up of some bread on a plate

During the course we focussed on the basics of my master recipe and process, as well as working with wholemeal flour and using doughs for making rolls and other lovely sourdough goodies.

I always make sure that there is lots of dough to play with on my courses to get the feel of how different flours affect the dough but also to be able to turn dough out to make rolls in various guises, including the ones in the photos in this post.

A close up of some food on a plate

There were all made with my master recipe dough, one portion of which included 150g of khorasan/kamut flour (hence the yellow tint), and another made up of 250g Mrs Middletons plain natural flour + 250g Mathews Cotswolds white spelt flour.

We chopped up the dough and roll some portions in toasted seeds (above), and some in some Middle Eastern zaatar spice mix (below), and left some naked.

A close up of an avocado on a plate

You will find the details for making my various rolls recipes in my recipe index and all of the doughs were made using my master recipe.

I do love running my courses, I meet such lovely people, and it’s always an honour to welcome sourdough bakers from around the country and the world to my kitchen xx

My final proof sourdough rolls…

A close up of some food that is cut in half

The rolls are made using my master recipe dough again, but this time direct from the banneton, maybe my simplest method for making rolls yet!

Following the overnight prove, bring the dough gently together and place it into a well rice floured banneton, cover, and place it in the fridge as per the recipe process.

You can then use this whenever you are ready to make the rolls; I have used dough that’s been in the fridge for 3 hours and up to 31 hours and everything in between to make these rolls. The point being that you can have the dough ready to use whenever you need it.

It gives you full control over the timing – you don’t need to held hostage by the dough!

A white table with some food on it

When you’re ready, sprinkle some water onto your counter surface.

Turn the dome of dough gently out onto the counter.

Using a dough cutter, cut into 8 or 12 wedges.

A close up of some bread on the table

*At this point you can gently place the pieces of dough into chopped nuts, seeds, oats (as baked below), whatever you like. You can try and keep the wedge shape or wind them into other shapes, or just splodge them on the tray (see the photos below of a chopped pecan studded roll made by placing the cut wedge into the chopped nuts then wound into a swirl).

A tray of uncooked pastries on top of brown paper.A close up of some food on top of a table

Place the wedges onto a prepared tray.

You can now bake these from cold start, or in a preheated oven.

They don’t need to be covered and no steam is required.

Cold start: Place the tray into the cold oven, turn it up to 220C fan, 240 non fan, 450F, and bake for 20-25 mins until browned and risen

Hot start: Preheat the oven to 220C fan, 240 non fan, 450F, and bake for 20-22 mins until browned and risen

A close up of some bread with nuts on itA close up of some bread with nuts on it

To see this in action, check out the video on my YouTube channel showing exactly how I make them: https://youtu.be/YCVqTOJwzSY

A close up of a pastry with nuts on topA close up of some bread on top of a table

Happy Baking!

My master recipe sourdough pizza…

A close up of some pizza slices on a plate

This recipe uses the dough created using my master recipe process and then using it to create the pizza of your choice; the dough can be made up of the flour/s of your choice to create different flavours & textures…

A piece of pizza is being cut into slices.

The outcome being a lovely textured, holey, tasty pizza base!

The key is how to manage and store the overnight dough ready for when you want your pizzas. I have got 2 methods below, each designed to make it simple to fit the dough in with your timings, and not the other way round!

A close up of the crust on a pizza.

Method 1.

The morning after the overnight prove, you will hopefully have a lovely big bowl of bubbly dough; if it is escaping the bowl, gently do a single set of pulls and folds, just go once round the bowl, to pull it loosely together, re-cover it, and place it in the fridge. If the dough hasn’t reached the top of the bowl already, just place it in the fridge to bring the activity to a halt until you want to use it.

When you know when you want your pizzas to be ready for, remove the dough from the fridge an hour or so beforehand and let it warm up a bit.

Cover your work surface with water, flour or olive oil, I use water.

Turn the dough out from the bowl onto your surface and cut into portions, 2, 4 or 6, depending how big you would like your pizzas to be.

Let it sit for 10 minutes.

**I use a foil lined baking tray to cook my pizzas, liberally drizzled with olive oil (I like the crust it generates when baked). However, you may prefer using semolina, polenta/corn meal, flour, whatever your choice under the dough, directly onto your baking tray or baking implement of your choice. If you’re using a pizza stone, prepare the dough on a board or tray ready to be able to move it across to your stone as you usually do.

After 10 minutes place the dough on your chosen bakeware, and start to gently use your finger tips to push the dough out into a thinner rounder shape, or shape of your choice. You will need to let it sit for a few minutes and then do it again as the dough will bounce back.

Preheat the oven to 220C fan/240 non fan/460F.

Give your dough one final push out, spread with sauce of your choice and toppings of your choice, and bake for 12-15 minutes until the base is cooked and the cheese is bubbling.

Enjoy!

A collage of four different pictures with food.

Method 2.

In the morning you will hopefully have a lovely big bowl of dough. Cover your work surface in flour, water or oil, and turn the dough out onto the surface. I use water at this point.

Prepare your baking tray, I drizzle olive oil over my foil lined tray as stated above.

Portion the dough into 2, 4 or 6 pieces.

Let it sit for 10 minutes.

Place the pieces onto your prepared baking tray and use your fingers tips to push it gently out into a round; it will want to bounce back so let it set for a while and do it again.

Once you’ve got it pushed out to the thinness and size that you want, cover the whole tray with a large plastic bag, or place cling film over the dough, and put the whole tray in the fridge.

It can now sit in there until you want to use it, I’ve let mine sit in the fridge all day in the past.

**The top 2 photos in the collage below show the dough before and after being in the fridge. As you can see, the dough continued to work in the cold – my SuperStar in action!

You can now use this dough directly from the fridge, you don’t need to let it warm up or come to room temperature, you can just add your toppings and bake.

If you’re more comfortable letting it come to room temperature before baking you can do that too.

Preheat the oven to 220C fan/240 non fan/460F, and bake for 12-15 minutes until the base is cooked and the cheese is bubbling.

Four different pictures of pizza dough and cheese.

Enjoy!

A close up of some pizza slices on a plateA close up of some pizza on top of a blue surface

Beautiful blistered base, and it tastes SOOOO good!

A piece of pizza is being cut into slices.

And a view of the cooked base…

A close up of some kind of food

I love the crust that the olive oil creates, added to the soft interior.

A pizza sitting on top of a blue plate.A close up of some pizza on top of a blue surface

I hope you like my method and find it useful, and user & life friendly. For more pizza recipes and more, check out my book, The Sourdough Whisperer.