You can now find a full set of videos on my YouTube channel to take your from making your starter to your first loaves and beyond. Plus there’s videos answering all of the most frequently asked questions that I receive. You can find it all on my channel, Foodbod Sourdoogh, or use the links below.
Whatever you need, between my videos and my books, I’ve got you covered!
ALL ABOUT SOURDOUGH STARTER
To read how to make a starter (full written steps): CLICK HERE
To watch how to make a starter (full step by step video): CLICK HERE
To hear and see the answers to your Frequently Asked Questions about Starters: CLICK HERE
For everything you DON’T need to do with a sourdough starter, and how to keep it really simple, watch my full series of videos:
To watch my full master recipe in action: CLICK HERE
To hear and see the answers to your Frequently Asked Questions about dough and loaves: CLICK HERE
ALL ABOUT SHAPING DOUGH
Watch everything you need to know about how to shape your dough: CLICK HERE
ALL ABOUT OVER PROVING
Watch everything you need to know about what over proving is, why it happens, how to prevent it, and what to do if it does happen AND making sourdough in hot weather: CLICK HERE
ALL ABOUT USING DIFFERENT FLOURS
For Everything you need to know about using new flours or adding different flours to my master recipe: CLICK HERE
ALL ABOUT ADDING EXTRA INGREDIENTS
For Everything you need to know about adding extra ingredients and flavours to my master recipe: CLICK HERE
ALL ABOUT SANDWICH LOAVES
To watch how I make my sourdough sandwich loaves: CLICK HERE
ALL ABOUT BABY LOAVES
To watch how I make my baby master recipe loaves and my baby cube loaves: CLICK HERE
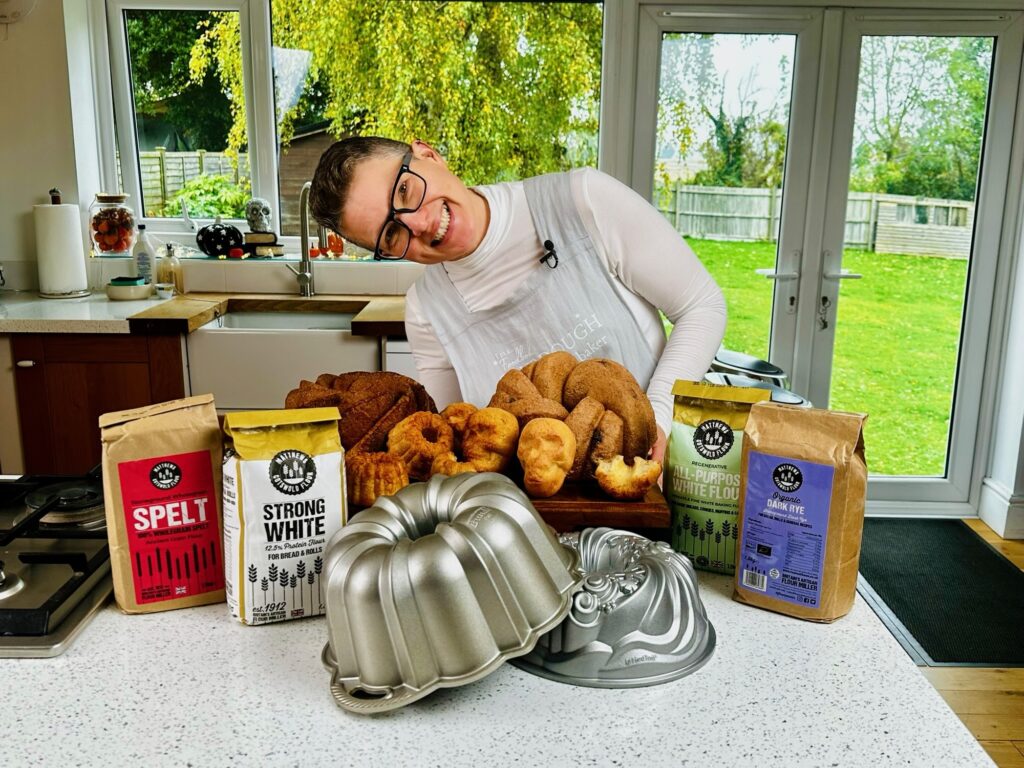
ALL ABOUT BUNDT PAN LOAVES
To watch how I make sourdough loaves in Bundt pans: CLICK HERE
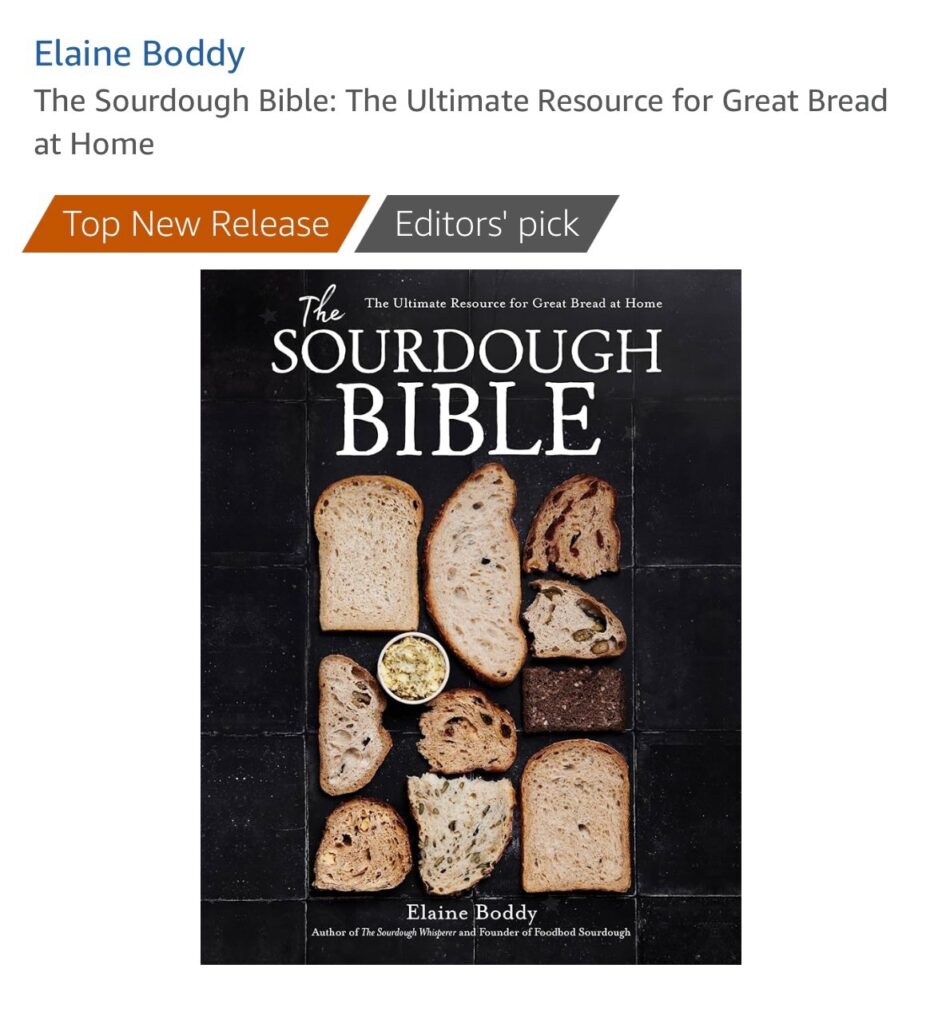
This week my new, and fourth, book, was published in the US, and reviews are already coming in…
‘I love this book! It is very informative for those like me that are new to sourdough bread making, but would also be great for those seasoned breads makers. It has SO MANY recipes that I can’t wait to try!!! I highly recommend this book! ❤️’
Annette Rowley Burrow
‘This book is so wonderful. It has everything one needs and repeatedly dispels the fear factor of making bread. I have two other of your books, which are also fantastic, but this new book has it all. I am so excited to begin new bread adventures with it! Thank you!!💝’
Welcome to Sourdough September, a month that celebrates sourdough created by the Real Bread Campaign in 2013 to raise awareness of this fabulous super bread and encourage people to appreciate real sourdough by making their own or seeking out genuine sourdough to purchase.
So why bother? It’s just bread isn’t it? You may be thinking that sourdough is ‘trendy’, just a load of hype, and really not worth the faff of making your own. Well, let me tell you a bit more about it and reassure you that it’s totally worth it! I’m Elaine from Foodbod Sourdough and hopefully I can answer those questions for you..
Firstly, let’s address the hype:
It may seem like sourdough has had a revolution recently, but even before lockdown it was gaining a constant momentum, but sourdough is not new, it is the actually oldest form of risen bread, dating back thousands of years. Before sourdough all bread was flat, made mostly with just flour and water. I like to think that one day someone left some mixed flour and water untouched for longer than they meant to and saw it rise and bubble, and bingo, the first sourdough starter was born, as was the advent of risen bread, and with it, a more satisfying kind of bread, something with more chew and fulfilment, and far healthier than any other.
That mix of flour and water that grew and bubbled away did so due to the natural wild yeast in the flour fermenting with the water, when this is then mixed with a bigger portion of flour and water to create dough, the same effect occurs, but because it’s a bigger mix, the fermentation takes longer and during this time it starts to break down the gluten in the flour and as a result makes sourdough the most easily digestible bread there is; if you’ve ever eaten bread and become bloated and lethargic as a result, try eating sourdough instead because due to the effect of breaking down the gluten, you won’t get the same outcome, it will be much more gentle on your stomach. Sourdough also has a lower glycemic index so it doesn’t spike blood sugar levels, and provides more nutrients than non sourdough bread.
And if you don’t find any of that a good reason to try sourdough, it’s also a lot more fulfilling and satisfying than other bread due to the texture and chew that it provides, and the fact that it’s a good source of protein. So if you want to eat the best form of bread, make it this one.
So yes, it deserves the hype!
Secondly, let’s address the faff:
Many people have over complicated the process of making sourdough, adding unnecessary steps, fear, stress and ‘faff’ to what in reality is a simple and enjoyable process. As a result people approach making sourdough with fear and low expectations, but it doesn’t have to be that way.
Which I where I come in – I take all of that faff and completely disregard it. You can take a huge percentage of what you’ve read about making sourdough and ignore it. You don’t need a science degree, you don’t need to pay a babysitter to look after your starter, you don’t need to give up all of your free time, you don’t need to get up in the middle of the night, you can easily and simply make sourdough in any kitchen, in any part of the world, with equipment you’ve probably already got, and without it invading your home life. You have full control of the whole process and can produce this bread to fit the requirements of your tastes and home. Tapwater, a clean jar with a fitted lid, and some good flour, and you’re ready to go.
So if you fancy making some of this fabulously tasty, healthy bread, in the simplest possible way, check out all of my information online, check out all of my resources:
SNEAK PEEK RECIPE 🌟 today I am sharing one of the recipes coming in my new book…as requested, the book includes a selection of ‘discard’, or fast, recipes for making tasty goodies simply with your starter. I hope you like them – be warned, they’re very tasty and very easy to eat, and also easy to make ahead and bake when you’re ready.
My new book, The Sourdough Bible, is available now to pre order HERE
‘Everything but the Bagel Crackers
Sourdough crackers are so popular, I couldn’t produce a “bible” without including some. These are made using Everything but the Bagel seasoning, which I have also used in the Everything but the Bagel Sesame-Crusted Baby Loaf in the book, to ensure that you get more uses out of the ingredients that you may have needed to buy for my recipes. These crackers are truly moreish; they also keep well in a tin if you do have leftovers.’
Equipment: Digital scale, Medium-sized to large mixing bowl, Rolling pin, Pizza cutter, 2 large baking sheets, lined with parchment paper
Makes 40 to 45 crackers, depending on the size you cut them into
200 g (1 cup) starter in any form: fed for the purpose/unfed/discard 150 g (¾ cup) all-purpose flour or strong white bread flour, plus more for dusting 25 g (⅛ cup) oil of your choice, I used olive oil 25 g (⅛ cup) Everything but the Bagel seasoning blend (shop bought or you’ll find simple recipes for making it online and in my book, it’s a blend of sesame seeds, salt, dried garlic, dried onion, black sesame seeds and poppy seeds, very aromatic and very tasty!)
Note: No additional salt is needed, as the seasoning is very salty.
Step 1: In a medium-sized to large bowl, combine all the ingredients and mix well. The mixture will seem dry, but it will come together to make a firm ball of dough.
Step 2: Cover the bowl with a shower cap or cover of your choice and place it in the fridge for at least 1 hour, or up to 24 hours.
Step 3: When you’re ready, place the dough onto a floured surface and roll it out to ⅛ inch (3 mm) thick or a little less. Use the pizza cutter to cut the dough into 1-inch (2.5 cm) strips, then cut them into 1½-inch (4-cm)-long pieces. I cut mine at a diagonal, purely for aesthetics.
Step 4: Place the cut pieces on the prepared baking sheets—they can be placed close together but should not overlap.
Step 5: Prick each piece twice with a fork to prevent them from puffing when they bake.
Step 6: When you are ready to bake, decide whether you would like to bake in a preheated oven or from a cold start. If preheating, set the oven to 350°F (180°C) for convection or 375°F (200°C) for conventional. If you preheated the oven, bake, uncovered, for 7 minutes. Carefully remove the pan from the oven, turn the crackers all over and bake for a further 7 minutes. If using a cold start, bake uncovered for 12 minutes on one side. Carefully remove the pan, turn the crackers all over and bake for a further 7 minutes.
Step 7: Once baked, allow the crackers to cool briefly and serve. Or cool completely and place in a tin for later.
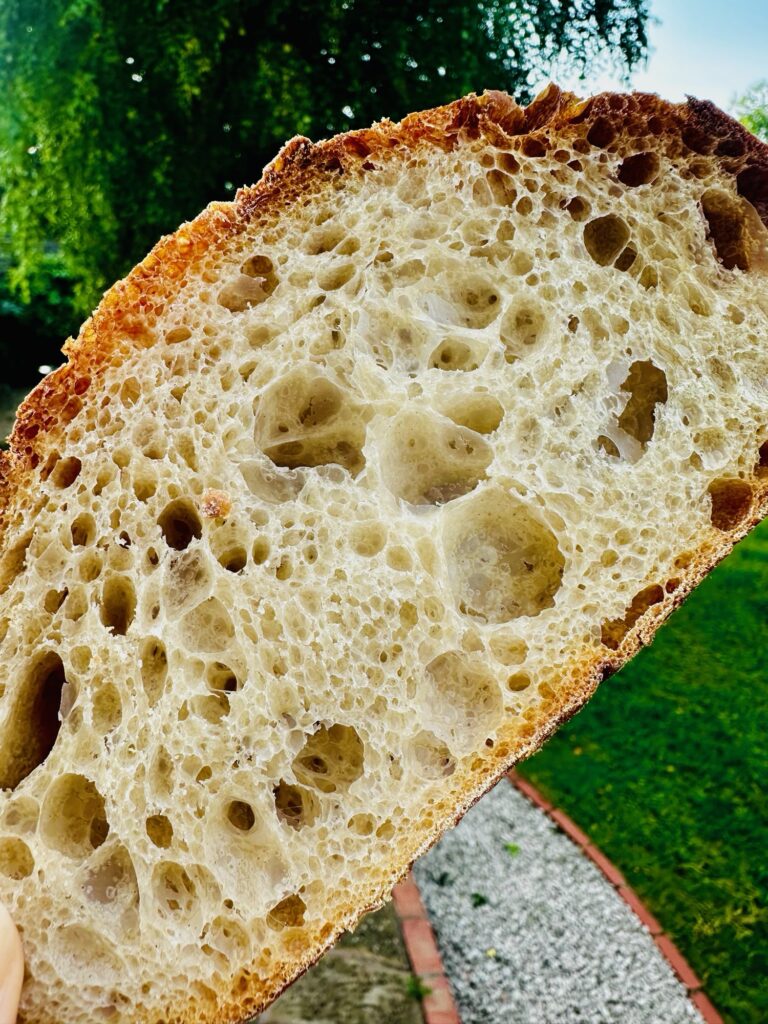
My master recipe can be very simply scaled up or down to make whatever sized loaves you would like, and this recipe shows the baby master version of the recipe which makes a perfectly sized smaller loaf, ⅔ of the full size loaf. This recipe is based on using strong white bread flour, you can find many variations of the recipe in my books, and can watch the video for making these smaller loaves on my YouTube channel here.
Yield:
Make 1 small loaf
Ingredients:
30 g (1⁄8 cup) starter
200 g (3⁄4 cup) water
300 g (21⁄2 cups) strong white bread flour
4 g (1⁄2 tsp) salt, or to taste
Timing:
The timing and temperature are here to show my ideal proving scenario. If it is colder than stated, the dough will need longer to fully prove; if it is warmer, the dough will need to be made differently from the start with less starter.
Equipment:
Digital scales
Large mixing bowl, ideally 23cm diameter and 9cm deep duralex glass bowl
Bowl scraper
Clean shower cap
Round cane banneton, 17 cm diameter and 8.5 cm deep OR wood pulp banneton 21.5 cm diameter and 8.5 cm deep
Rice flour, for dusting
Medium/large baking pan with a lid, lined with parchment paper
Wire rack
Method:
Step 1: In your mixing bowl, roughly mix together all the ingredients. Cover and leave the bowl on the counter.
Step 2: After 2 hours, perform a set of pulls and folds on the dough. Cover the bowl and leave it on the counter.
Step 3: After 1 hour, perform two more sets of pulls and folds. Cover the bowl again and leave it on the counter again each time.
Step 4: Leave to prove until the dough has doubled in size. If you are using the duralex bowls that I use, aim for the dough to grow level with the middle set of lines engraved on the bowl.
Step 5: Pull the dough into a tight ball and place it into your prepared banneton. Cover the banneton with your shower cap, and refrigerate for at least 3 hours.
Step 6: Transfer the cold dough to your prepared pan, score it. If you’ve chosen to preheat your oven, preheat to 220°C (425°F) fan/convection or 230°C (450°F) conventional.
Step 7: Bake at the above temperatures for 40 to 45 minutes from preheated. Or, if baking from a cold start, bake for 45 to 50 minutes.
Step 8: Remove from the oven and pan, and allow to cool fully before slicing.
Refer back to THIS page for the full detailed master recipe process, hints and tips.
For full details of making and baking baby loaves in cube Pullman pans see the full steps and lots of variation recipes in my new book, The Sourdough Bible.
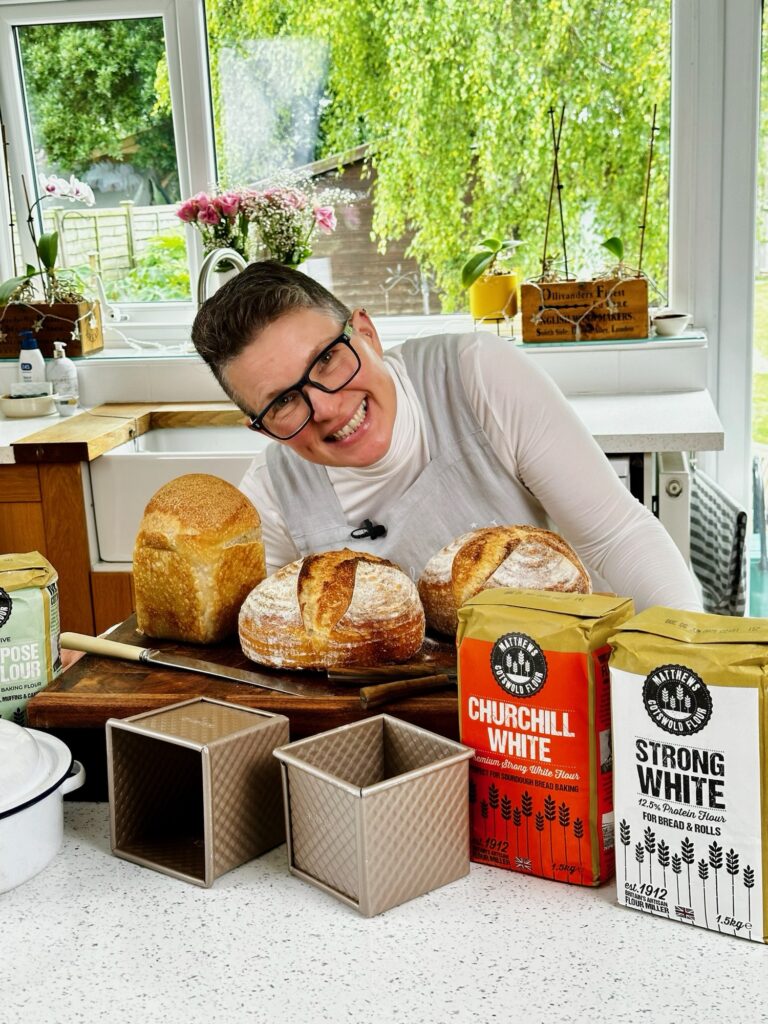
This recipe takes my standard master recipe and shows how to convert it to make a sandwich loaf. This recipe is the short version, and goes hand in hand with the full length master recipe here, the video of how to then use it to make a sandwich loaf here and the video on my YouTube channel here.
Find the full length step by step sandwich loaf master recipe in my new book, The Sourdough Bible
Yield
Makes 1 standard loaf
Ingredients
50 g starter
350 g water
500 g strong white bread flour
7 g salt, or to taste
Timing
The timing and temperatures are here to show a typical proving scenario, but is NOT prescriptive, merely a starting point. If the overnight temperature is colder than stated, the dough will need longer to fully prove; if it is warmer, the dough will need to be made differently from the start with less starter. For more information and help with this, see my FAQs and top tips.
Equipment
Digital scales
Large mixing bowl, ideally 23cm diameter and 9cm deep (2.25 to 2.5 L)
Bowl scraper
Clean shower cap
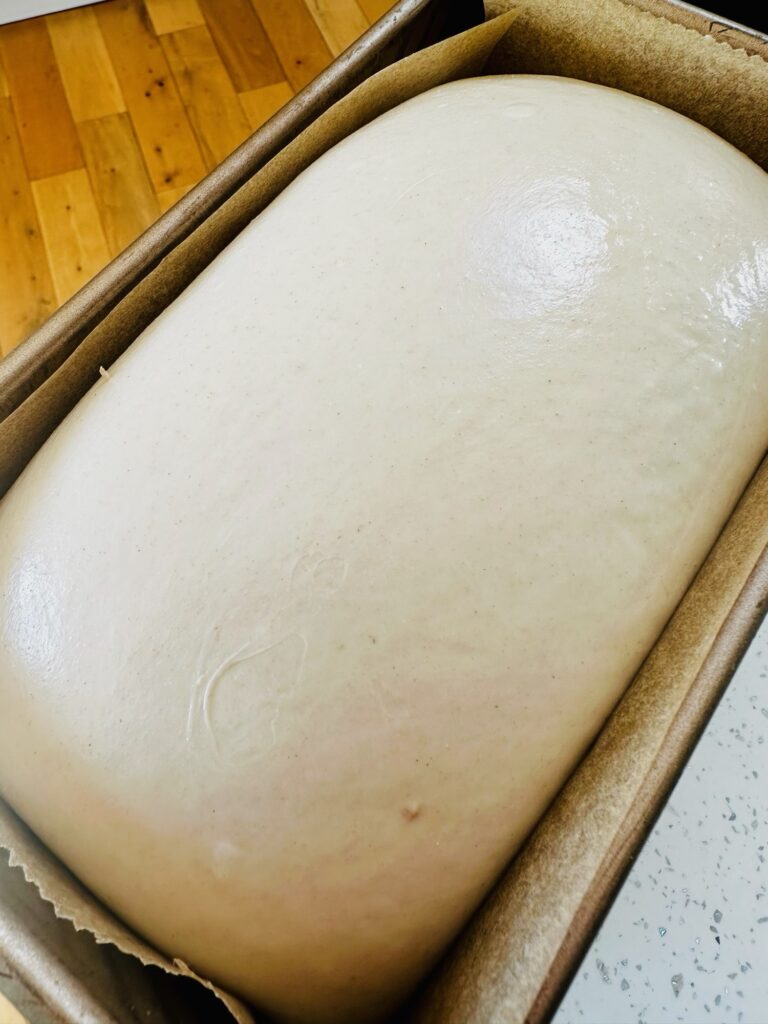
Pullman loaf pan, 21.5 x 12.5 x 11.5 cm, minus the lid, lightly sprayed with a neutral oil, or lined with baking parchment paper
Wire rack
Method
For best results, start this process in the evening; if you choose to start the dough in the morning, allow time for the dough to fully prove.
Step 1: In a large bowl, roughly mix together all the ingredients, then cover the bowl with your shower cap and leave the bowl on the kitchen counter.
Step 2: After 2 hours, perform a set of pulls and folds on the dough, lifting and stretching the dough across the bowl. Cover the bowl again and leave it on the counter.
Step 3: After 1 further hour, perform 1 more set of pulls and folds on the dough, bringing it into a nice smooth ball. Cover the bowl again and leave it on the counter.
Step 4: Now leave the dough to prove until it has doubled in size. If it is between 18-20C in your kitchen overnight this will take 8-10 hours, see the notes above.
Step 5: Shape the dough for your pan (see the video for how to), cover it with your same shower cap and prove again on the counter or in the fridge. It will grow slowly. Once the dough has grown level with the edge of the pan, it’s time to bake.
Step 6: If you’ve chosen to preheat your oven, preheat to 180°C (360F) fan assisted/convection or 200°C (400°F) non fan.
Step 7: Bake at the above temperatures for 45 to 50 minutes from preheated. Or, if baking from a cold start, bake for 50 to 55 minutes.
Step 8: Remove from the oven and pan, and allow to cool fully before slicing.
This recipe utilises my master recipe as a base, and the dough is made with Cotswold Flour pizza flour, link below. This flour has been created specifically for making pizza bases (but is also great for making sourdough loaves too as I can fully attest) and is made with strong white bread flour plus a flour conditioner, vitamin C powder (aka ascorbic acid), which helps to produce not only a great structure in the dough but mostly to give us a wonderfully relaxed and easy to stretch dough which is ideal for making pizzas.
If you don’t have access to this flour, try using straight strong bread flour, all purpose flour or type 00, the same guidelines will apply, all you may need to do is tweak the amount of water but I’d still suggest using my quantities as your starting point. Or you could try adding a tablespoon of lemon juice to your mix or some vitamin C powder (ascorbic acid) to see how it changes the feel and behaviour of the dough.
What you need to know about my pizza dough recipe…
Water: I have got 2 versions of the same recipe, the only difference being how much water is used in the mix. I never talk about hydration percentages as I find it redundant information, I’m only using them here as an example to explain what I’m sharing. For information only and to compare, my standard master recipe is 70% hydration; all that means is that as a standard, the water content (350g) is 70% of the flour content (500g).
The first version of the recipe therefore uses what equates to 60% hydration and the second version equates to 65%. The one with less water is a perfect starting point for your pizza making as it produces dough that is easy to work with and not too soft and scary. This version is also ideal if you are doing the first mixes in an electric mixer.
If you feel comfortable with that level of water then try to slightly higher one and see how it feels.
Both options produce perfectly light and airy pizza crusts and tasty bases.
Starter: I have used less starter than usual in these recipes as it is summer at the moment, and summer is often a pizza making time. Feel free to increase it to my standard 50g if you feel it’s needed taking into account all of the information about making sourdough and how it is affected by the weather and heat.
Yield: as there are 3 of us in my family, these recipes produce 3 balls of dough, and each ball is perfect for a 12” pizza base.
You can easily scale this up or down based on your requirement.
Flour: As mentioned above, click HERE for the pizza flour I have used in these recipes.
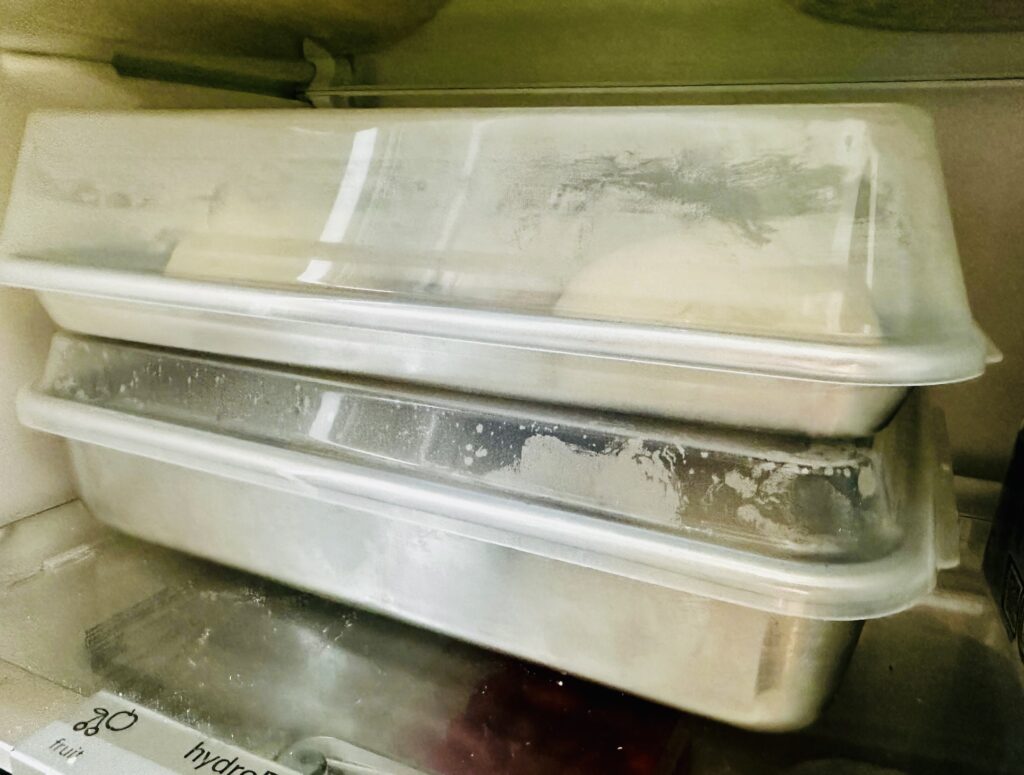
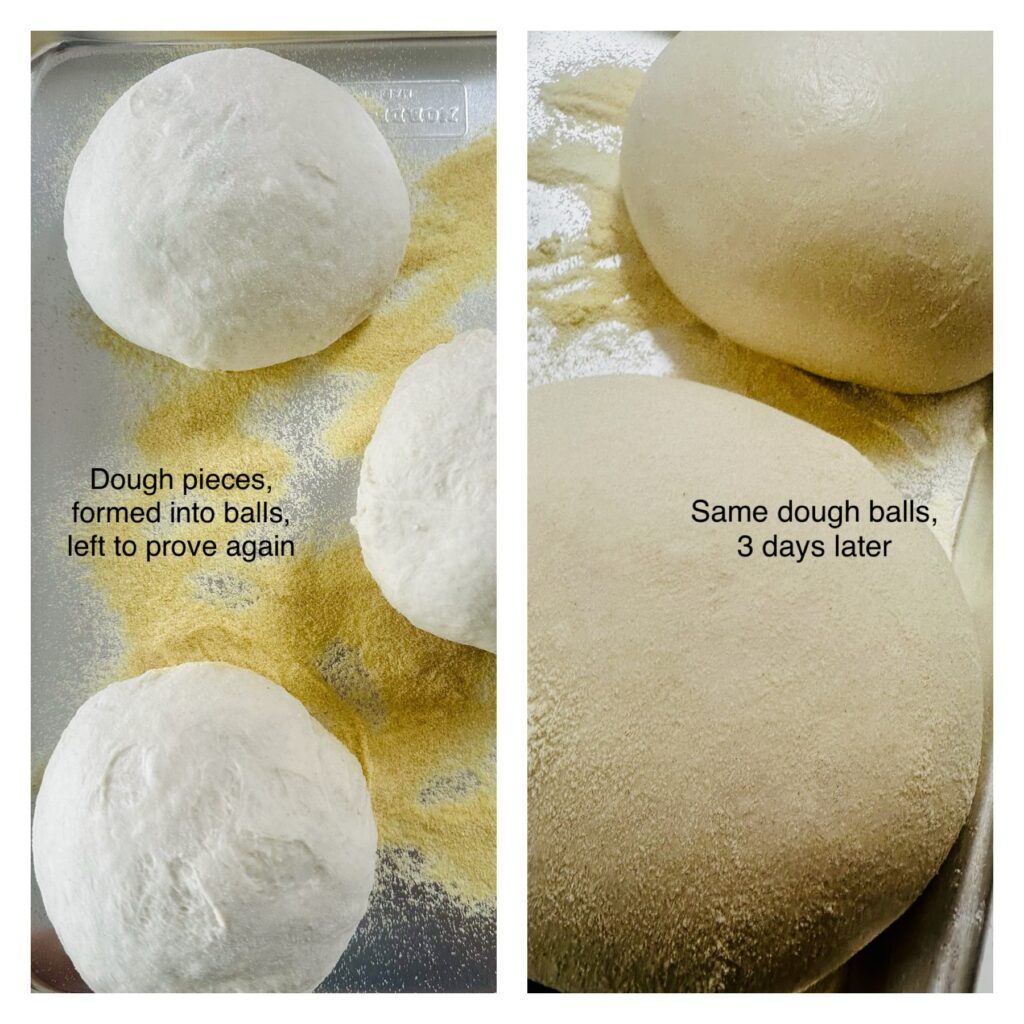
Timing: these doughs REALLY benefit from a long rest in the fridge, 2-3 days works well, I’ve even left them for 5 days before using the dough balls and they’ve been fine. This can really help with planning ahead.
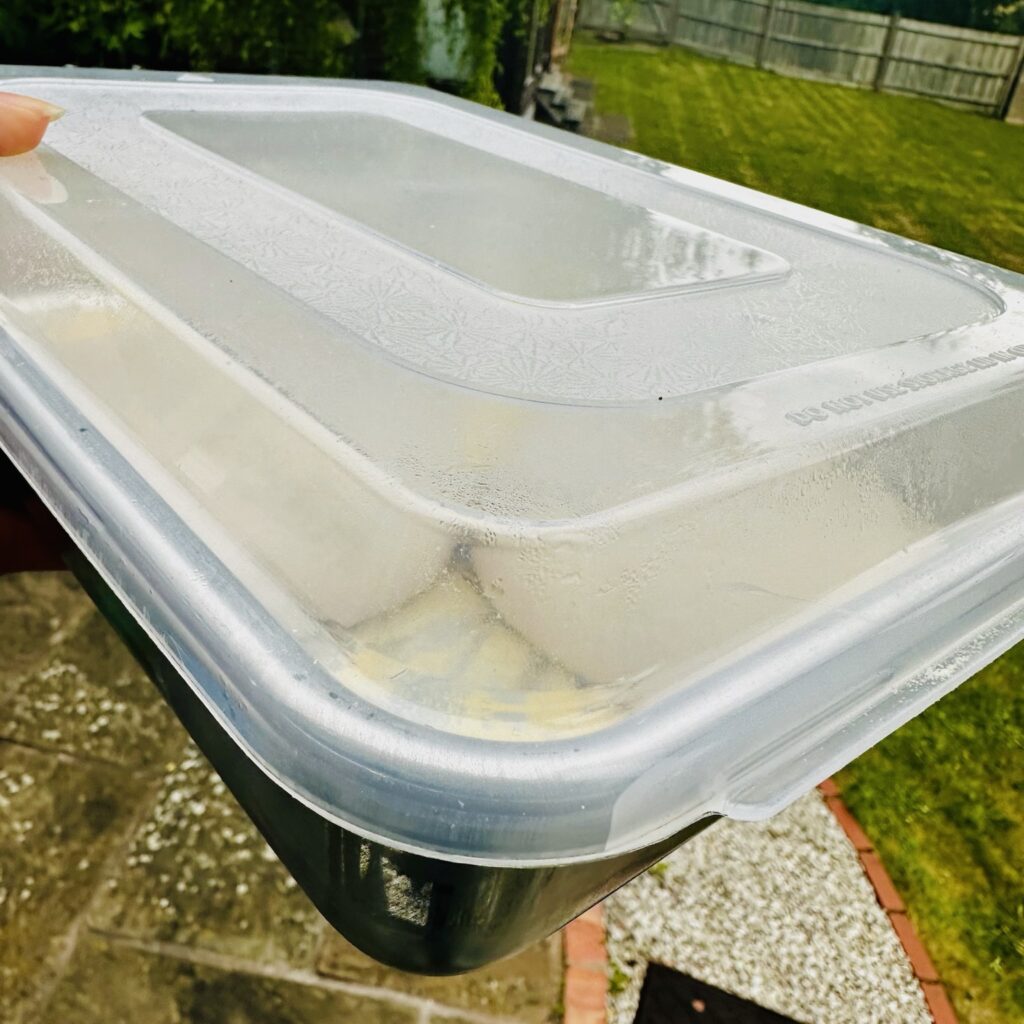
Equipment: a covered pan like the one I use is perfect for proving the dough balls in the fridge, if you can I highly recommend getting one or some, plus these will work well for making focaccia and other things. Mine is a ‘Nordic Ware Naturals Baker’s Quarter Sheet with Lid, Aluminium Baking Tray’.
You can find the ones I use here in the US. Or here in the UK.
Also needed:
Mixing bowl
Digital scales
Bowl scraper
Shower cap
Version one (60%):
20g starter
270g water
450g pizza flour (see intro)
Salt to taste
Version two (65%):
20g starter
290g water
450g pizza flour (see intro)
Salt to taste
Fine semolina flour or rice flour
Method
Step 1: late afternoon/early evening, roughly mix together all the ingredients in your mixing bowl, cover with your shower cap and leave the bowl on the counter.
Step 2: after 2 hours, perform one set of pulls and folds on the dough, lifting and pulling the dough up and over and across the bowl, repeatedly, all the way round and round the bowl, until it becomes smooth. The dough will be stretchy. Cover the bowl again and leave it on the counter.
Step 3: After 1 hour, perform two more sets of pulls and folds, each time the dough should come into an easy bouncy smooth ball. Each time it comes into a ball, cover the bowl again and leave it on the counter. These actions do not need to be a set time apart.
Step 4: Leave to prove overnight/until doubled in size.
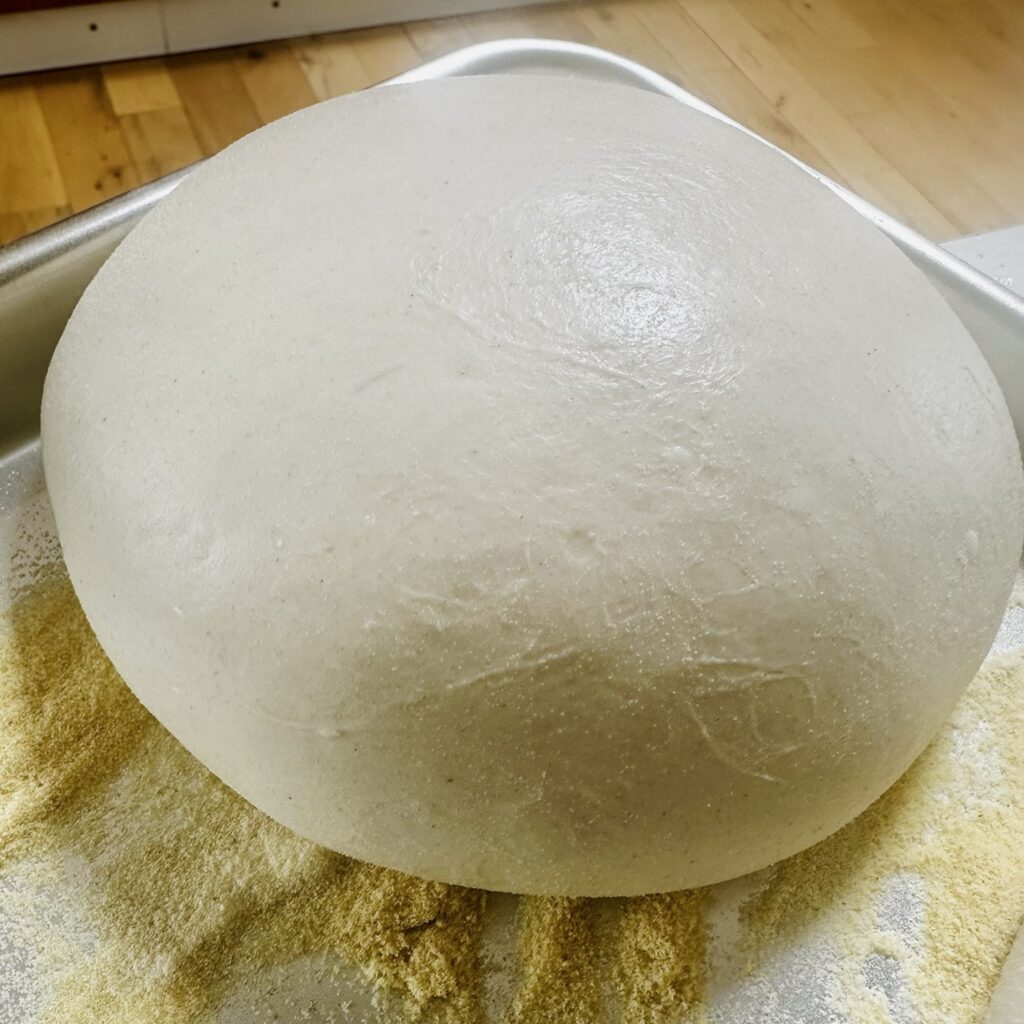
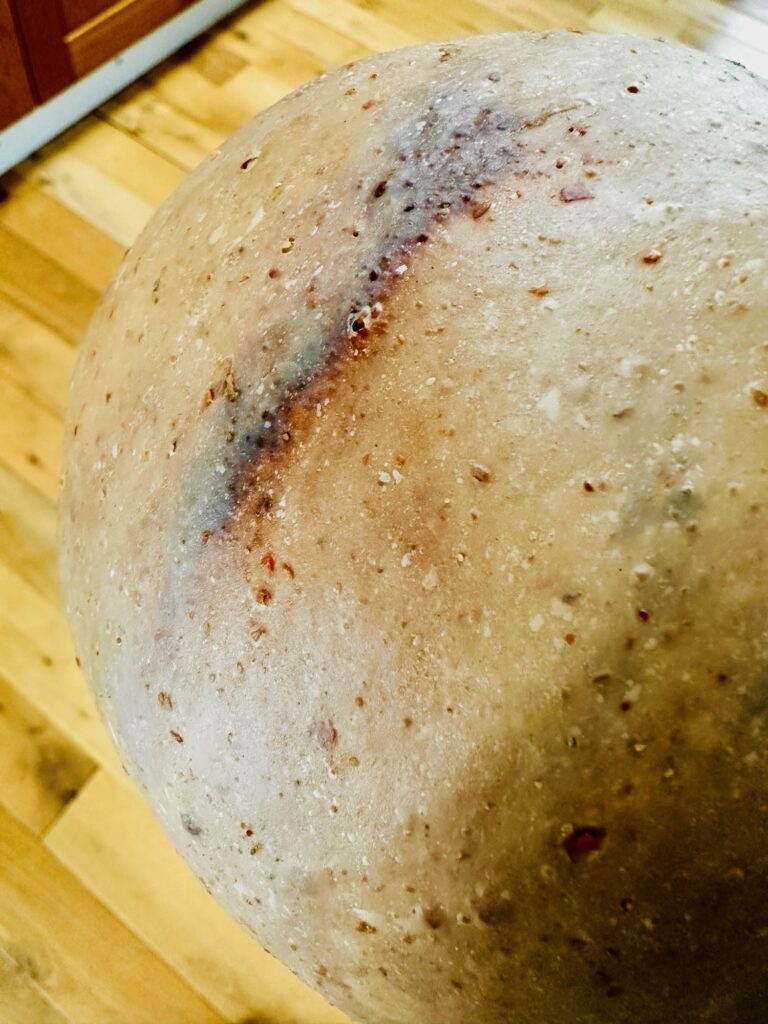
Step 5: Split the dough equally into 3 pieces. Sprinkle semolina or rice flour in your pan/tub and over the counter. Shape the dough pieces into tight balls, place them smooth side up in your prepared pan, cover it, and place it into the fridge. It will prove again and the dough will develop into the beautiful orbs of dough you can see in my photos.
Step 6: to then use the dough, my pizza advisor, Scott’s (see below) best advice, and what I’ve been doing as a result, is to take the covered pan holding the balls of proved dough from the fridge a few hours before needing to use them, this helps the dough to relax which makes them easier to stretch and handle.
To use: shape your base, top with your favourite toppings and cook/bake it as you always do.
Or for lots of tips and to see and hear more about this, watch our new podcast episode with Scott and see him give me a lesson in shaping pizza bases – and in that episode I am using sourdough pizza doughs made exactly as above so you’ll be able to see it in action. Have your dough made and ready!
These are some reminders and tips from the conversations I’ve had, and things I’ve been asked recently, but these are also the things I am asked about the most often, they are all things I’ve said many times before, but they may be a useful reminder for you, or they may be new to you if you’re new to me ☺️
🌟 These tips are all based on using my standard master recipe and are based on my own practices and methods.
In your dough:
🌟 if it’s hot where you are, or in your kitchen, use less starter in your dough to prevent over proving 🌟 if it’s humid where you are, or in your kitchen, use less water in your dough to prevent it from being bubbly and sticky and impossible to handle and shape 🌟 if it’s hot AND humid use less starter AND less water 🌟 in all 3 of the above, nothing else in the recipe needs to change only those aspects
🌟 if your water is soft, use 25g less water in the recipe 🌟 if your water is hard, nothing needs to change 🌟 if you’re using organic or supermarket bread flour use 25g less water to prevent soft unmanageable dough
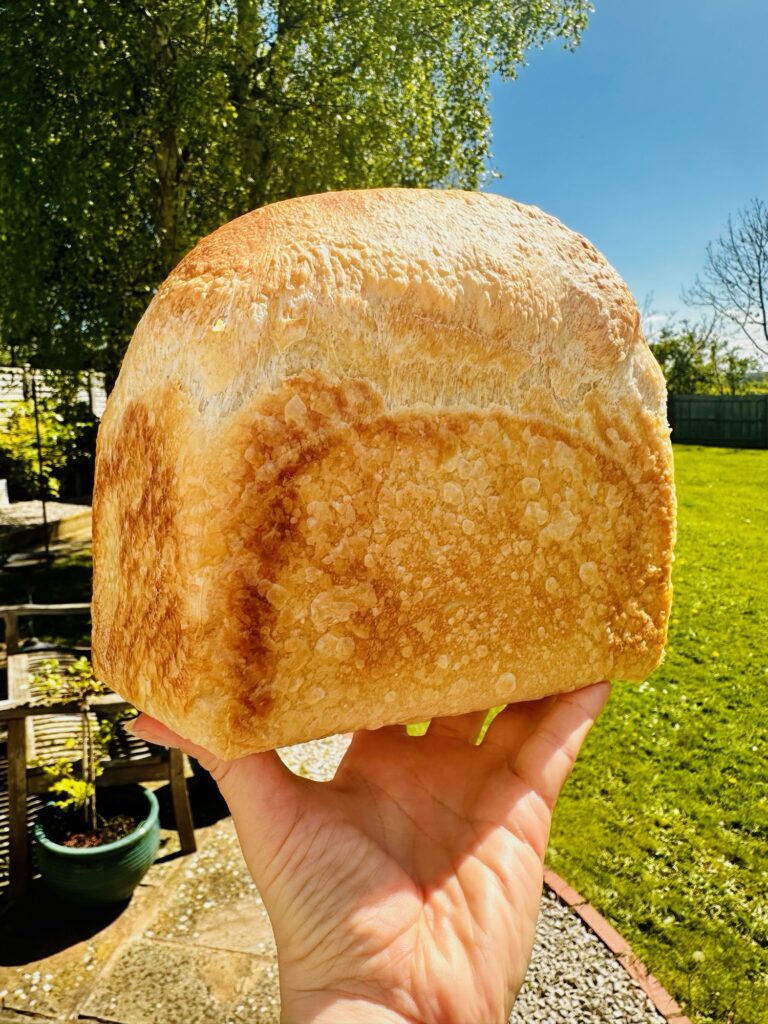
🌟🌟 the loaf in this photo above was made with 10g of starter 🌟🌟 less starter does NOT equate to less flavour or texture (as this photo shows), less starter always mean MORE flavour as the dough works harder which creates more flavour 🌟🌟 more starter does NOT mean more flavour, all it means is more risk of over proving at any time of the year
In your starter:
🌟 if it’s hot where you are, or in your kitchen, don’t leave your starter on the counter for too long, watch it carefully and once it’s started to grow and is responding put it into the fridge, it will keep growing just more slowly 🌟 if it’s hot where you are, or in your kitchen, use less water in your starter than flour to prevent it from becoming thin in the heat, as above 🌟 if it’s humid where you are, or in your kitchen, using less water in your starter if it’s getting too thin from the added moisture in the air 🌟 don’t be afraid to give your starter what it needs, ratios are not necessary, equal weights are not necessary if your starter needs different input 🌟 thick is always better than thin in a starter, a thin starter won’t rise and won’t lift your dough 🌟 if you’re making a new starter these things also apply, learn to watch your starter and see what it needs
I hope these help!
For more tips and help read more of the posts here on my website.
These are also some of the posts I send people the most often to assist their sourdough making:
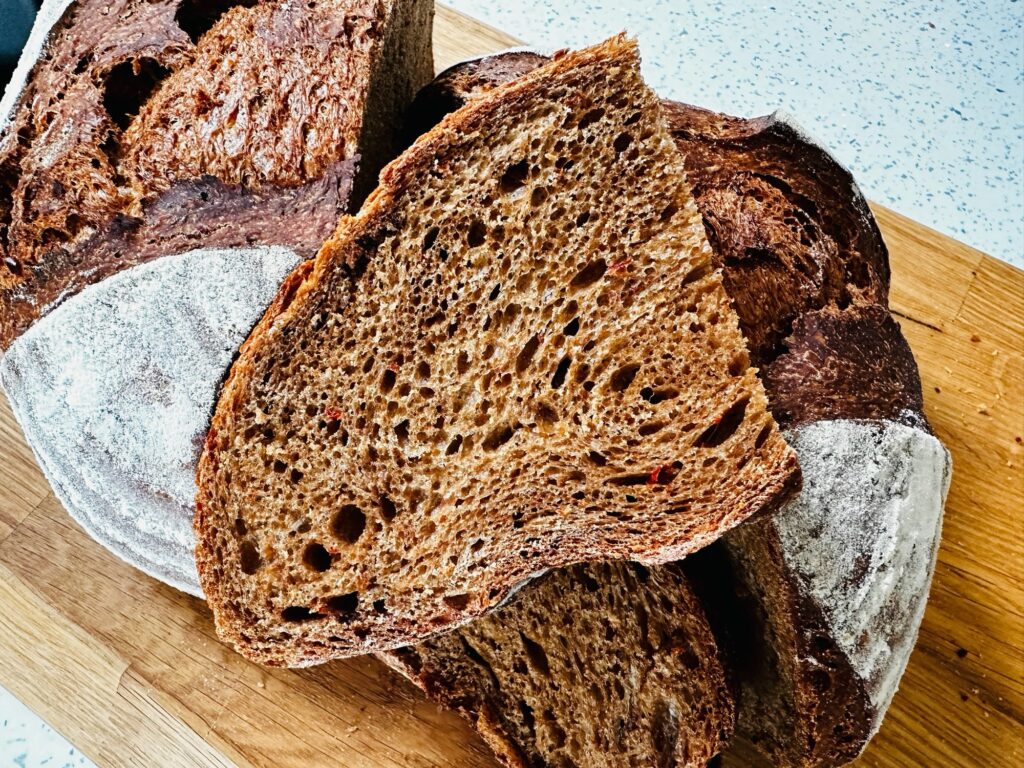
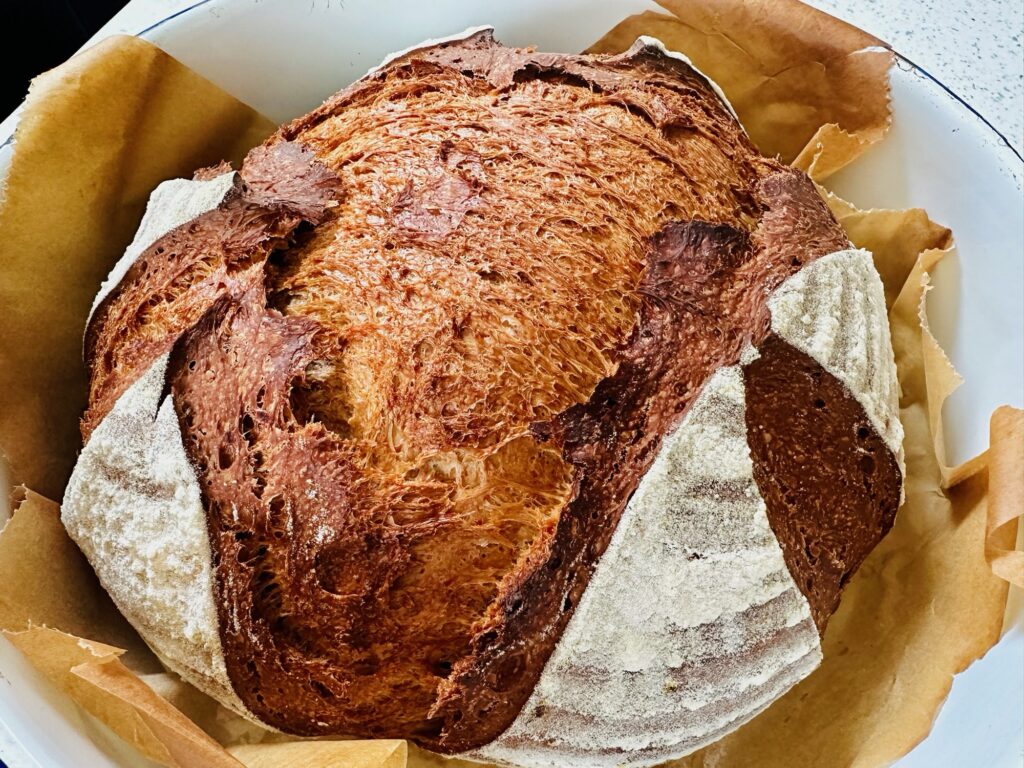
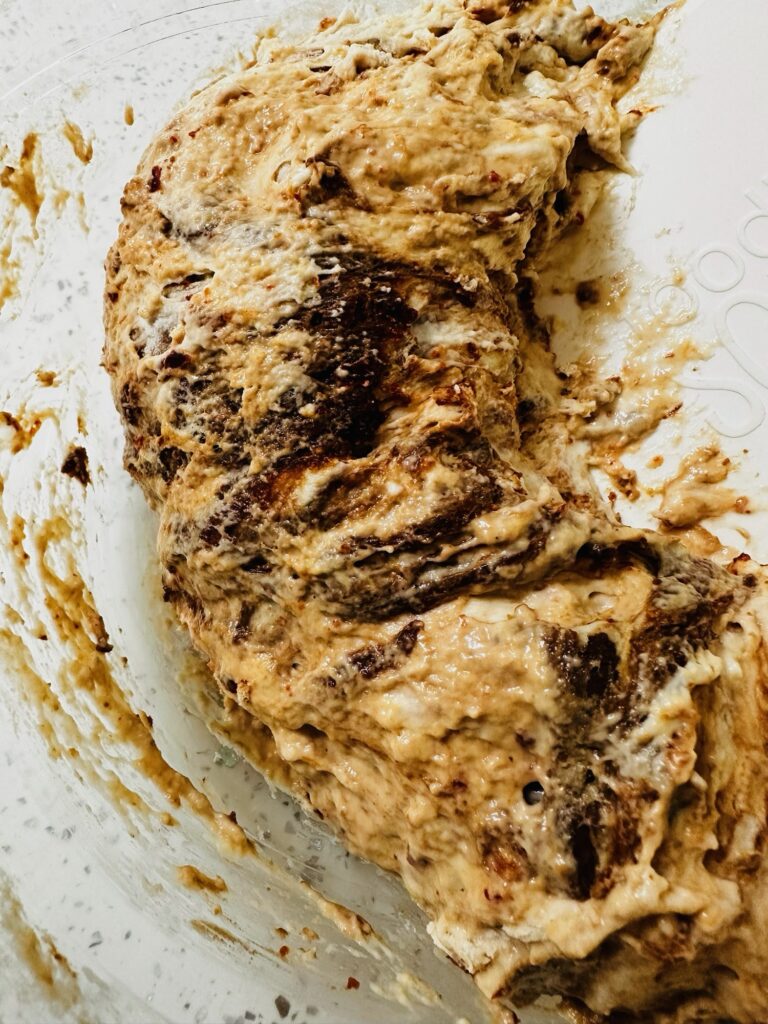
Adding peanut butter to my standard sourdough recipe brings a wonderful richness to the dough and the loaf, the loaf will be slightly crusty with a soft inside, plus the oils mean the loaf lasts longer. The dough will be sticky initially but as the peanut butter mixes through the dough it becomes silky and smooth. The chilli flakes add a warm kick to the loaf, you can make this hotter if you prefer by using stronger chilli flakes or more of the Aleppo chilli flakes.
I used my absolute very favourite brand of peanut butter, Manilife, I love love their products, and this cocoa peanut butter is fabulous! I hope you’ll try it…
The recipe below provides the basics of the recipe and everything you need to know. See my main full master recipe for more timing, equipment and more complete/fully detailed process steps.
Option: if you can’t find the fabulous cocoa peanut butter use any of the Manilife peanut butter range plus 1-2 tbsp cocoa powder.
Step 1: Roughly mix together all the ingredients, cover and leave the bowl on the counter. See the photos below to see how the dough might look.
Step 2: After 2 hours, perform a set of pulls and folds, the dough will be sticky and the peanut butter will not yet be fully mixed through. Cover and leave the bowl again.
Step 3: After 1 more hour, perform two more sets of pulls and folds, the dough will become textured and smooth and easier to work with. Cover and leave.
Step 4: Leave to proof until doubled in size, whether overnight (if you’re following my standard process) or during the day (if you’re using one of my other timetables).
Step 5: Shape the dough for your banneton, it will easily come into a smooth ball, cover, refrigerate, and proof again.
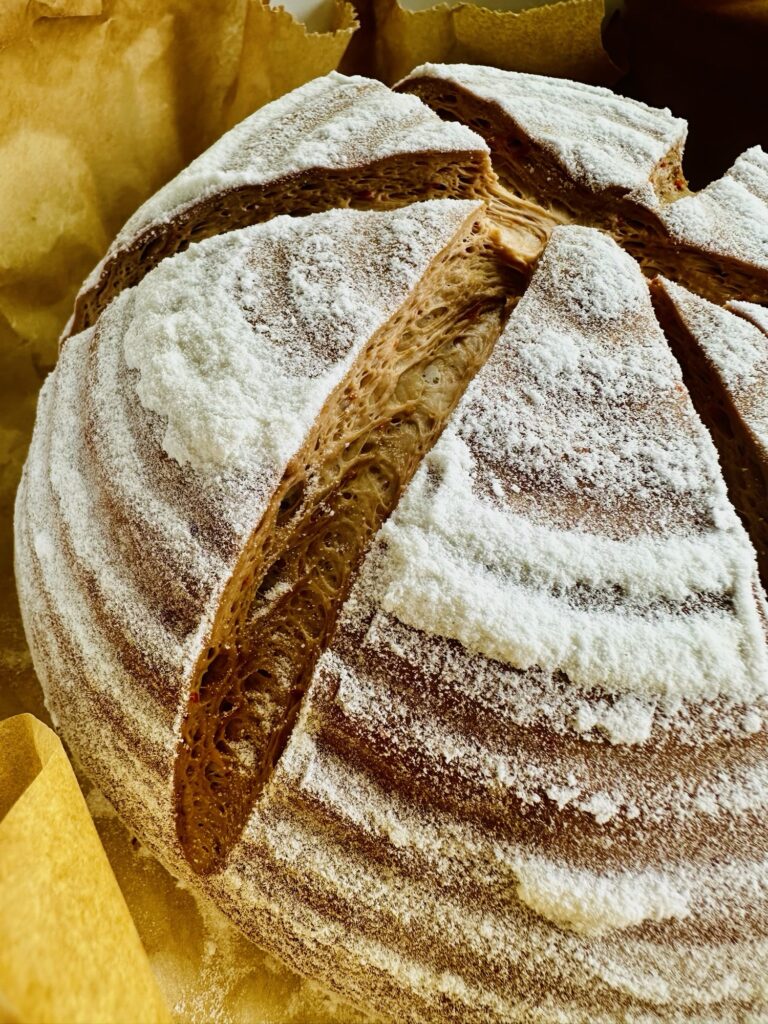
Step 6: Score and bake direct from the fridge, from a cold start for 55-60 mins at 425°F (220°C) convection or 450°F (230°C) conventional.
Step 7: Bake at the above temperatures for 50-55 minutes from preheated.
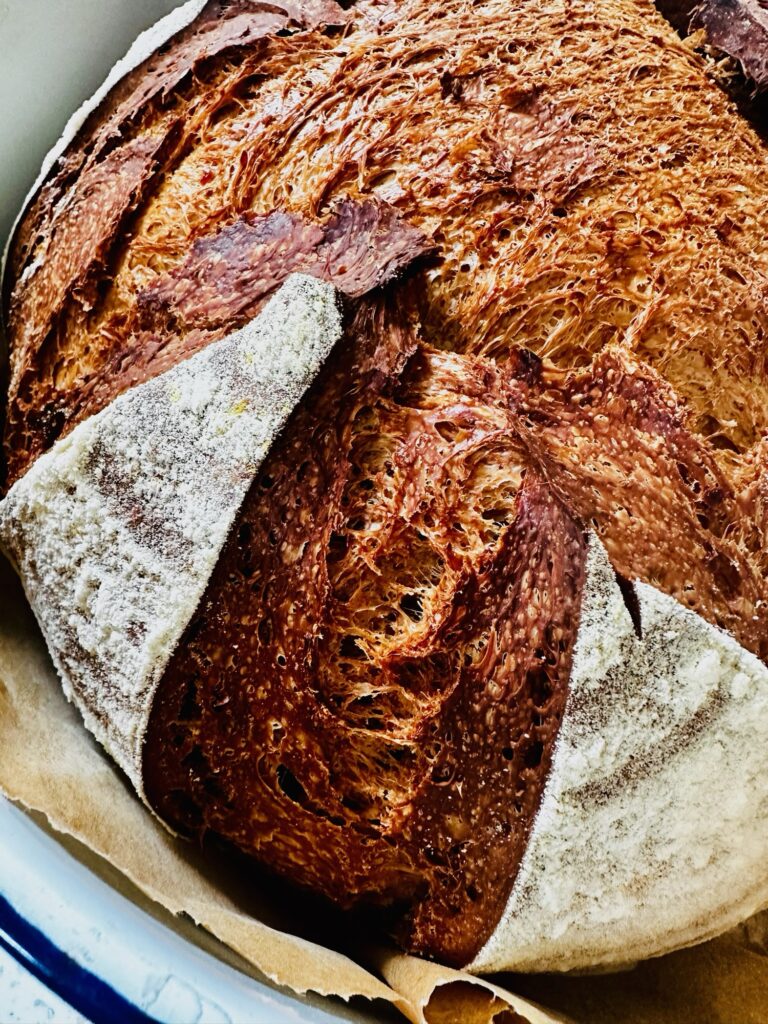
Step 8: Remove from the oven and pan and allow to cool fully before slicing.
I served this loaf with my cocoa peanut butter vegetable chilli dish which you can now find on the Manilife website.
The first rough mixThe second mixAfter the final set of pulls and folds The next morningScored and ready to bakedBaked!