Join us for the BIG BAKE-A-LONG!

Let’s bake together all over the world, in our own kitchens, all at the same time!

What’s happening:

On Saturday 1st July, Angela (see below) and I invite to join us in our kitchens for a zoom ‘Bake Along’ : join us as we make the stuffed sourdough pizza rolls from my new book, Easy Everyday Sourdough Bread Baking. Watch us as we make, share, chat, swap tips, and mostly, HAVE FUN with all of YOU 🌟🌟🌟🌟

A perfect opportunity to make my new recipe with me and Angela, make it in your kitchen with friends, family, children, grandchildren, nieces, nephews, anyone who fancies playing with dough…lots of fun AND tasty food!!! Perfect to eat IMMEDIATELY, for your Saturday night, weekend plans, or 4th July celebrations. I highly recommend making a couple of doughs ready to play with – I will!

🌟 Join us at 10am EDT US time/3pm UK time/please convert to your time zone 🌟

What we will provide:

The full recipe for my stuffed pizza rolls, Angela’s recipe, and tips for her homemade tomato sauce.

Details of everything you will need for the event including the dough and at what stage it needs to be, details for fillings, utensils, baking tray etc. and alternative options. If you don’t fancy a pizza filling, I’ll provide alternative ideas for using the same dough.

If you are not a sourdough baker, you are welcome to join in with a yeasted dough.

🌟 Make and bake and learn and share 🌟 and as you’re making and baking/once you’ve baked them, post online and tag us so that we and the world can see the fun we’ve had!

We look forward to welcoming you into our kitchens!

Timing: 60-90 mins.

You will see Angela and I onscreen, and the brilliant Keanu will be on hand behind the scenes to read and forward any questions during the event.

How to book a place:

Click on this link to book your place. There is no charge for this event. If you want to join and just observe you’ll be very welcome.

Who we are:

Angela Ferraro-Fanning is a permaculture homesteader in central New Jersey. She believes in regenerative homesteading practices that mimic patterns in nature. The six-acre historic farm is home to Clydesdale horses, honeybees, sheep, ducks, geese, guinea fowl, a small orchard, hobby vineyard, and food forest gardens. Angela is the author of several books including The Little Homesteader series, The Harvest Table Cookbook, and The Sustainable Homestead. She also co-hosts a podcast called HOMESTEADucation.

Web: Axeandroothomestead.com

IG, TikTok: @AxeAndRootHomestead

YouTube: Axe And Root Homestead

Elaine from Foodbod Sourdough, is a sourdough baker, cookbook writer and teacher, but mostly a sourdough ‘simplifier’. The key focus of everything she does, and shares, is to show how truly simply sourdough can be made. Elaine removes the complication and unnecessary steps, and often the fear, that can come with making sourdough, and shows bakers all over the world how they can easily make their own healthy, tasty bread, week in, week out, in their home kitchens, to suit their lifestyle and timings.

Elaine also hosts a podcast all about food, The Foodbod Pod.

Website: https://foodbodsourdough.com/

Instagram: https://www.instagram.com/elaine_foodbod/

Facebook: https://www.facebook.com/foodbodsourdough

YouTube: https://www.youtube.com/c/foodbodSourdough

🌟 SEE YOU ON 1st JULY: Click on this link to book your place 🌟

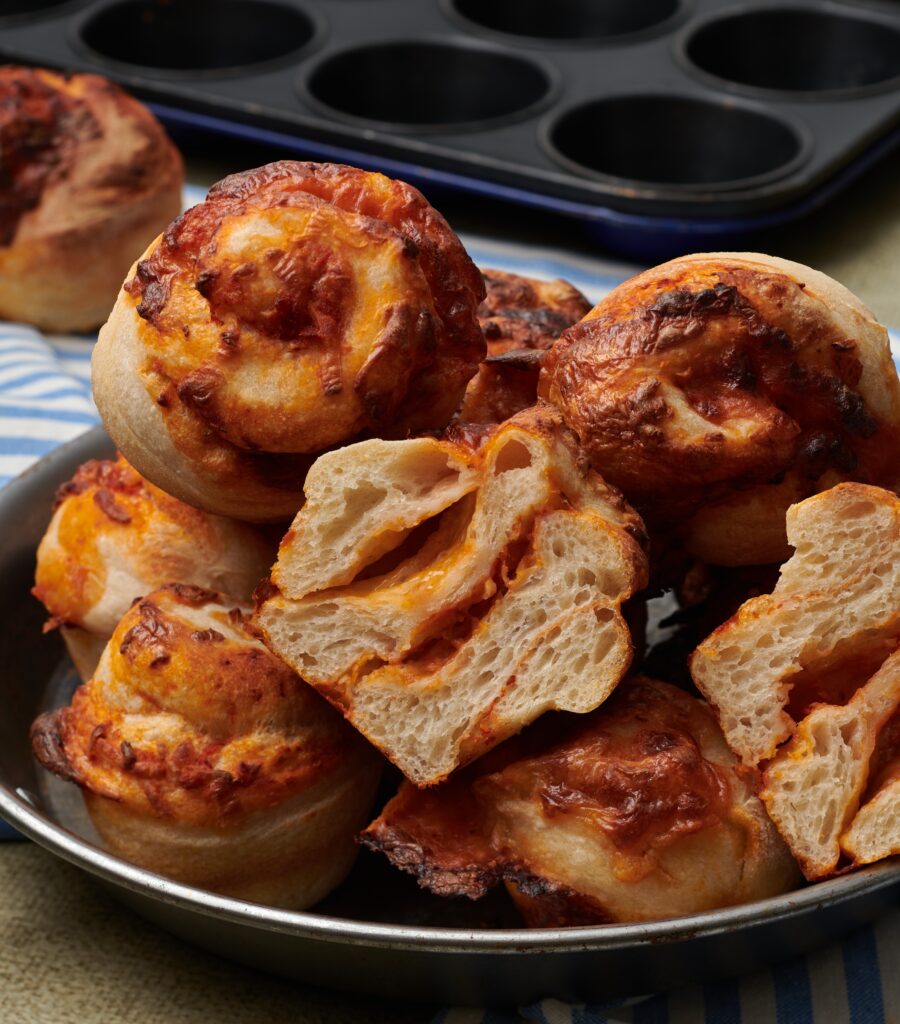
Stuffed pizza rolls

I am very excited to share a recipe from my upcoming new book with you! These stuffed pizza rolls are perfect for a family get together, pretty much for any meal, for a pack up, a picnic, a party, a snack, breakfast, brunch, lunch and dinner, and really any event. They also freeze and defrost perfectly, and are fun to make yourself or with kids or as a shared baking project. There’s minimal shaping, the muffin tin does it all for you, just roll them up, chop them up, stuff them into the muffin pan wells and bake!

I hope you will give them a go, give them your own twist, and that you love them…
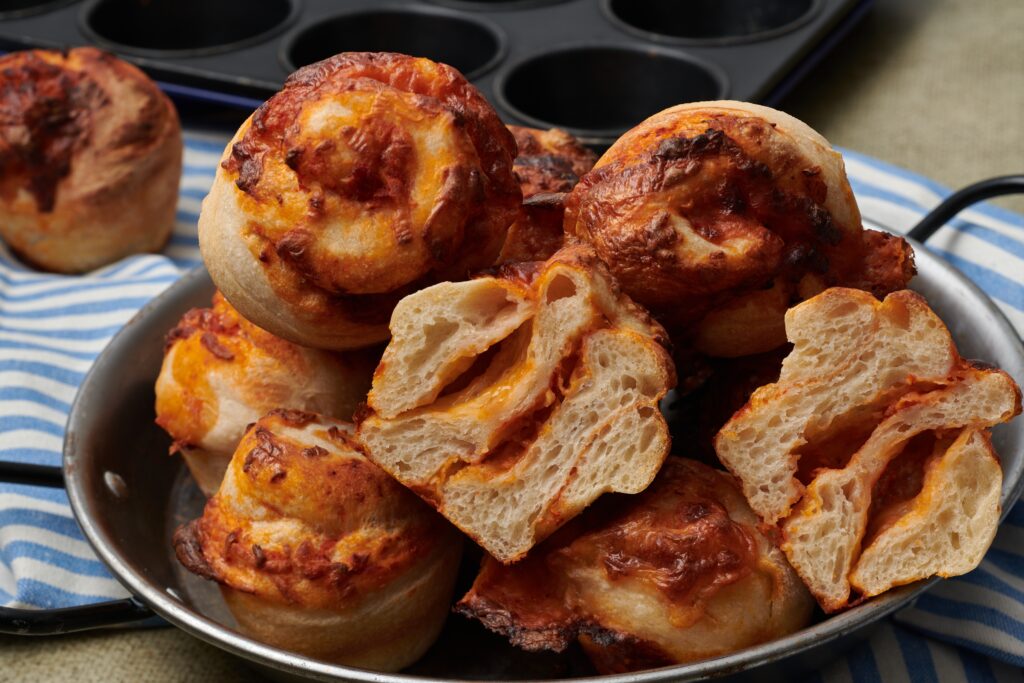
‘These pizza rolls are made using one of my favorite processes—stretching out my dough after the main overnight proof, covering it with my favorite ingredients, rolling it up, chopping it up and baking the pieces into filled rolls. In this recipe, I have updated my process and use a standard muffin tray to bake the rolls in. This works perfectly to provide a uniform size but also helps to shape the rolls. It means that even if the dough gets messy or hard to handle, you can stuff it into the muffin spaces and it will still bake up beautifully to even sized muffin shaped rolls.”

Equipment: Have a 12-hole muffin tray ready, preferably nonstick. If your muffin tin is not nonstick, lightly spray or grease inside the wells with a neutral or flavorless oil or butter.

Makes 12 roll ups

Ingredients:

Dough

50 g (1⁄4 cup) active starter

325 g (11⁄3 cups) water

500 g (4 cups) strong white bread flour

7 g (1 tsp) salt, or to taste

Filling

150 g (3/4 cup) pizza sauce

200 g (2 cups) grated cheese (I use hard “pizza mozzarella” that I can grate. You can also use a mix of mozzarella and Monterey Jack)

Additional pizza toppings of your choice (for example, thinly cut mushrooms or sliced meats such as pepperoni or chorizo [avoid anything too thick or chunky])

Method:

Step 1: In the early evening, in a large mixing bowl, roughly mix together all the ingredients, except the pizza sauce, cheese and any other filling ingredients, leaving the dough shaggy. Cover the bowl with a clean shower cap or your choice of cover and leave it on the counter for 2 hours.

Step 2: After the 2 hours, perform the first set of pulls and folds on the dough; it will be sticky at this point, but stretchy. Cover the bowl and leave it on the counter.

Step 3: Once the dough has rested for at least an hour, complete two more sets of pulls and folds on the dough throughout the evening, covering the bowl after each set. The dough will be nicely stretchy and will easily come together into a firm ball each time. Complete the final set before going to bed.

Step 4: Leave the covered bowl on the counter overnight, typically 8 to 10 hours, at 64 to 68°F (18 to 20°C).

Step 5: The next morning, place the dough, untouched but still covered, in the fridge for at least an hour, until you are ready to use it; this could be for lunch, dinner or a meal the next day. The dough will firm up, making it easier to work with later.

Step 6: When you are ready to bake, decide whether you would like to bake in a preheated oven or from a cold start. If preheating, set the oven to 400°F (200°C) convection or 425°F (220°C) conventional.

Take your bowl of dough from the fridge. Sprinkle flour over your kitchen counter. Using a bowl scraper or your hands, gently ease the bubbly risen dough from the bowl onto the counter. Use your fingertips to start stretching and pushing out the dough, until it becomes a rectangle that measures 18 x 12 inches (45 x 30 cm) with an even thickness all over. The dough will want to pull back as you stretch it; continue to pull it gently, careful not to make holes in the dough. If the dough starts to tear or seems very hard to stretch, let it rest on the counter for 5 to 10 minutes allowing the gluten in the dough to relax and try again.

Spread the pizza sauce evenly all over the stretched dough and sprinkle the grated cheese evenly over the top, right up to the edges. If you are adding extra fillings, place them over the sauce and cheese. Roll up the dough from one of the longer edges toward the other to make an even, tight roll of dough. Using a dough knife or sharp knife, cut the dough into 12 equal pieces, approximately 11⁄2 inches (4 cm) wide. Place them, cut side down, in the muffin pan hollows. If the rolled up portions of filled dough start to fall apart, or you struggle with the dough holding together, push them into the pan hollows however they come. Do not worry about perfect shaping; the muffin pan will create the roll shapes for you as they bake.

Step 7: If you preheated the oven, bake the rolls uncovered for 25 minutes. If you are using a cold start, place the filled muffin pan in the cold oven, set the temperature as above and set a timer for 30 minutes.

Step 8: Once they are baked, remove the pan from the oven, carefully remove the rolls and let them sit briefly on a rack before serving. They are best eaten freshly baked, but my testers also informed me that they were still great eaten a few days later and reheated in a microwave for 30 seconds.

Top Tip: If you would prefer to bake them later, follow step 6 to fill, roll and cut the dough up into pieces, and then place the rolls into the muffin tin. Cover the tin with a large plastic bag or damp tea towel and place it into the fridge. When you are ready to bake, you can bake them directly from the fridge, following the directions above.

Happy baking! Happy making, rolling, cutting, baking, and EATING! If you choose to order it, I truly hope you like my new book xx

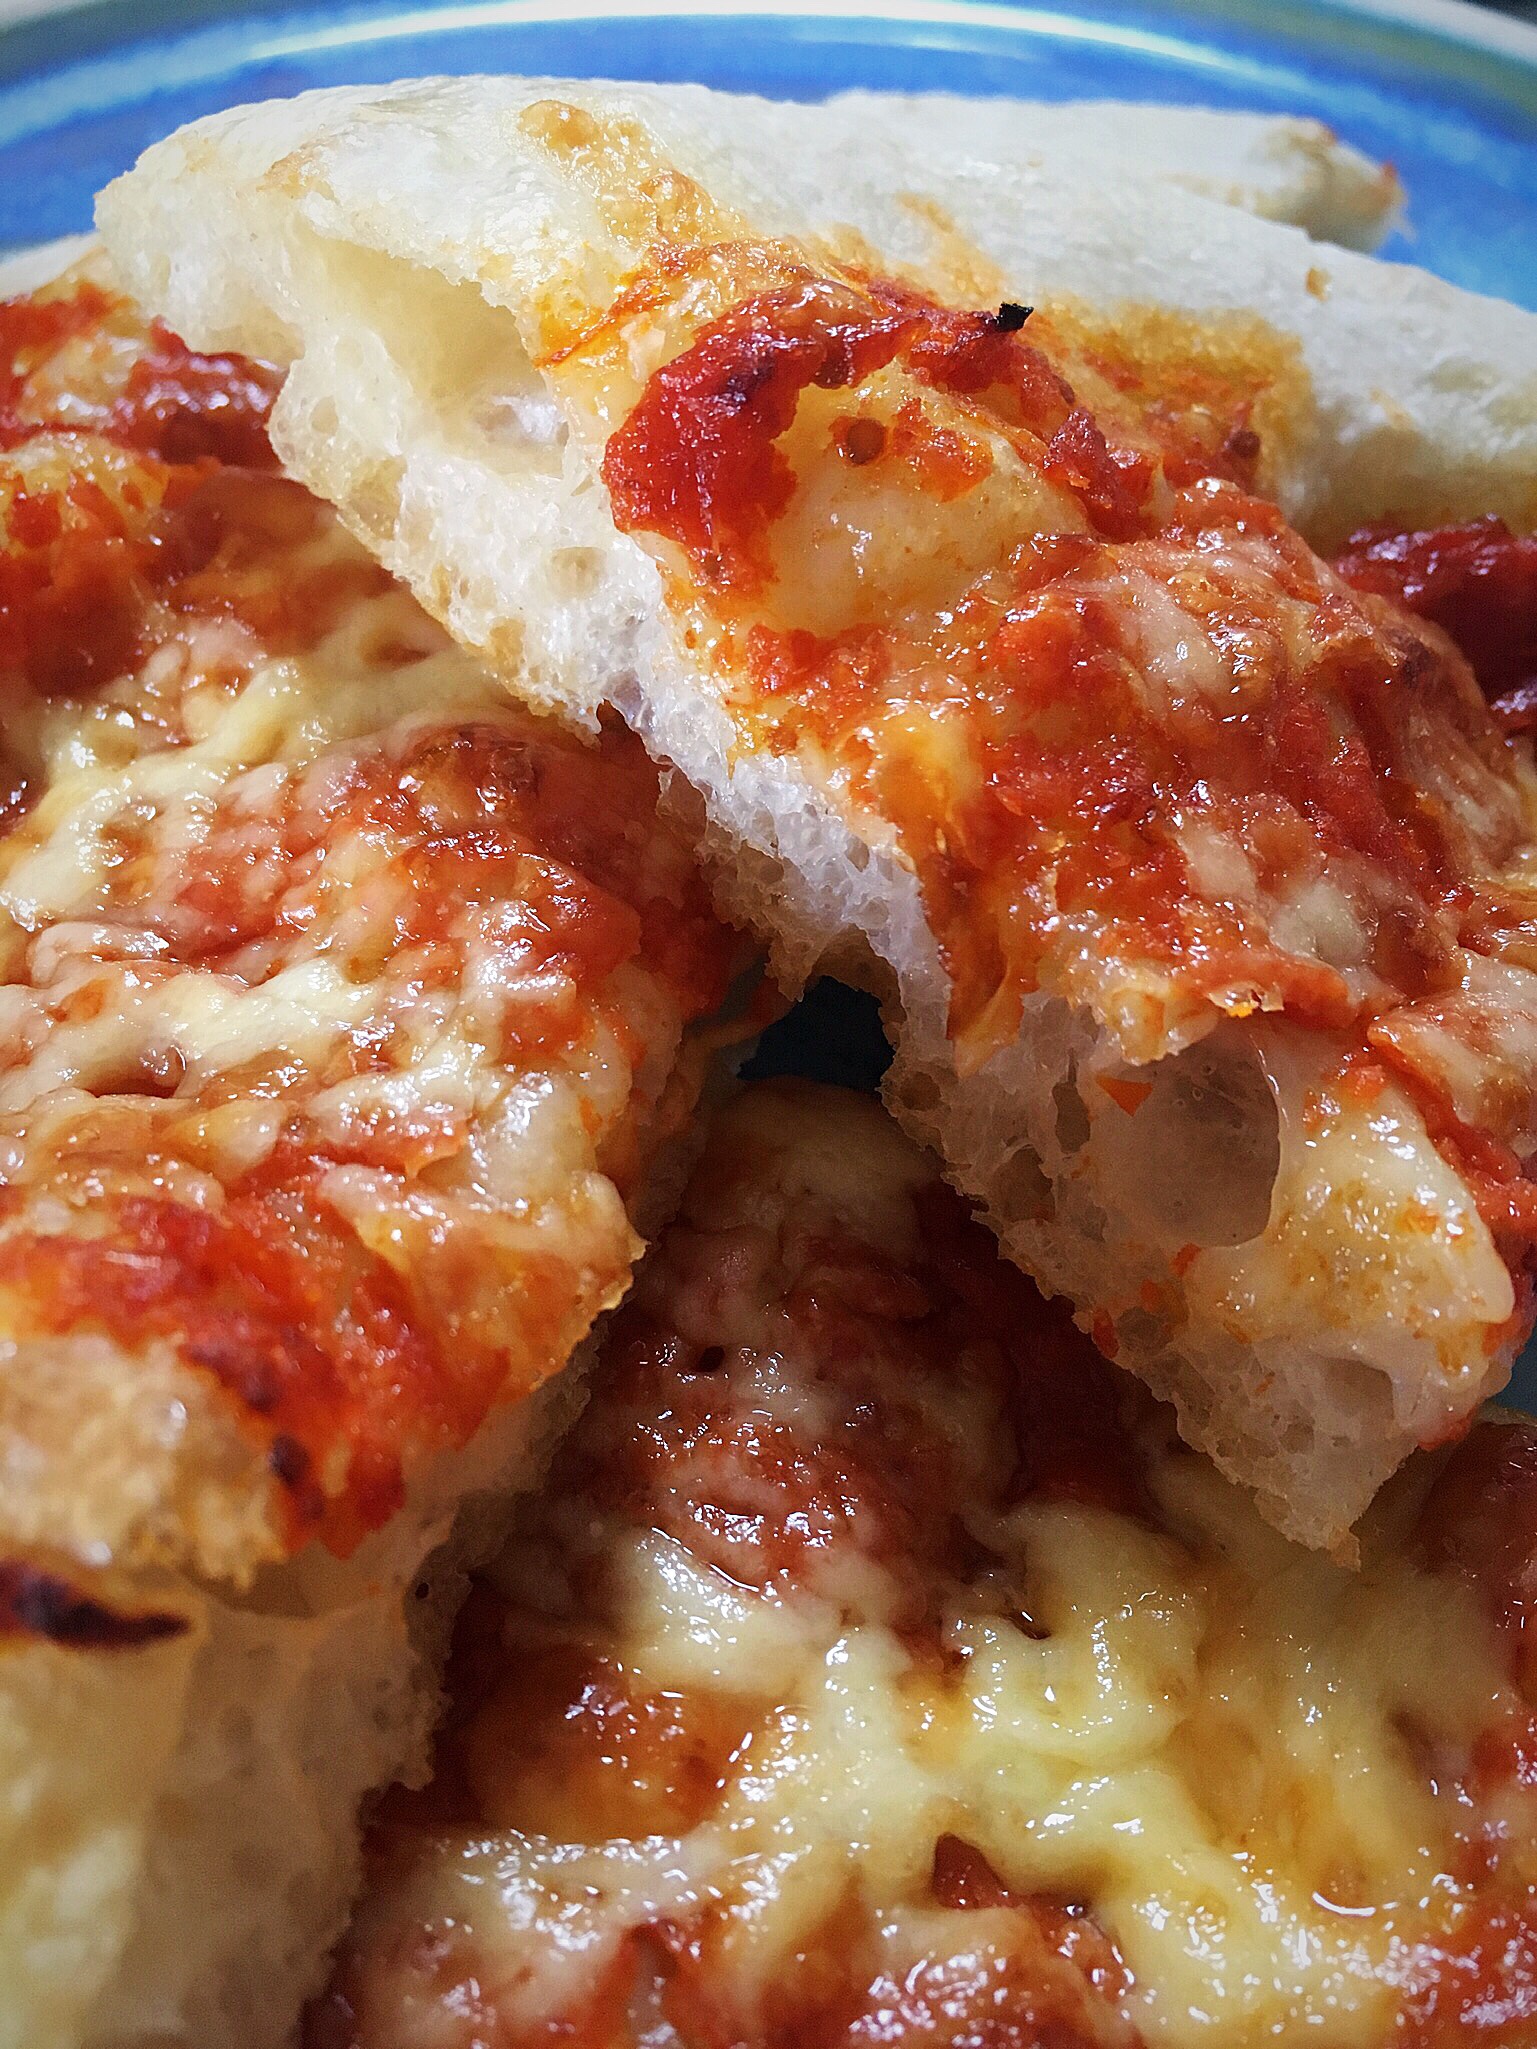
Shana’s sourdough pizza..

Welcome to the first guest recipe on my blog, this great pizza recipe is brought to you by Shana from Shana’s Sourdough. If you are in the US and would like to find the equipment that I use to make my sourdough recipes, Shana is your person, PLUS she is a great baker and I’m happy to be able to share some of her recipes here too.

Note: Shana uses my master recipe as her starting point for making her dough.

This recipe for crispy sourdough pizza will tantalize your taste buds with its crispy crust, melted cheese, and your favorite toppings. The key to this crispy sourdough crust is simply adding a little extra butter. Follow these simple steps to create the perfect sourdough pizza every time.

Ingredients:

  • 350g water
  • 100g starter
  • 500g white bread flour
  • 10g salt
  • 60g room temperature butter
  • Shredded mozzarella cheese
  • Pizza sauce
  • Toppings of your choice

Instructions:

  1. Mix water, starter, white bread flour, salt, and butter in a bowl.
  2. Cover the mixture and let it rest for 1 hour.
  3. Perform 25 stretch and folds on the dough, cover, and let rest for 30 minutes.
  4. Perform two more sets of 6-8 stretch and folds, each time allowing the dough to rest for 30 minutes.
  5. Prove the dough for 8-10 hours until it has doubled in size.
  6. Spray the countertop with water to prevent the dough from sticking and divide it into two pieces.
  7. Shape the dough into round shapes with a wet bench knife.
  8. Cover the bottom of your cast iron with olive oil to prevent sticking and make the crust crispy.
  9. Lightly push the dough to the edge of the pan with oiled fingertips, allowing it to rest if the dough resists stretching.
  10. Cover the dough and rest for 30 minutes.
  11. Add shredded mozzarella cheese directly onto the pizza dough.
  12. Add pizza sauce on top of the cheese.
  13. Add your desired toppings and more cheese.
  14. Preheat the oven to 450°F. Bake one pizza at a time by placing it on the lower rack for 18 minutes.
  15. Then move it to the middle rack for 3-5 minutes for extra browning.
  16. Enjoy your delicious, crispy, and cheesy sourdough pizza!

‘Thanks for trying out this recipe from Shana’s Sourdough! We hope you enjoyed it as much as we do. If you’re looking for more delicious sourdough recipes or any other things sourdough, be sure to visit our site. We’ve got a wide variety of recipes and sourdough equipment to choose from, so you’re sure to find something you love. Thanks for visiting, and we hope to see you back”

Thank you Shana xx

My master recipe sourdough pizza…

This recipe uses the dough created using my master recipe process and then using it to create the pizza of your choice; the dough can be made up of the flour/s of your choice to create different flavours & textures…

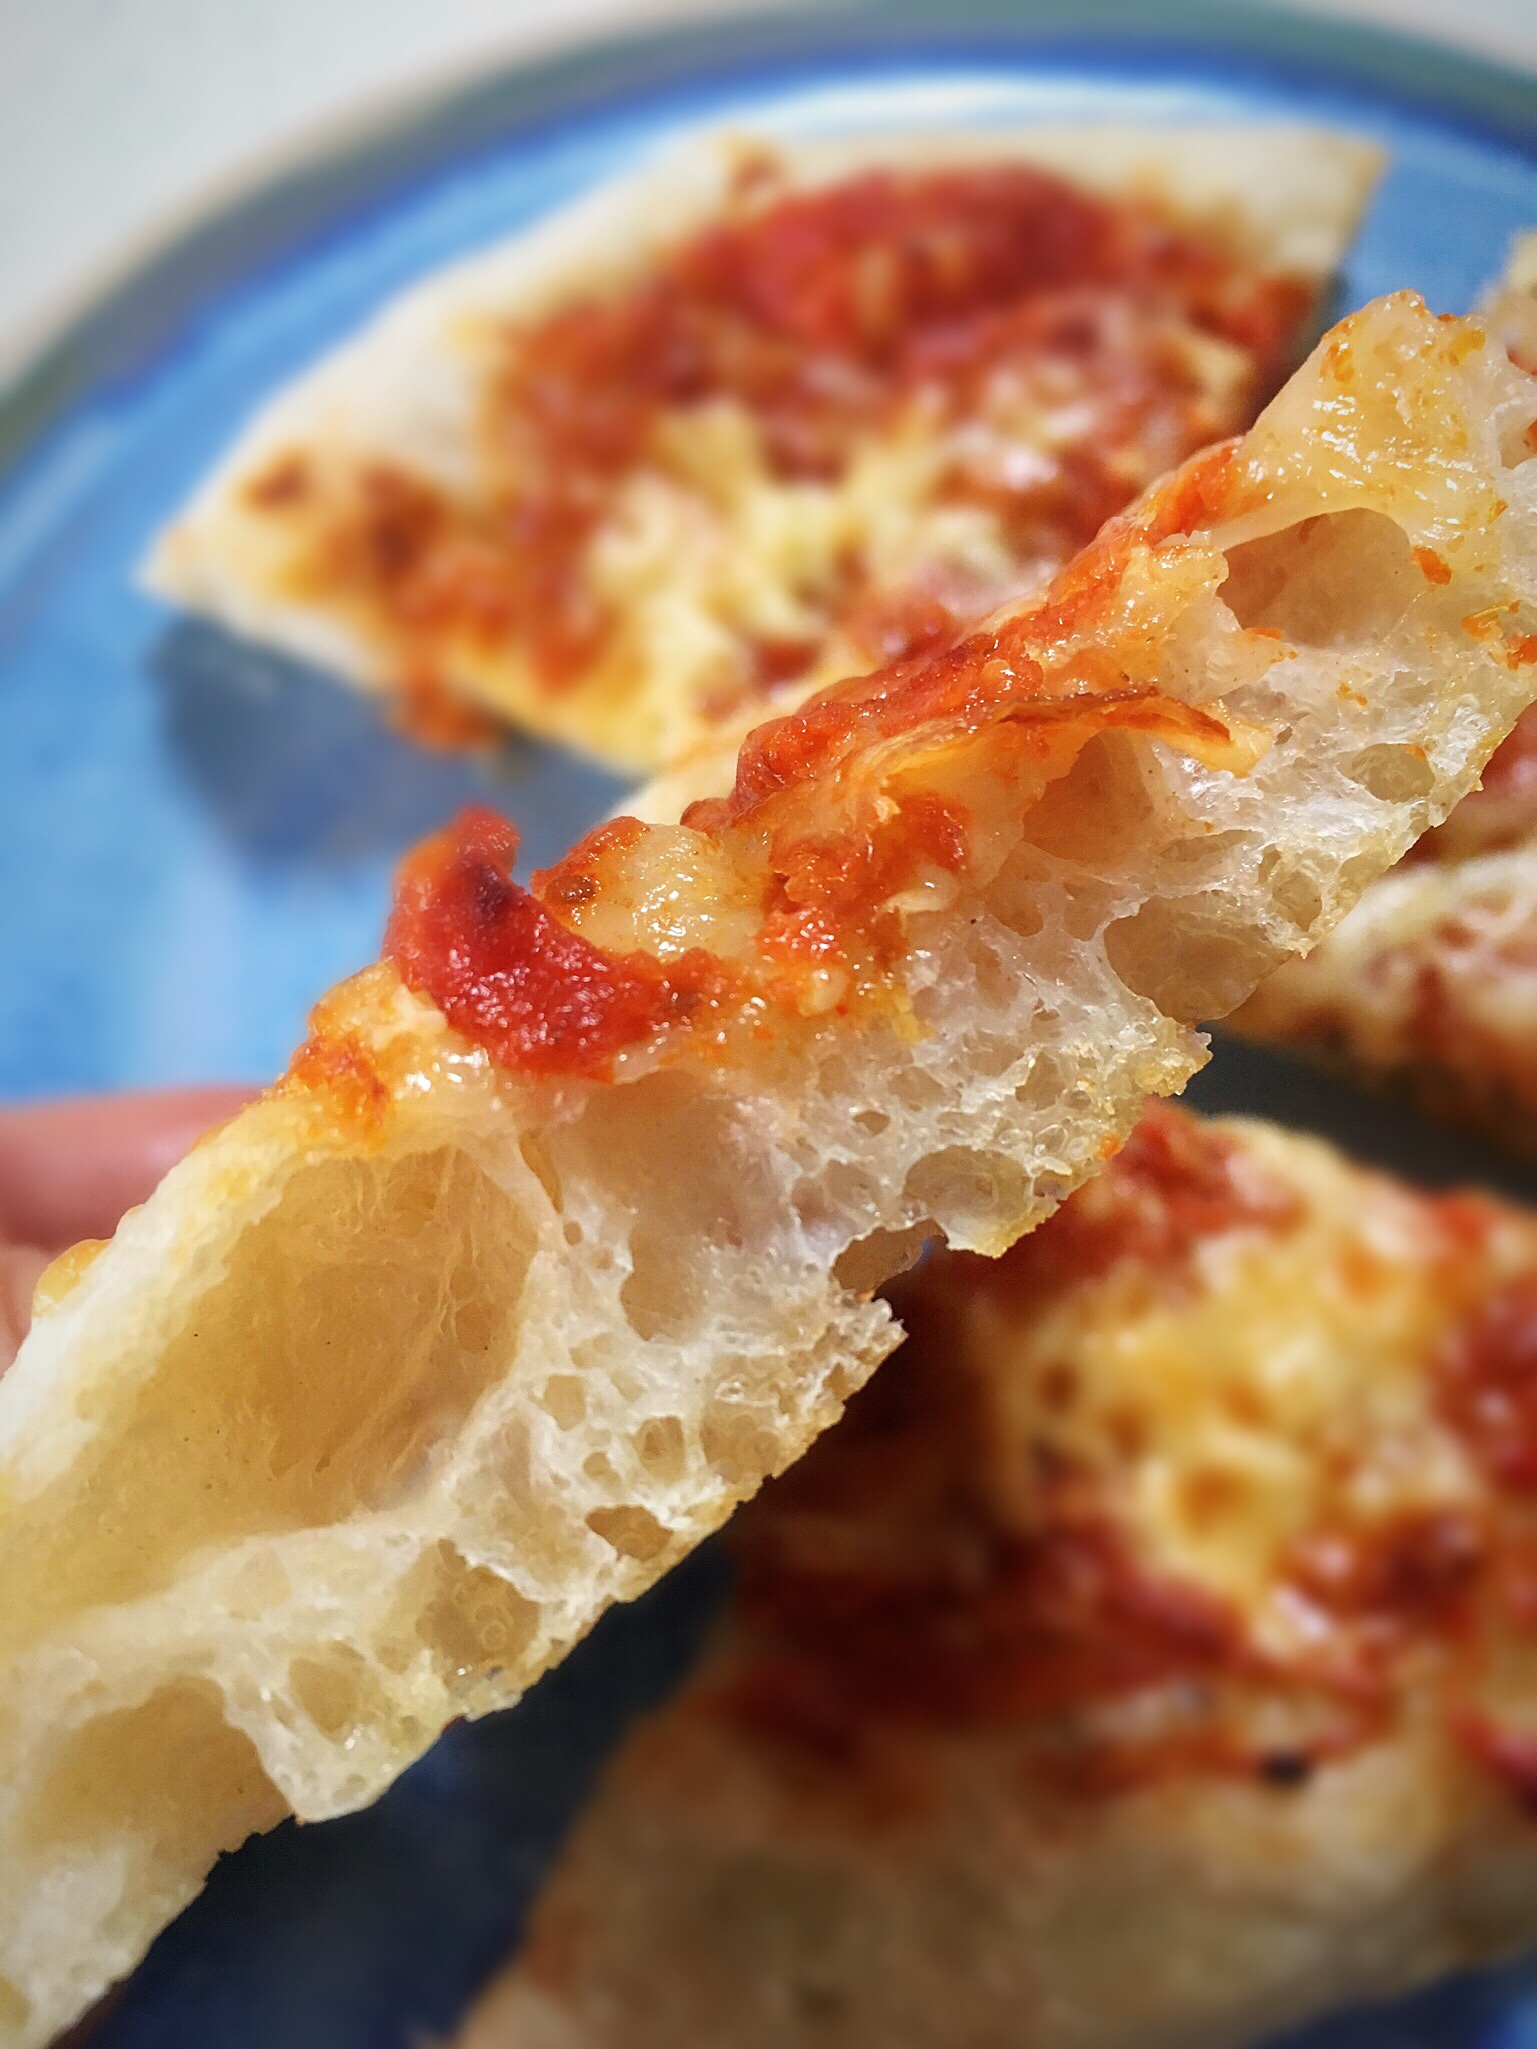
The outcome being a lovely textured, holey, tasty pizza base!

The key is how to manage and store the overnight dough ready for when you want your pizzas. I have got 2 methods below, each designed to make it simple to fit the dough in with your timings, and not the other way round!

Method 1.

The morning after the overnight prove, you will hopefully have a lovely big bowl of bubbly dough; if it is escaping the bowl, gently do a single set of pulls and folds, just go once round the bowl, to pull it loosely together, re-cover it, and place it in the fridge. If the dough hasn’t reached the top of the bowl already, just place it in the fridge to bring the activity to a halt until you want to use it.

When you know when you want your pizzas to be ready for, remove the dough from the fridge an hour or so beforehand and let it warm up a bit.

Cover your work surface with water, flour or olive oil, I use water.

Turn the dough out from the bowl onto your surface and cut into portions, 2, 4 or 6, depending how big you would like your pizzas to be.

Let it sit for 10 minutes.

**I use a foil lined baking tray to cook my pizzas, liberally drizzled with olive oil (I like the crust it generates when baked). However, you may prefer using semolina, polenta/corn meal, flour, whatever your choice under the dough, directly onto your baking tray or baking implement of your choice. If you’re using a pizza stone, prepare the dough on a board or tray ready to be able to move it across to your stone as you usually do.

After 10 minutes place the dough on your chosen bakeware, and start to gently use your finger tips to push the dough out into a thinner rounder shape, or shape of your choice. You will need to let it sit for a few minutes and then do it again as the dough will bounce back.

Preheat the oven to 220C fan/240 non fan/460F.

Give your dough one final push out, spread with sauce of your choice and toppings of your choice, and bake for 12-15 minutes until the base is cooked and the cheese is bubbling.

Enjoy!

Method 2.

In the morning you will hopefully have a lovely big bowl of dough. Cover your work surface in flour, water or oil, and turn the dough out onto the surface. I use water at this point.

Prepare your baking tray, I drizzle olive oil over my foil lined tray as stated above.

Portion the dough into 2, 4 or 6 pieces.

Let it sit for 10 minutes.

Place the pieces onto your prepared baking tray and use your fingers tips to push it gently out into a round; it will want to bounce back so let it set for a while and do it again.

Once you’ve got it pushed out to the thinness and size that you want, cover the whole tray with a large plastic bag, or place cling film over the dough, and put the whole tray in the fridge.

It can now sit in there until you want to use it, I’ve let mine sit in the fridge all day in the past.

**The top 2 photos in the collage below show the dough before and after being in the fridge. As you can see, the dough continued to work in the cold – my SuperStar in action!

You can now use this dough directly from the fridge, you don’t need to let it warm up or come to room temperature, you can just add your toppings and bake.

If you’re more comfortable letting it come to room temperature before baking you can do that too.

Preheat the oven to 220C fan/240 non fan/460F, and bake for 12-15 minutes until the base is cooked and the cheese is bubbling.

Enjoy!

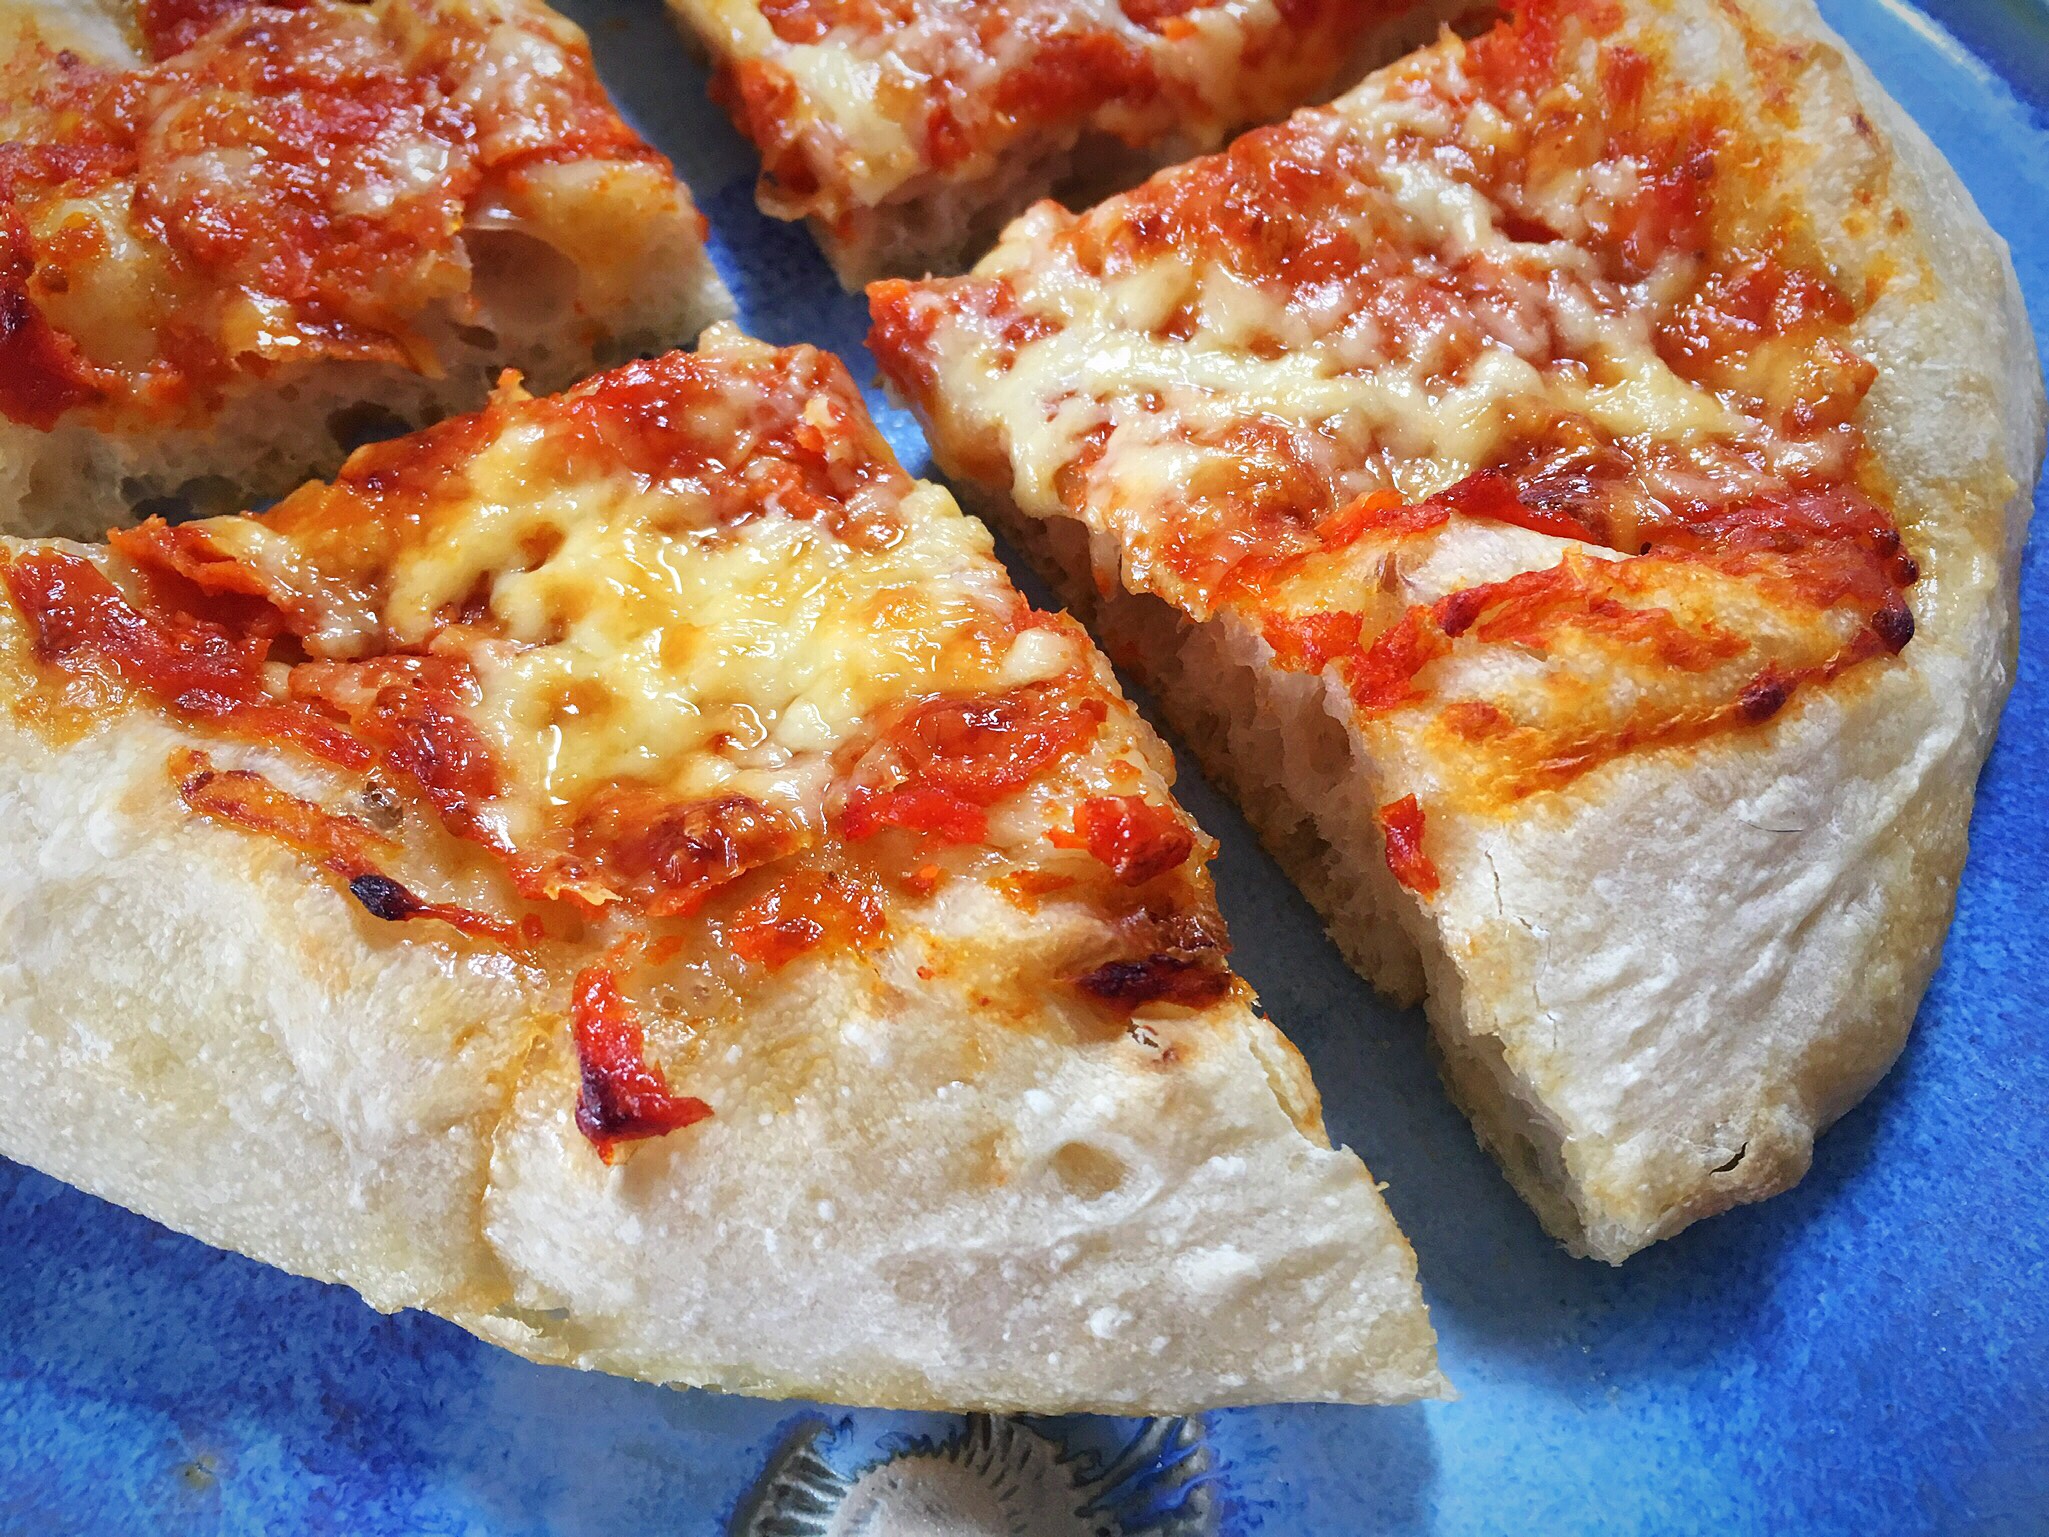
Beautiful blistered base, and it tastes SOOOO good!

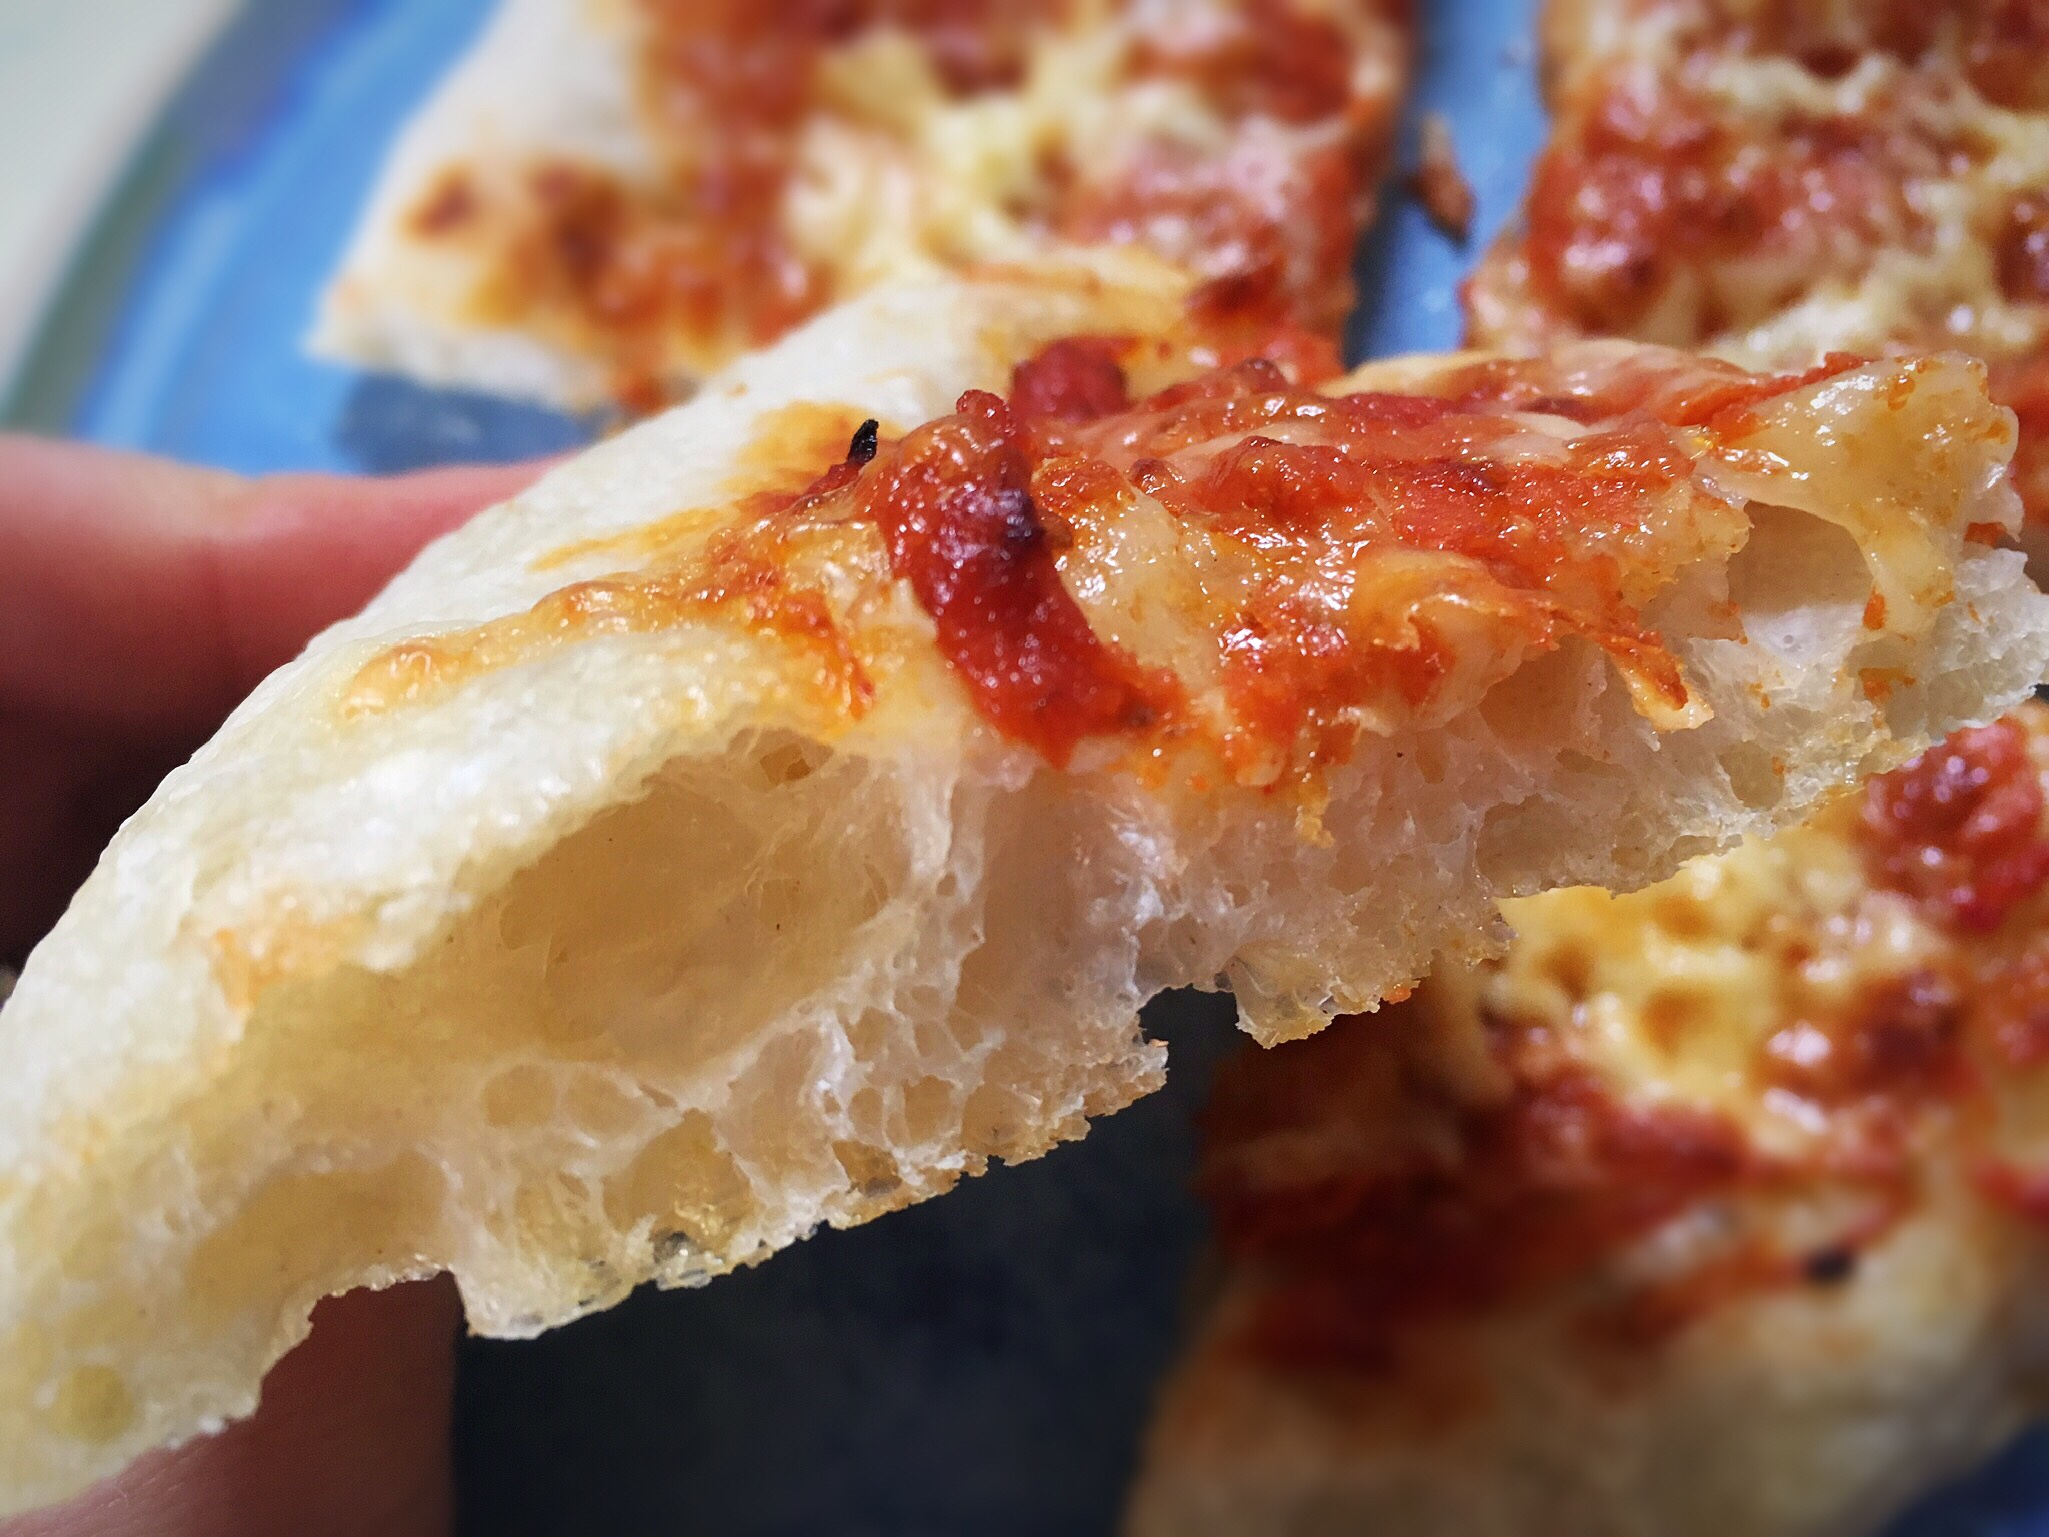
And a view of the cooked base…

I love the crust that the olive oil creates, added to the soft interior.

I hope you like my method and find it useful, and user & life friendly. For more pizza recipes and more, check out my book, The Sourdough Whisperer.