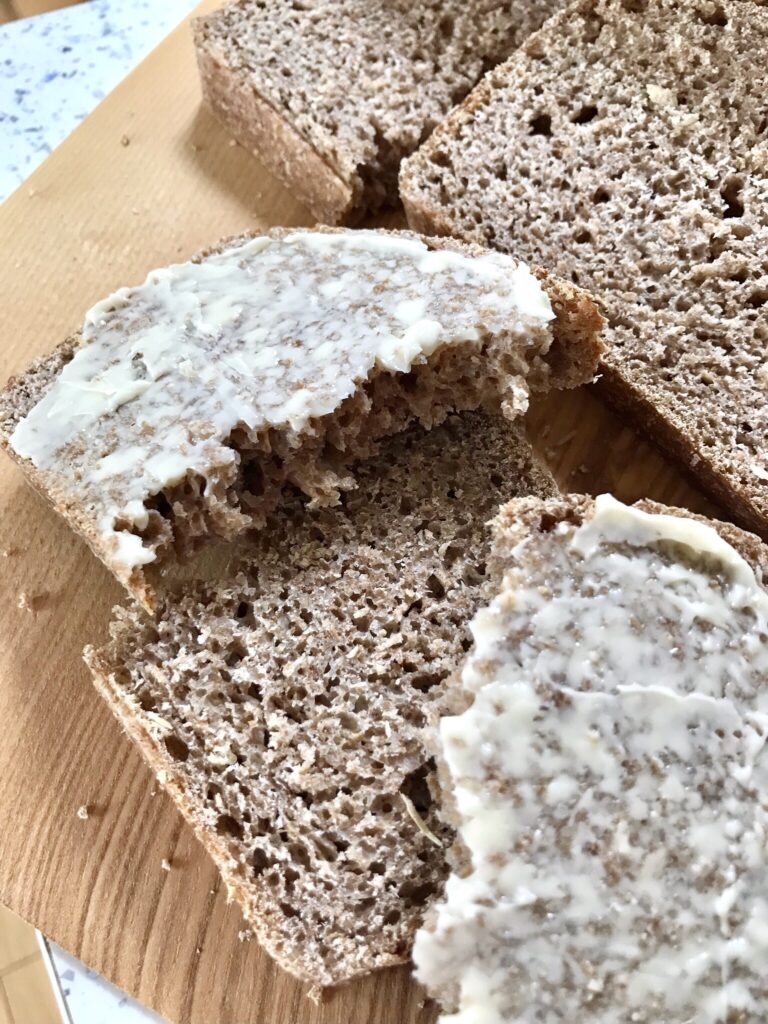
100% spelt sourdough loaf…

Spelt flour is a beautiful flour to use and produces an amazingly tasty loaf. It is not, however, a straightforward flour to use and benefits from being baked in a loaf tin to give it support. To make this loaf, I followed my master recipe process to make the dough and the process for making sandwich loaves as in my book.

This is the flour I use for this recipe here in the UK.

Ingredients

50g starter (I used my spelt starter, see below)

350g water

500g wholemeal spelt flour

1 tsp salt

Method

To make the dough, follow my usual master recipe process as written on my site or in my book, mixing everything up together mid/late afternoon. It may seem dry initially but it does not need extra water, go in with your hands and squeeze the mixture together, so that there is no dry flour left.

Then cover the bowl with your shower cap/cover, and leave it on the counter for 2 hours, this rest time will make it easier to stretch the dough later.

After 2 hours, do a set of stretches and folds on the dough. Wholemeal flour is oily and does not stick to the bowl which also means that when you try to stretch it, the whole dough will lift out of the bowl so I hold the dough in place with one hand, lift a portion with the other hand, pull it up and tuck it over the dough. Do this a few times round the bowl.

This will be a stiff, spongy mix.

Cover the bowl again, let it sit for 1 hour then repeat the stretches. It will only need a few actions.

Do this twice more then cover the dough again and leave it on the counter overnight.

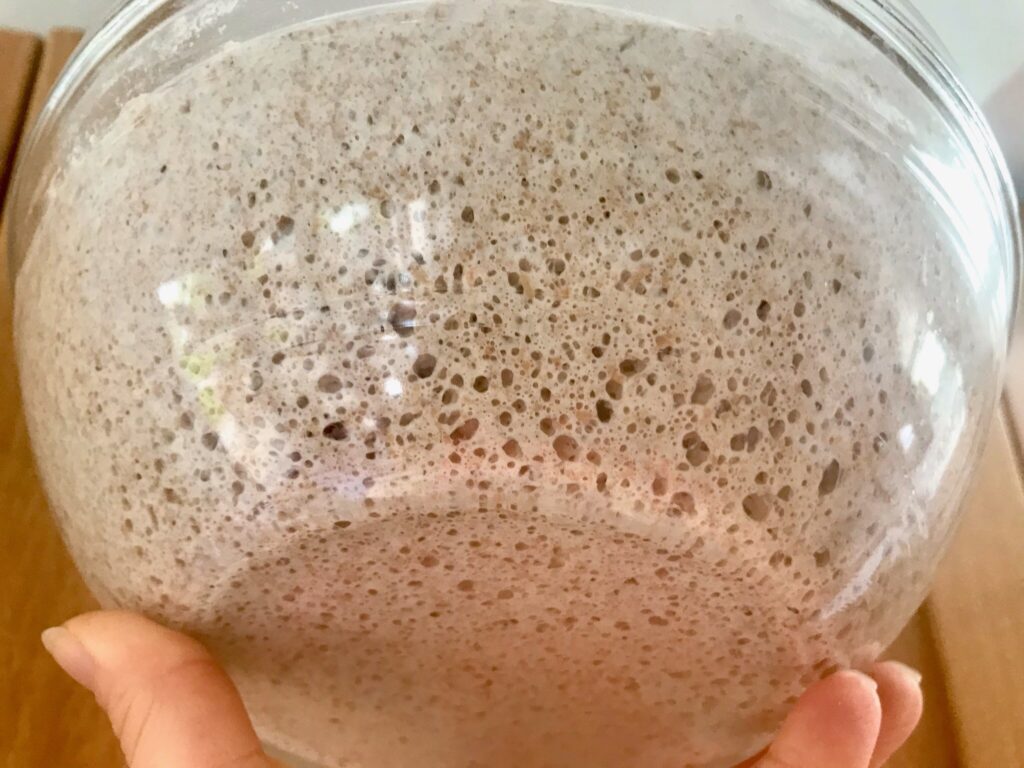
In the morning the dough will have grown to double the size with a smoothish surface.
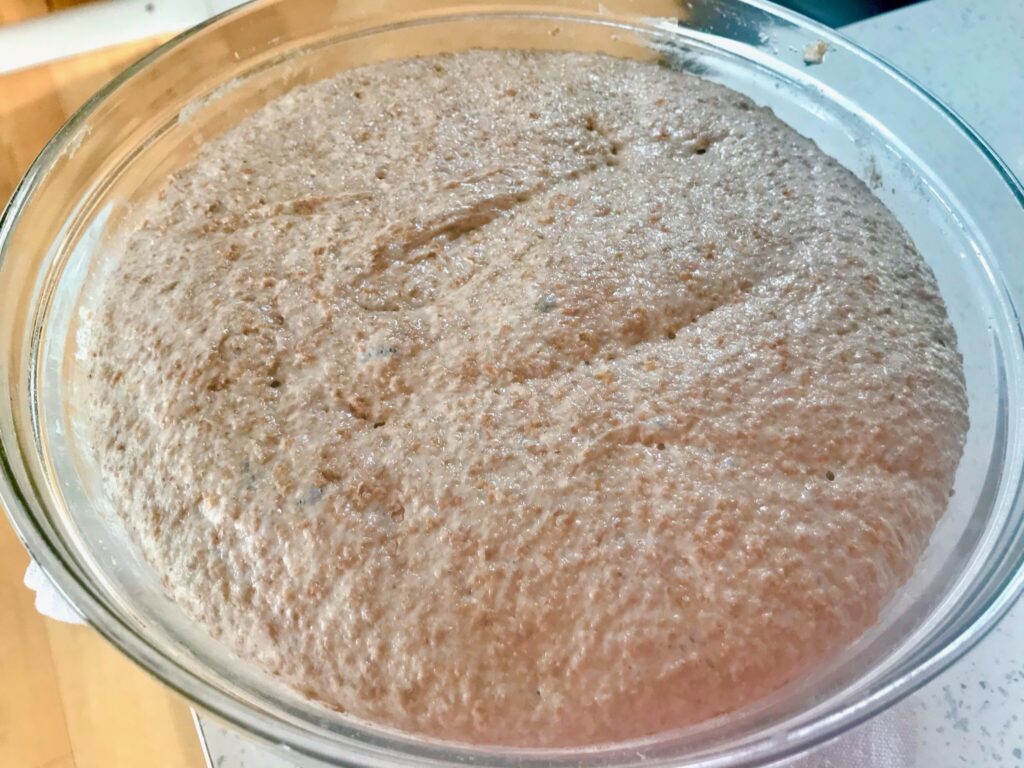
View of the top of the bowl
View from the side

This now needs to be pulled together to go into the tin. This video shows how I do it: https://youtu.be/DHp-TXjLGp0

The dough will be spongy and textured and will not take many pulls to bring it together.
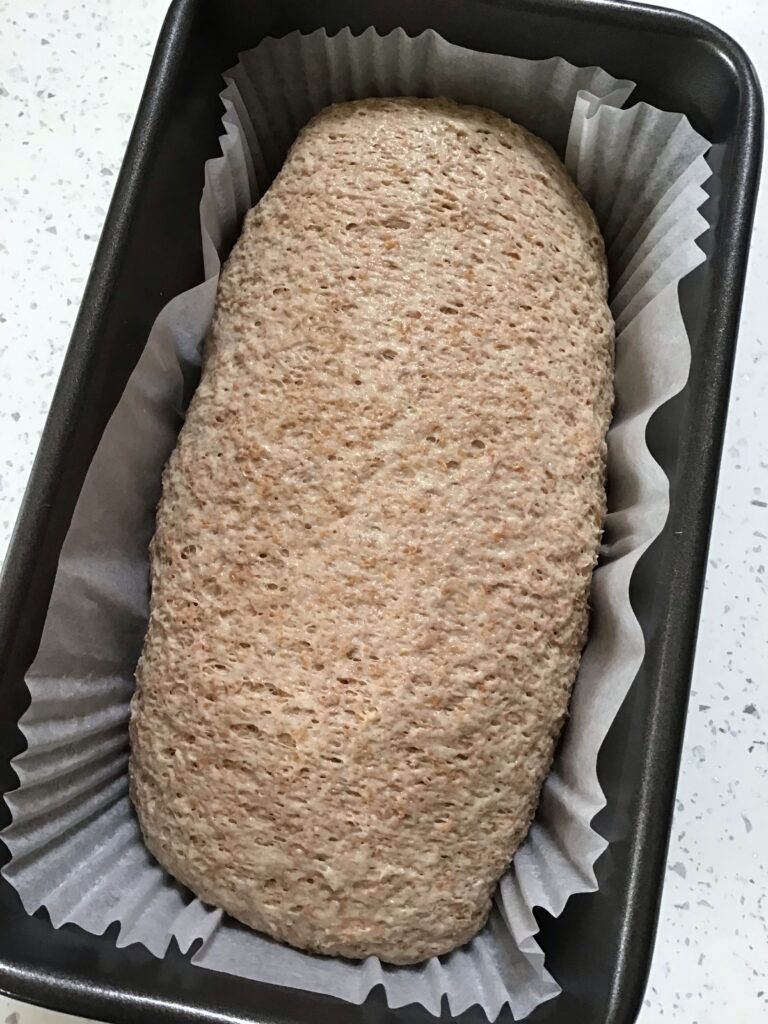
Ready for the next prove

Once it is in the tin as per the video, cover it again, and leave it on the counter.

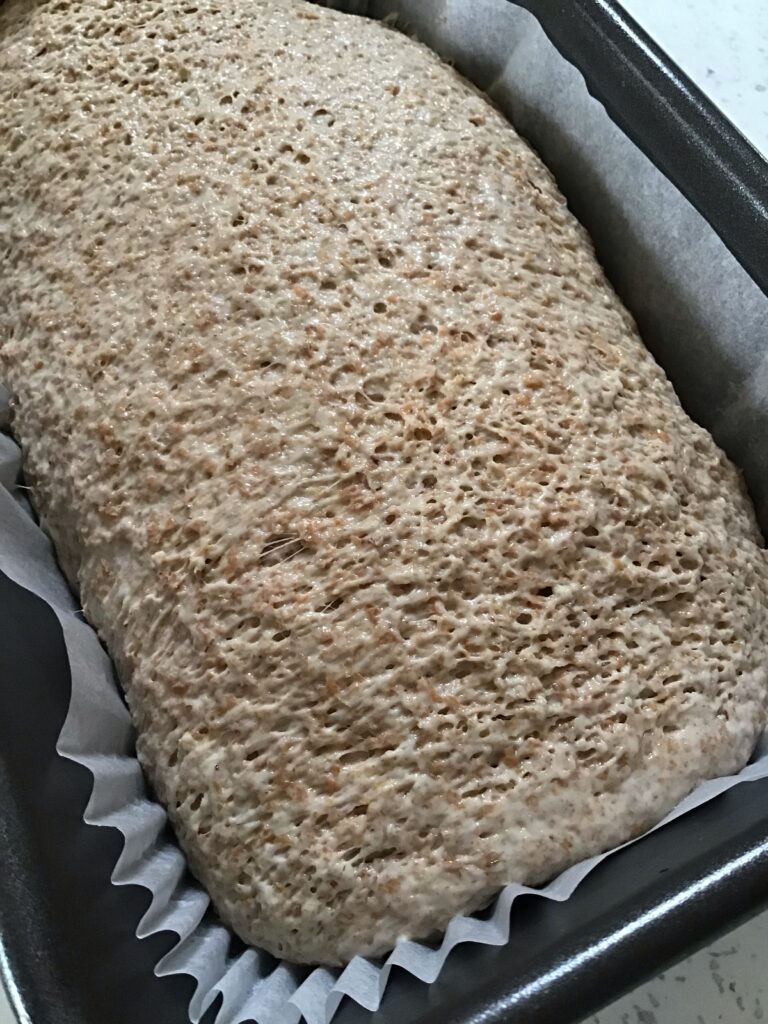
Let the dough prove again. Once it is level with the edge of the tin, bake.
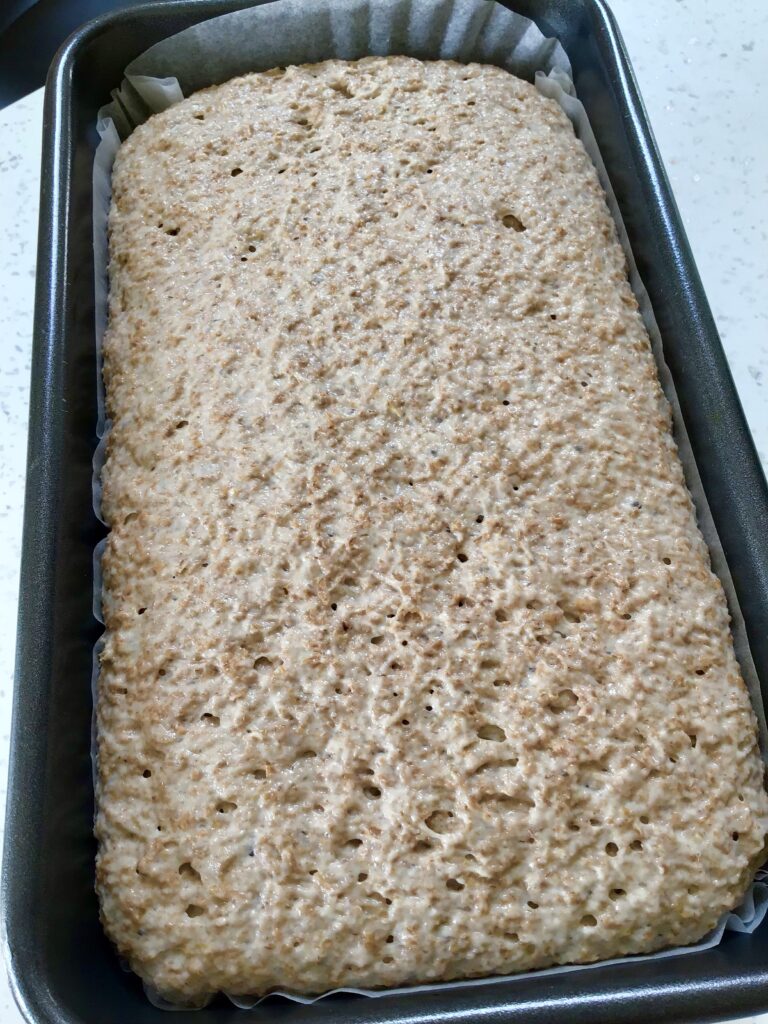
After several hours on the counter
Ready to bake

This can be done from a cold start; place the tin with the dough in, uncovered, into the cold oven. Turn the oven up to 180C fan/200C non fan and bake for 45 mins from the time you placed it into the oven.

The loaf will not grow much more as it bakes, the growth is all in the proving, the baking merely consolidates that.

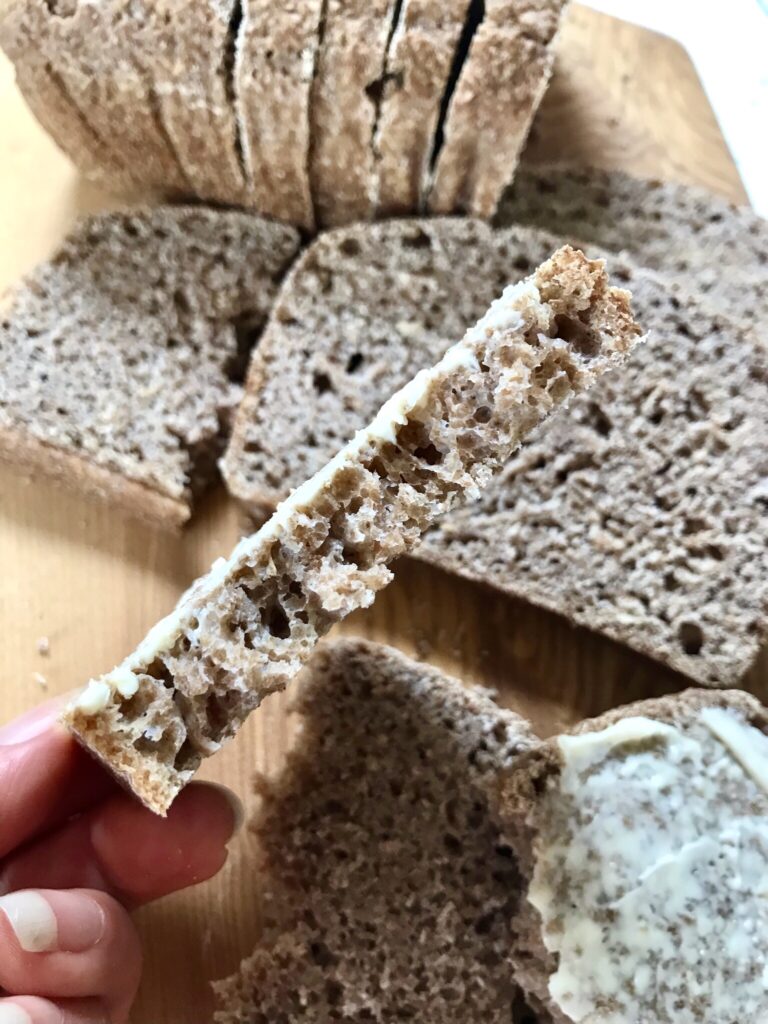
Once baked, remove from the pan, tap the base, and if it sounds hollow, remove the paper and cool on a rack for a good hour at least. If you feel it needs baking for longer, put it back in the oven for 5-10 more minutes.
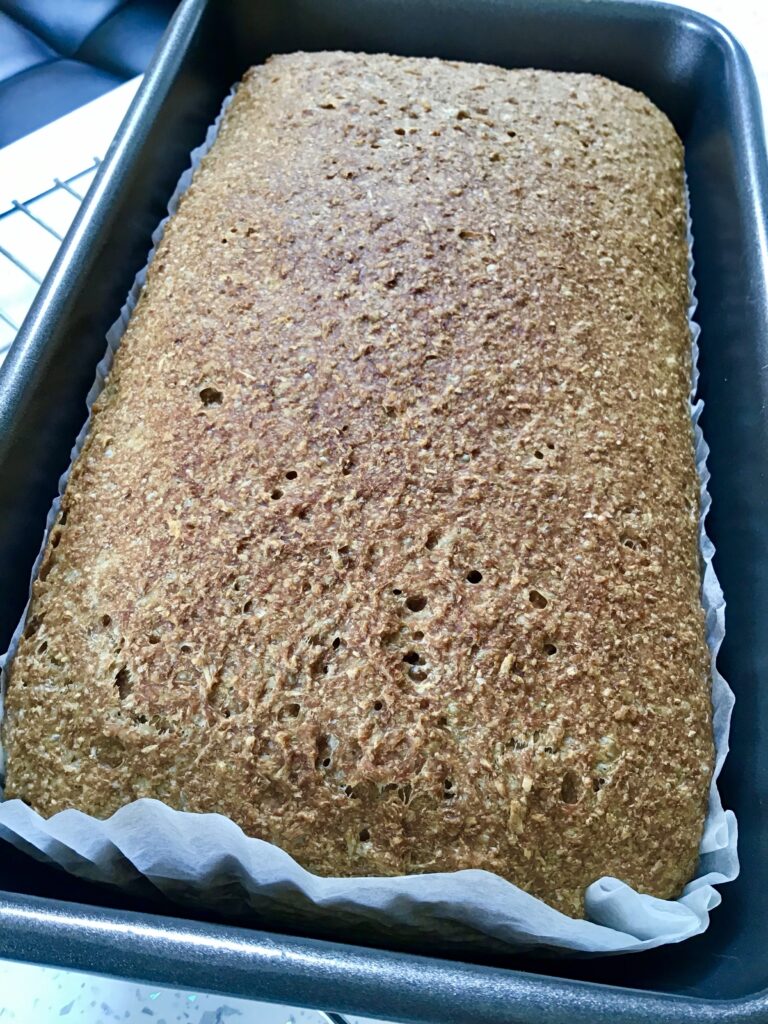
Baked and fresh from the oven

These loaves tend to feel slightly moist which is normal.
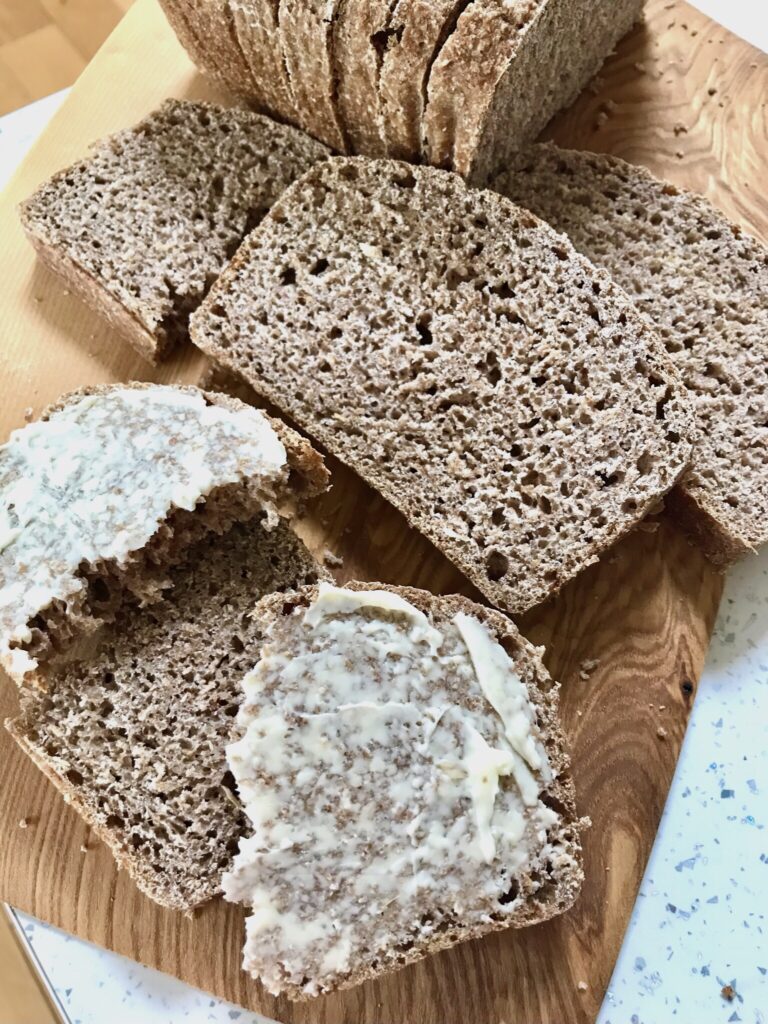
To make this loaf I used a wholemeal/wholewheat starter too to make this a 100% spelt loaf…
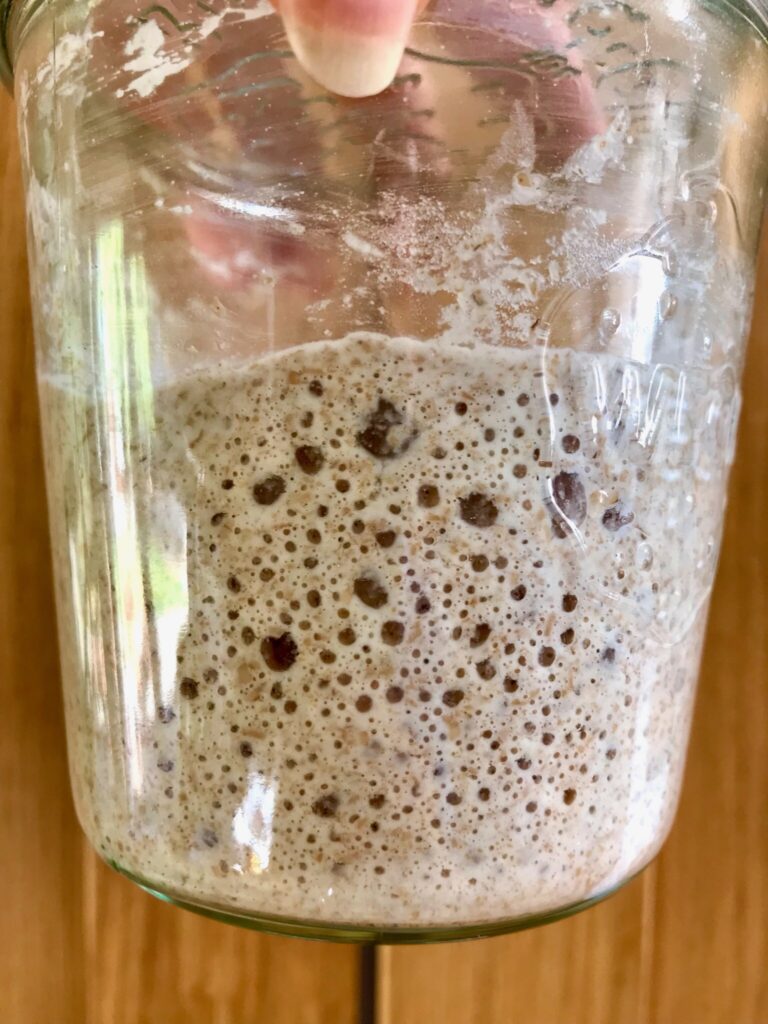
To make your own, follow my guide for making a starter on my site or in my book, exactly as it’s written, just using wholemeal/wholewheat spelt flour. Please note that you can use any type of starter made with any flour, if you want to keep the loaf fully spelt, below are some notes about making a wholemeal/wholewheat spelt flour starter.

Day 1: this will be a thick first mix

Day 2: this will still be a thick mix, but not as much as day 1. There may be a slight liquid forming on surface, this is normal

Day 3: you may see bubbles forming on surface and throughout the mixture, it will have an elastic, thick, bouncy consistency

When you feed it it will be thick, maybe already showing bubbles after mixing and stirring

Over next 24 hours, you should see bubbles appearing, the texture becoming almost spongy, and the volume starting to grow, and a strong wheaty smell developing

Days 4 & 5: the mix will be thick, elastic and textured

Day 6: you will notice a strong smell when the starter is stirred, this is normal, and typical of wholegrain flours. It should also now be textured, bubbly, and thick before feeding

And lovely and thicker after feeding. Bubbles may be appearing as soon as fed and stirred

Day 7: it should be responding to its feed and growing and becoming textured with a bubbly surface.
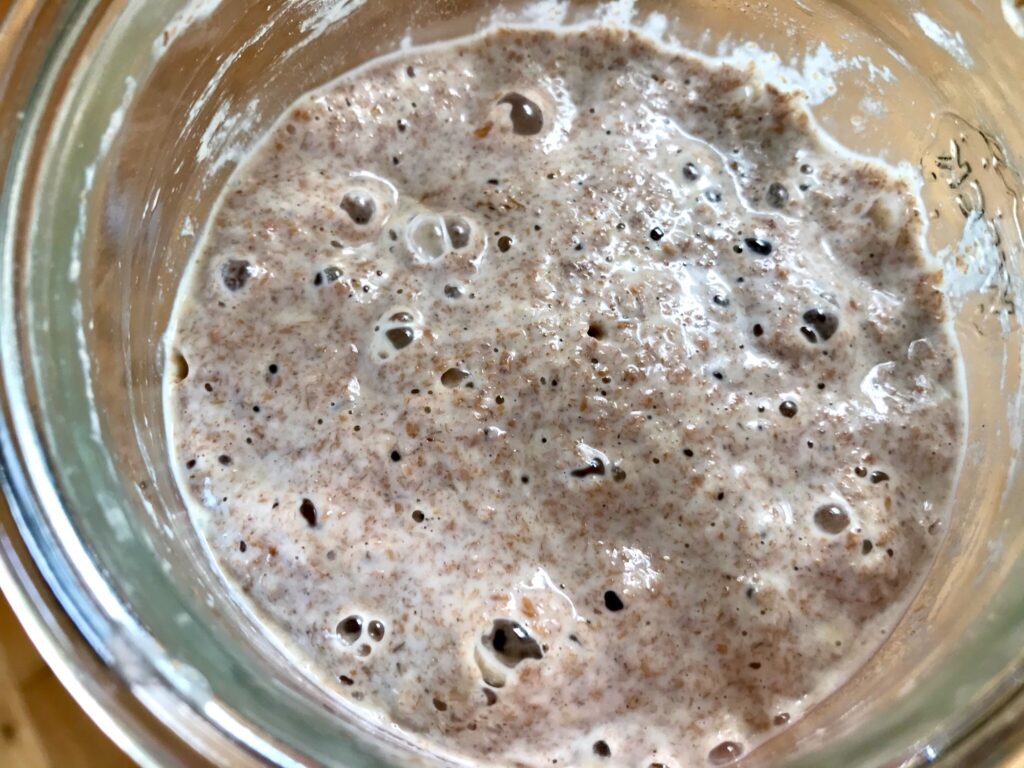
Note that with wholegrain flours, any show of dark liquid on the surface or around the edges is normal.

I hope you enjoy creating your own wholemeal/wholewheat spelt starter and loaf, and enjoy the fabulous flavour! For more ideas about using spelt flour, and lots more wholegrain and ancient grain flours, check out my book “˜Whole Grain Sourdough at Home”.
A book cover with a picture of bread on it.

My enriched foodbod master recipe sourdough…

I’m so excited about this post, I’ve really enjoyed making and testing these loaves…I hope you like it too!

Every bread in this post has been made using my master recipe to create enriched doughs and loaves…they’re beautiful and shiny and they smell amazing; the texture of the bread is light, soft, not too rich, not too sweet, and with a hint of our joyful sourdough flavour…I’ve played with flours and shapes and pans, and have had great fun creating my ‘enriched master recipe sourdough’…

This loaf was made using the lighter version of the dough below, and with half strong white bread flour and half white spelt flour. Before and after shots of the bake below.
Soft and fluffy interior.
A slice of the above loaf.

The doughs are all enriched with eggs, milk, butter and honey. This is a very very tasty sourdough creation! Its great eaten on it’s own, as well as with your choice of toppings, and smells amazing all over again when toasted. And no mixer required, even better!

The end shot of the loaf above.

I have tested this several times recently and it worked perfectly with just strong white bread flour, a mix of SWBF and white spelt flour, and with 100% white spelt flour. Each version has been a success, the white spelt flour adding a silkiness to the dough that’s lovely to work with, as well as a lightness to the crumb.

This loaf was made with the richer version of the dough below and 100% white spelt flour. Once baked I brushed with it butter and sprinkled with sesame seeds.
The inside of the loaf above.

NOTES:

🌟 The added dairy products do not go bad during the overnight prove, the dough is protected by the starter.

🌟 The butter only needs to be softened, not fully melted. If you do melt it, ensure it is cool before mixing with the rest of the ingredients.

🌟 The softened butter does not need to be fully mixed through the dough initially, it will soften more and become fully incorporated as your work with the dough.

🌟 This is a heavy slow dough, allow it time to grow fully.

🌟 It’s also a dough that requires very little shaping.

🌟 It keeps well for a week if wrapped well.

🌟 I don’t like things very sweet; for us, chief taster included, the 50g honey in the recipe was perfect. If you prefer things sweeter, replace it with sugar, quantity of your choice.

🌟 I have made two slightly different versions of this, one a little richer than the other, and I like both. You can tone things down, or up, as you choose.

🌟 You can choose your own version, using the flour/s of your choice, and all or just one to two of the added ingredients. It works whichever options you choose.

🌟 For dietary alternatives, use no eggs or egg replacements/non dairy milk/no butter or a dairy free option.

🌟 I made the round loaf in my 20cm diameter enamel roaster (above) and the rectangular loaf in a large loaf tin (27cm x 17cm/10.5” x 6.5”). You can use a standard 2 lb loaf tin too.

🌟🌟🌟 My master recipe strikes again! 🌟🌟🌟

Slices of the loaf tin loaf from above.

Ingredients

50g active starter

1 whole egg + 1 egg yolk (save the white) + milk to make up a total of 350g (I use semi skimmed/half fat milk)

75g softened butter

50g runny honey

500g strong white bread flour OR 250g SWBF + 250g white spelt flour OR 500g white spelt flour

1 teaspoon of salt, or to taste

Alternative slightly lighter option:

50g active starter

1 whole egg + milk to make up a total of 350g

50g softened butter

50g runny honey

500g strong white bread flour OR 250g SWBF + 250g white spelt flour OR 500g white spelt flour

1 teaspoon of salt, or to taste

As per my master recipe (for full step by step directions click on the link to the left):

Feed your starter as normal to generate the 50g needed for the recipe.

Begin mixing the dough in the evening.

Roughly mix all of the ingredients: it will be very sticky.

After an hour, perform the first set of pulls and folds on the dough. Lifting and pulling the dough across the bowl until it starts to come into a soft ball then stop. Cover the bowl again and leave it to sit.

During this first set of pulls and folds the dough will still be sticky but keep working with it.

After an hour, perform the second set.

During this set of pulls and folds, the dough will start to become smooth and silky (esp if it’s 100% white spelt flour) and will take less actions to pull it into a ball. Cover and leave to sit.

Over the next hour or so, perform the third, and fourth set if you do one, the dough should be nice to handle now. Each time stop when the dough comes into a loose ball.

Cover and leave to prove on the counter overnight as usual.

Next morning the dough will typically have grown, but not yet doubled, allow it 2-3 more hours if it needs more time.

Line a tin with baking parchment paper or a loaf tin liner.

Pull the dough together, it does not need to be handled much, it doesn’t need to be too tight, this will be a stiff heavy dough, and place it hand side down/smooth side up into your liner.

Cover again and leave to prove on the counter again until the dough is level with the edge of the pan, typically 3-4 hours.

Mix the egg white with a tablespoon of water and brush the top of the dough gently with it.

Bake, uncovered, from a cold start at 160C fan/convection, or 180C non fan/convention oven, for 45 mins, covering if the top becomes too dark.

Remove from the oven, and the tin and allow to cool.

Enjoy!

Braided and hand shaped loaf using dough made with half strong white bread flour and half white spelt flour
Dough made with the lighter version of the above options and made with half strong white bread flour and half white spelt flour.
Slices of the inside of the baked loaf above.

To use the dough to create shaped doughs, refrigerate the dough for 1-2 hours after the overnight prove to firm it up, then turn it out, portion it and shape it as you choose before covering it again and leaving it to prove again for 3-4 hours, then bake as above.

Dough split into 6 equal pieces (by eye), shaped into balls and placed together inside the lined pan and allowed to prove again before baking. You could also bake them separately to make rolls.
The baked loaf.

🌟🌟🌟 It really is true, you can use my master recipe as a base for anything you want to create! 🌟🌟🌟

You can now find this recipe in more detail and with new variations in my new book! Happy baking!

My sourdough spelt banana bread…

Introducing my sourdough banana spelt bread…I used white spelt flour in this loaf, feel free to substitute it for any flour/s of your choice. I’ve used all and any flour to make this recipe, it works whatever you choose to use. Try it with a mix of white and wholewheat/wholegrain spelt flours, a portion of rye flour, any ancient grain flours, they all work.

The starter adds flavour and texture but not lift in this recipe as it is an immediate recipe. It’s great freshly baked but also good later and the next day once the flavours have developed.

As is my choice, I used a small amount of honey in my loaf. If you would prefer something sweeter please feel free to double it or replace it with 100-150g of your choice of sugar. You could also add chopped nuts, chocolate chips, raisins, whatever you fancy.

Ingredients

200g white spelt flour (I use this one)

100g bubbly active starter

50g runny honey

50g softened butter

1tsp bicarbonate of soda

1/2tsp baking powder

1 egg

3 medium/2 large ripe bananas, roughly mashed

An extra banana if you want one for decoration, sliced

Method

Either grease or line a 2lb/900g, 23 x 13cm/9″ x 5″ loaf tin

Mix all of the ingredients together well, but not over mixed, spoon the mixture into the loaf tin.

Place into your cold oven, turn it up to 160C/320F fan/convection, 180C/360F non fan/convention and bake for 50-60 minutes or until a metal skewer comes out clean.

Eat!

Baking sourdough with spelt and kamut/khorason flour…

A close up of some bread on a table

These loaves have been made using my starter and a variety of white spelt flour, kamut/khorason flour, and mixes of the two.

These were experimental to test how the flours would hold up on their own for use in sourdough so this post is to share the outcome. I’ve used both spelt and kamut flour in loaves that included strong white bread flour with great success and flavour, which you can find in my recipe index; this time I wanted to test them out on their own to see how they behaved.

Please note: these loaves were all made with a smaller banneton which is 17cm diameter and 7.5cm deep. This allowed me to use less flour in these trials. The quantities are included at the end of the post.

And: I’ve used my same starter in all of them, fed the usual way with strong white bread flour; you don’t need different starters for different loaves.

Three loaves of bread on a cutting board.

Firstly, let me talk about the actual flours themselves; these are milled from ancients grains. Spelt and khorason (kamut is actually the brand name, the entire grain has a brand!) are wonderfully tasty grains that are lovely and nutty and chewy to eat in their naturally grown form once cooked, I eat them a lot this way.

The flours are milled from those grains.

Being ancient grains, they are quite different from more modern flours, and very different from one another, so considerations have to be taken when using them in your sourdough.

White spelt flour is very soft, it’s a lovely fine gentle flour. It therefore struggles to hold its form if used 100% for a free form loaf such as sourdough because it is not a very strong flour, the protein level is less than 11%, and so it benefits from additions to give it strength to hold its shape. I found that when used on it’s own for a loaf, it still created a lovely dough, it rose well, it baked nicely, the crumb was lovely and light, but it was a bit unevenly shaped once baked. I know from past experience that spelt does not hold its shape so I chose to bake it in a smaller pan (20cm diameter as opposed to me usual 26cm diameter enamel roaster) to give it the benefit of the sides of the pan to stop it from spreading, which it needed. The cut slice shows the shape more.

A loaf of bread in a bowl on top of a table.A loaf of bread in a bowl with a wooden spatula.A close up of some bread on a plate

Once I added seeds to the dough, it was a whole different story: they gave the dough structure and it held its shape perfectly, hence being able to use a bigger pan.

A round cheese with many holes in it.A loaf of bread in a bowl on wax paper.A close up of some bread on the tableA close up of some bread on a plate

And it tasted great!!!!! I always toast my seeds beforehand which all adds to the flavour.

Khorason flour is quite different. I used a wholewheat khorason flour which has 15g of protein per 100g. The flour is a lot more grainy that the spelt, and it soaks up a lot more water. It can often pull in quite tightly when first mixed into a dough, then loosen up later, so don’t be fooled! I have found that it enhances the flavour of the sourdough quite distinctly and increases the sourness.

Using it for a 100% khorason loaf generates a tight crumb and a denser bake, but it’s so tasty, I recommend trying it.

A loaf of bread in a bowl with water.A loaf of bread in a basket with some type of crust.A close up of some slices of bread

Mixing 50:50 white spelt flour and wholewheat khorason was a real success: the spelt lifts and lightens the khorason, whilst the khorason gives the spelt structure. And it tastes great! it’s still a closer crumb than all white or all spelt, but it’s tasty and lovely which is all that matters right? And the butter doesn’t escape!

A close up of some bread slices on top of each otherA loaf of bread is sitting on the table.

I will be putting videos of making these loaves on YouTube, but all I’ve done is use my master recipe process, all I’ve done is change the quantities, so everything else is the same; please feel free to increase the quantities to make a bigger loaf.

The spelt loaf quantities:

300g white spelt flour

200g water

30g starter

1/2 tsp salt, or to your taste

The seeded spelt loaf quantities:

300g white spelt flour

200g water

30g starter

1/2 salt, or to taste

50g mixed roasted seeds, I use pumpkin seed, sunflower seeds and linseeds

The khorason loaf:

300g wholewheat khorason flour

250g water

30g starter

1/2 tsp salt, or to taste

The spelt & khorason loaf:

150g white spelt flour

150g wholewheat khorason flour

250g water

30g starter

1/2 tsp salt, or to taste

The process: I used the process of my master recipe, find the links to the left, all the way through, and baked in a preheated oven at 220C fan (240C non fan) covered, for 30-35 minutes as required.

A close up of bread on a cutting board

Happy baking!

The white spelt flour was from Mathews Cotswold Flours

The khorason flour was from Doves Farm

The starter was always fed and bubbly!

Spelt and white loaf…

A loaf of bread with some type of crust on it

Anyone who knows me from Instagram or my foodbod blog will know that I love grains. I literally love quinoa, spelt, kamut, bulgur wheat, any grain, on its own by the spoonful, or with endless accompaniments…

A bowl of food with spinach and an egg on top.

A recent dish including quinoa

Some of these grains also translate into lovely flours; I’m not a fan of quinoa flour, I find it bitter, but spelt flour and kamut flour are both lovely. They have a lovely nutty flavour to them. They do not translate into strong flours however, they need to be handled with care to bake bread with them.

You can bake 100% spelt flour loaves but my experience has been that they need to be baked in a tin to give them structure.

This loaf therefore is 50% strong white bread flour, 50% spelt flour to give the loaf strength from the bread flour. The spelt flour is very soft and light and the resulting dough is very soft, but still bubbles up beautifully. I used my master recipe in exactly the same way just with the 50:50 mix.

I shared a video on Instagram and Facebook today to show just how light and bubbling the dough was, below is a screenshot of the dough after its overnight proof, it was very light and needed gentle handling. The final proof in the fridge firmed it up sufficiently to be able to score the loaf and it rose beautifully as it baked.

A bowl of food on top of the table.

Form this, above…to this, below…

A round bread sitting in the middle of a bowl.

A loaf of bread with one bite taken out.

A loaf of bread in a bowl with some type of crust.

A loaf of bread with some cheese on top.

Happy Baking!