How long…?

A question I am asked daily is ‘how long…?’

This could be ‘how long will it take for my new starter to be ready to use?’ or ‘how long will it be before I can use my starter after feeding it?’ or ‘how long will it take for my dough fully proved?’, these are the main questions that come up.

There is only one answer to all of these, or any question of ‘how long…?’ when talking about sourdough which is…

I literally cannot tell you “how long”. There is no fixed, definitive answer to any of these questions.

I cannot ever tell anyone how long any of that things will take because there are too many factors involved. And understanding that and what these factors are will enhance your sourdough exponentially. Time and patience are the bedfellows of sourdough success, hand in hand with flour, temperature and environment. Which can all sound confusing and impossible to manage, but it’s truly simpler than people think, and as soon as you grasp those elements, sourdough making becomes relaxing and more enjoyable.

If I answer those earlier questions, this will give you a guide to what the main considerations are which you can the apply to your kitchen…

Question: how long will it take for my new starter to be ready to use?

Answer: honestly, it will take as long as it takes. All starters are different. Some take 5 days, some take 5 weeks, they’re all individual. It depends on the flour you use, the temperature in your kitchen, the wild yeast activity in your flour. The key is to let it happen, because it will.

Question: how long will it be before I can use my starter after feeding it?

Answer: this will all depend on the strength of your starter, and the room temperature. If it’s chilly, it will be slower; if it’s warmer, it will be faster. Watch it and it will show you when it’s ready, it will have grown and become active and lively.

Question: how long will it take for my dough fully proved?

Answer: again, this will depend on the strength of your starter, and the room temperature. If it’s chilly, it will be slower; if it’s warmer, it will be faster. This is why all of my recipes include time and temperature hand in hand for the main prove. Read my site and my book and lots of my posts on here for more info.

And one final question, that we all ask: how long do I REALLY have to wait to slice into my freshly baked loaf?

Answer: to eat it at its absolute best, at least an hour, otherwise it will be gummy, but truly, it’s totally up to you!

Time, patience, and understanding how room temperature affects sourdough making, are the keys to success. Read my other posts and hints and tips for more information.

I hope this is all helpful. My best advice is:

🌟 Make notes.

🌟 Watch your starter.

🌟 Watch your doughs.

🌟 They will tell you when they’re ready.

🌟 And most of all, enjoy the process xx

My enriched foodbod master recipe sourdough…

I’m so excited about this post, I’ve really enjoyed making and testing these loaves…I hope you like it too!

Every bread in this post has been made using my master recipe to create enriched doughs and loaves…they’re beautiful and shiny and they smell amazing; the texture of the bread is light, soft, not too rich, not too sweet, and with a hint of our joyful sourdough flavour…I’ve played with flours and shapes and pans, and have had great fun creating my ‘enriched master recipe sourdough’…

This loaf was made using the lighter version of the dough below, and with half strong white bread flour and half white spelt flour. Before and after shots of the bake below.
Soft and fluffy interior.
A slice of the above loaf.

The doughs are all enriched with eggs, milk, butter and honey. This is a very very tasty sourdough creation! Its great eaten on it’s own, as well as with your choice of toppings, and smells amazing all over again when toasted. And no mixer required, even better!

The end shot of the loaf above.

I have tested this several times recently and it worked perfectly with just strong white bread flour, a mix of SWBF and white spelt flour, and with 100% white spelt flour. Each version has been a success, the white spelt flour adding a silkiness to the dough that’s lovely to work with, as well as a lightness to the crumb.

This loaf was made with the richer version of the dough below and 100% white spelt flour. Once baked I brushed with it butter and sprinkled with sesame seeds.
The inside of the loaf above.

NOTES:

🌟 The added dairy products do not go bad during the overnight prove, the dough is protected by the starter.

🌟 The butter only needs to be softened, not fully melted. If you do melt it, ensure it is cool before mixing with the rest of the ingredients.

🌟 The softened butter does not need to be fully mixed through the dough initially, it will soften more and become fully incorporated as your work with the dough.

🌟 This is a heavy slow dough, allow it time to grow fully.

🌟 It’s also a dough that requires very little shaping.

🌟 It keeps well for a week if wrapped well.

🌟 I don’t like things very sweet; for us, chief taster included, the 50g honey in the recipe was perfect. If you prefer things sweeter, replace it with sugar, quantity of your choice.

🌟 I have made two slightly different versions of this, one a little richer than the other, and I like both. You can tone things down, or up, as you choose.

🌟 You can choose your own version, using the flour/s of your choice, and all or just one to two of the added ingredients. It works whichever options you choose.

🌟 For dietary alternatives, use no eggs or egg replacements/non dairy milk/no butter or a dairy free option.

🌟 I made the round loaf in my 20cm diameter enamel roaster (above) and the rectangular loaf in a large loaf tin (27cm x 17cm/10.5” x 6.5”). You can use a standard 2 lb loaf tin too.

🌟🌟🌟 My master recipe strikes again! 🌟🌟🌟

Slices of the loaf tin loaf from above.

Ingredients

50g active starter

1 whole egg + 1 egg yolk (save the white) + milk to make up a total of 350g (I use semi skimmed/half fat milk)

75g softened butter

50g runny honey

500g strong white bread flour OR 250g SWBF + 250g white spelt flour OR 500g white spelt flour

1 teaspoon of salt, or to taste

Alternative slightly lighter option:

50g active starter

1 whole egg + milk to make up a total of 350g

50g softened butter

50g runny honey

500g strong white bread flour OR 250g SWBF + 250g white spelt flour OR 500g white spelt flour

1 teaspoon of salt, or to taste

As per my master recipe (for full step by step directions click on the link to the left):

Feed your starter as normal to generate the 50g needed for the recipe.

Begin mixing the dough in the evening.

Roughly mix all of the ingredients: it will be very sticky.

After an hour, perform the first set of pulls and folds on the dough. Lifting and pulling the dough across the bowl until it starts to come into a soft ball then stop. Cover the bowl again and leave it to sit.

During this first set of pulls and folds the dough will still be sticky but keep working with it.

After an hour, perform the second set.

During this set of pulls and folds, the dough will start to become smooth and silky (esp if it’s 100% white spelt flour) and will take less actions to pull it into a ball. Cover and leave to sit.

Over the next hour or so, perform the third, and fourth set if you do one, the dough should be nice to handle now. Each time stop when the dough comes into a loose ball.

Cover and leave to prove on the counter overnight as usual.

Next morning the dough will typically have grown, but not yet doubled, allow it 2-3 more hours if it needs more time.

Line a tin with baking parchment paper or a loaf tin liner.

Pull the dough together, it does not need to be handled much, it doesn’t need to be too tight, this will be a stiff heavy dough, and place it hand side down/smooth side up into your liner.

Cover again and leave to prove on the counter again until the dough is level with the edge of the pan, typically 3-4 hours.

Mix the egg white with a tablespoon of water and brush the top of the dough gently with it.

Bake, uncovered, from a cold start at 160C fan/convection, or 180C non fan/convention oven, for 45 mins, covering if the top becomes too dark.

Remove from the oven, and the tin and allow to cool.

Enjoy!

Braided and hand shaped loaf using dough made with half strong white bread flour and half white spelt flour
Dough made with the lighter version of the above options and made with half strong white bread flour and half white spelt flour.
Slices of the inside of the baked loaf above.

To use the dough to create shaped doughs, refrigerate the dough for 1-2 hours after the overnight prove to firm it up, then turn it out, portion it and shape it as you choose before covering it again and leaving it to prove again for 3-4 hours, then bake as above.

Dough split into 6 equal pieces (by eye), shaped into balls and placed together inside the lined pan and allowed to prove again before baking. You could also bake them separately to make rolls.
The baked loaf.

🌟🌟🌟 It really is true, you can use my master recipe as a base for anything you want to create! 🌟🌟🌟

You can now find this recipe in more detail and with new variations in my new book! Happy baking!

Spiced spinach sesame seed sourdough flatbreads…

My flatbreads served with a plate full of leftover roast vegetables, ajvar, zaatar and tahini

I do like a ‘chuck it all in a bowl and see what happens’ kind of creation, which is what these were…I’ve made many spinach flatbreads in the past, but this was the first time adding some starter. It adds an extra flavour and of course, all that sourdough goodness we love!

These are also packed with great healthy ingredients and are a great way to get kids eating spinach! You can use them as flatbreads or make bigger rounds and use them as a pizza base.

Equally great the next day, the flavours continued to develop

This recipe can serve as a basis for something you might fancy making, you can swap out the ingredients for things of your choice or just follow it as it is. I’ve included the spices I used, feel free to swap these for your favourites, an Indian inspired spice mix works well too.

Ingredients

200g starter (this can be discarded starter, unfed, or fed for the purpose)

250g baby spinach leaves

150g flour of your choice, I used buckwheat flour

50g toasted sesame seeds

3 tablespoons tahini or olive oil

3 garlic cloves, peeled

2 teaspoons tabil spice mix (toasted even amounts of coriander, cumin and carraway seeds, ground)

2 teaspoons pul biber chilli flakes

2 teaspoons paprika

Salt and pepper to taste

All in the bowl

Method

In a blender whizz up the everything expect the sesame seeds, starter and flour. Run it until the spinach and garlic are finally chopped.

Scoop it all into a mixing bowl, stir in the seeds, then fold in the starter and flour.

Cover the bowl and leave the dough to settle and develop.

Now you can leave the dough for an hour, or several or overnight. The longer you leave it the more the flavour will develop, it may even prove and little and puff up.

When you want to cook your flatbreads, heat your oven to 180C fan/200C non fan.

Turn the dough out onto a floured surface and break off portions. Shape them into round then flatten them out to 1/2cm thick.

Place them onto a oven tray. Either bake immediately or cover and allow them to prove again for an hour before baking.

The uncooked dough is such a great colour and smells amazing

Bake for 10-15 minutes until slightly puffed and darker in colour.

Eat warm or store for later, they’re even better after 2-3 days, and can easily be reheated in a toaster.

Enjoy!

I hope you like them!

Leftovers loaves…

A close up of some food on foil

You know how it is, you open your baking cupboard and you’ve got various bags of flour, with various amounts left, but not enough for an entire dough…

A loaf of bread with some type of cheese on it

So the only thing to do is to throw them all together and hope for the best?! That’s what I did this week. And these loaves were the outcome..

A loaf of bread in a bowl on wax paper.

A loaf of bread in a bowl with some potato chips.

These include portions of strong white bread flour, malted multigrain flour, khorasan flour and a seeded flour mix, all thrown together in various quantities to make up my normal 500g amount of flour for my master recipe.

A loaf of bread with many different toppings.

A loaf of bread with many different types of food.

As you can imagine, I was happy with the outcome!

A piece of bread is on top of foil.

A close up of some food on foil

I love seeing how the activity in Star and then the dough after it’s overnight prove translates into the dough…it never ever gets boring!

Happy Baking!

The story of this week’s course…

A blue plate topped with cookies covered in nuts.

This week I had a lovely lady in my kitchen who had travelled especially from Dubai, in the United Arab Emirates. It’s such a compliment that she wanted to come and share my kitchen, and that she follows my baking from so far away.

It was also very close to my heart to welcome her to my home; I lived in Dubai as a child and I have a long connection with the UAE having had parents living Dubai and then Abu Dhabi across 30 years, as well as living there myself full time for 5 years prior to that. It is a place that holds a special piece of my heart and formed many of my food tastes as well as creative influences.

It was a joy to talk to someone who remembers the Dubai that I remember from the 1980’s and to listen to her speak Arabic is a sound I always love!

A close up of some bread on a plate

During the course we focussed on the basics of my master recipe and process, as well as working with wholemeal flour and using doughs for making rolls and other lovely sourdough goodies.

I always make sure that there is lots of dough to play with on my courses to get the feel of how different flours affect the dough but also to be able to turn dough out to make rolls in various guises, including the ones in the photos in this post.

A close up of some food on a plate

There were all made with my master recipe dough, one portion of which included 150g of khorasan/kamut flour (hence the yellow tint), and another made up of 250g Mrs Middletons plain natural flour + 250g Mathews Cotswolds white spelt flour.

We chopped up the dough and roll some portions in toasted seeds (above), and some in some Middle Eastern zaatar spice mix (below), and left some naked.

A close up of an avocado on a plate

You will find the details for making my various rolls recipes in my recipe index and all of the doughs were made using my master recipe.

I do love running my courses, I meet such lovely people, and it’s always an honour to welcome sourdough bakers from around the country and the world to my kitchen xx

My master recipe focaccia..

A close up of some food on top of a table

This lovely vision was created by using my master recipe process and converting it to make focaccia; by using my recipe and process all the way through to the morning after the overnight prove, you can then use the dough to create this lovely bread.

NOTE: if your dough has proved overnight and is reaching the top of the bowl or hitting the shower cap by the early morning but you’re not ready to use it yet, gently do one round of pulls and folds to calm it down a bit, then cover it again to allow it to grow and fill the bowl again over the next 2-3 hours for when you want to use it.

A close up of a pizza with some type of herbs on it

For this focaccia, I scaled down the quantities of my usual recipe, but you can keep them exactly as they are to make a bigger loaf than mine, or use the quantities below to make a smaller version.

Ingredients

300g strong white bread flour

210g water

30g bubbly active starter

1/2tsp salt or to taste

Additions: rosemary, garlic, or whatever you fancy!

Method

*The details for my master recipe and process are in links to the left of your screen.

Following the process up to the morning after the overnight prove, prepare a large baking tray by liberally drizzling it with a good amount of olive oil.

Using a bowl scraper or your hands, gently ease the bubbly risen dough from the bowl and let is fall onto the tray; it will pretty much plop onto the tray, which is fine, just take care not to handle it roughly or press out any of the lovely bubbles.

Gently turn the dough over so that it is all covered in olive oil and cover loosely with a large plastic bag or cling film and leave it on the counter to prove again for 1.5 – 2 hours.

Heat your oven to 200C fan (220C non fan).

Using your fingertips, push the dough out to a rectangular/oval shape until it’s about 1″/2-3cm thick. Use your finger tips to firmly press dimples all over the dough.

Sprinkle or place whatever toppings you choose over the dough; here I’ve used dried rosemary and sliced garlic (not too thinly sliced).

Bake for 17-18 until browned, or longer if you’re using a bigger dough at the start. If like me your oven has a hot spot, turn the tray round half way through.

A pizza sitting on top of foil covered in cheese.A square pizza with olives and herbs on it.

Ease off the tray and place on a rack to cool. Resist the temptation to cut into it whilst it’s piping hot.

Cut when ready to consume and enjoy!

For more detailed focaccia recipes, check out my books: find focaccia made with added wholegrain flours in this book, or my master focaccia recipe and focaccia pizza recipe in this book.

A close up of some food on a wooden boardA close up of some food on a plate

This makes a lovely holey light focaccia with a nice crunchy base.

A pile of food sitting on top of a wooden cutting board.

A review of my superStar…

A loaf of bread next to two bags of flour.

When making sourdough bread, a good sourdough starter is essential to get your bread to rise as it should, regardless of the flour combination or recipe you’re using. I tried for a long time, unsuccessfully, to get my own starter nice and robust but it just wouldn’t cooperate. Finally I decided to buy some of Elaine’s starter, Star, and what a difference it made!

She dehydrates her Star at the peak of its strength. Star comes from a long line of Elaine’s starters that have been performing consistently well for many years, and that was evident from the very first loaf I baked.

When I received my packet of dried starter all I needed to do was to rehydrate it and it was ready to bake with. Elaine provides simple and clear instructions, and in a little over a day I had a fully active starter I could either bake with then or store in the fridge to use later.

I just can’t say enough about how much more fun baking has become for me now!

Katie

Minneapolis, USA

Sourdough rolls…

A basket of biscuits on top of a red and white star paper.

These rolls were made using my master recipe, link to the left, using Shipton Mill finest bakery no.1 white bread flour, but I also think that their Canadian bread flour would work well as it creates a slightly firmer dough in my experience. I also think they’d be lovely with various mixes of flour..

This week my lovely baking friend Steve and I made sourdough rolls together; I followed my master recipe exactly as it is, then after the overnight prove I pulled the dough together gently, placed it onto a floured surface then we cut it into 16 equal portions..as modelled by my lovely helper…

A collage of photos showing how to make bread.These pieces were rolled gently into rounds with the sides of our hands – very gently, the dough was very light and airy, and we wanted to preserve the bubbles – and placed onto a baking tray lined with parchment paper.

We then left them to sit for 10-15 minutes whilst preheating the oven to 200C fan (220C convection)

As they sat they did spread a little, and grow a little, which is good as it shows that the starter is still active.

They were too soft to score so I snipped crossed in the tops with scissors..

A close up of some dough on the pan

We baked them for about 18 minutes, turning the tray around half way through so ensure an even colour across the top.

As they baked we watched them grow beautifully, up into lovely balls.

They came out lovely and crusty on the outside and soft and holey in the middle.

A close up of some food on a red and white paper

We forced ourselves to let them cool once baked whilst we made some spiced root vegetable soup (I topped my soup with my homemade homous, whilst Steve lashed piles of my homemade harissa on his) to enjoy them with…and it was worth the wait, they were so good!

A bowl of hummus and bread on the table.

We cut the dough into 16 pieces and made smaller rolls; if you want to make bigger versions, you may need to bake them for a bit longer.

Happy baking!

An update: I made rolls again (below) and these were much bigger, I split the dough into 8 this time and I baked them for about 20 mins until slightly browned on the top…

A plate with two different types of bread on it.A close up of some bread on the tableA close up of some bread with holes in them

So good!!!

Another update: I baked these rolls from cold; I put the tray in the fridge for 1-2 hours after shaping them, then baked them from a cold start…

A bunch of cookies are on the tableA bunch of bread rolls are sitting on the tableA plate of sesame seed rolls with dipping sauce.

Once I put the tray into the oven, I turned the oven on and up to 200C fan assisted, and left them for 25 mins total. Perfectly baked!

Cold oven baking…

A loaf of bread in a bowl on the table.

Every loaf shown in this post has been baked in an oven that started cold.

Everything we read and are told is that the dough should go into a preheated oven, but these loaves belie that fact…it was news to me too!

It started with this loaf baked in a clay pot…

I knew that to use the pot I either needed to soak it before use, or put it cold into a cold oven to reduce the risk of it cracking. And so I did. And I held my breath, and it worked! The loaf above proves it.

So if it worked with a clay pot, surely it would work with my enamel roasters, that was my next test. And I’m here to tell you that it does, it works perfectly, as the loaf below shows too…the crust is crisp, the crumb is even, and the cost is less!

If your question is ‘surely I need to preheat the oven to get maximum oven spring?’ Then hopefully my loaves are showing that you don’t. The oven spring comes from a strong starter, good flour and good dough.

If you’re thinking ‘won’t the dough spread whilst the oven is heating up?’ Just make sure that you prove it in the fridge for a few hours to firm up the dough. And yes, it may spread initially, but then it will rise as it bakes, as my photos show.

If you’re thinking ‘that won’t work in my cast iron Dutch oven’, I can tell you that it will. I don’t have a DO but many of the people in my Facebook group and on Instagram do and they’ve tried it, and it works.

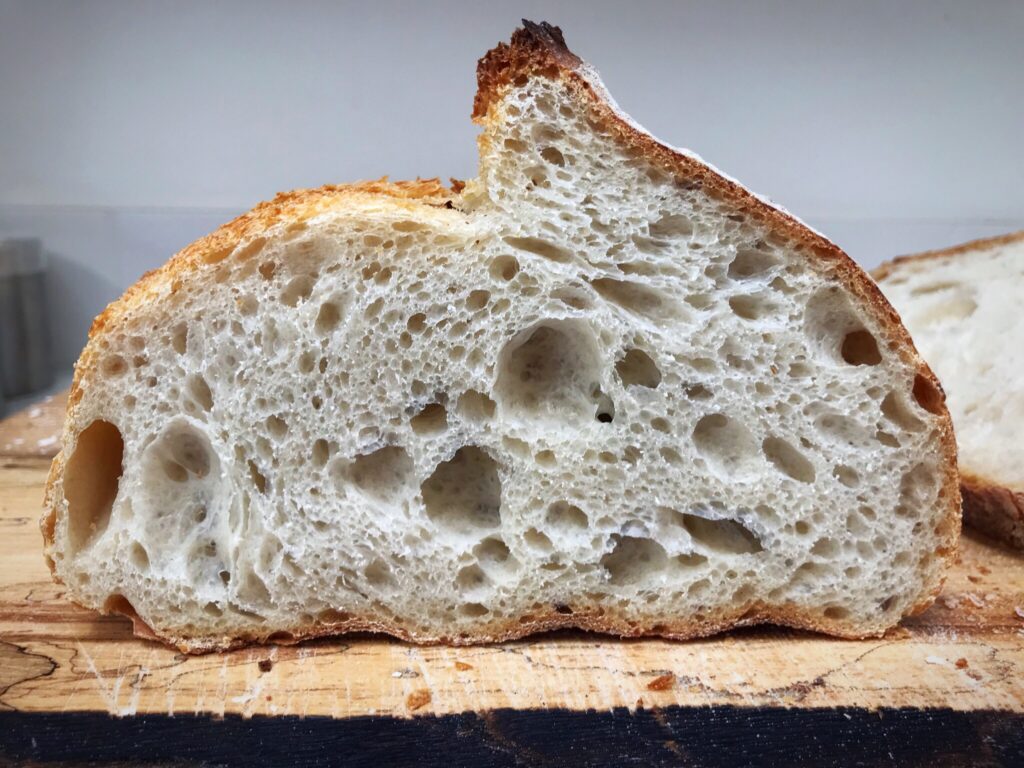
A slice from a cold baked loaf

So, this is the process I’ve been using: I’ve followed my master recipe, link to the left, done the final prove in the fridge for several hours, then:

put the dough into the cold baking vessel and score;

put the pot with the dough in into the cold oven;

turn the oven on, turn the heat up to 220C/425F fan/convection or 230C/450F non fan/convention.

Total time in the oven 55-60 mins.

Lid on the entire time.

For me that saves 20 mins of time for the oven to heat up, for others it may be longer.

So, who’s up for the cold baking challenge?

A close up of slices of bread on a cutting board

A course review…

My personal introduction to baking Sourdough bread – Knowledgeable, Enthusiastic and Great Fun.

I’ve been a lover of sourdough bread for a while now but the demise of local bakers restricted me to supermarkets. I’ve tried them all with Waitrose being by far the best. But is it real sourdough? I cook a lot at home and bake bread from tv recipes. But none of them really seem to deliver real sourdough bread. So what’s the answer? A sourdough baking course, of course. Hmmmmm.

Encouraged by my wife who had spotted Elaine on social media, I decided to take the plunge so I booked and went along to Elaine’s course feeling, strange for a retired man, very nervous. Possibly remembering many of the interminably boring management courses I have been forced to attend over the years.

The course was a good half day’s introduction to baking sourdough bread. The great thing is that it was hands on or should that be hands in! Elaine turned out to be a great enthusiastic and patient teacher, putting me at my ease and explaining at a level of detail that was just right for me.  The constant supply of tea and sourdough goodies all adds to the experience. I thoroughly enjoyed the teaching, the baking and the chat. Informality was the key to the day and I went home with some superb self cooked sourdough bread and cheese scones plus course notes to help at home. Boring it was not.

Elaine clearly explains the methods and the equipment you will need to be a successful home baker. Watching and learning and doing it yourself and learning is key. Since the course, I’ve made my own starter and two loaves and things are looking good. I’ve encountered one or two problems or should that be memory lapses since the course but Elaine has been superb with her help, guidance and sympathy.

If you love sourdough and want to cook your own, I couldn’t recommend Elaine’s course more highly. Get motivated and try something refreshingly different.

Brian.