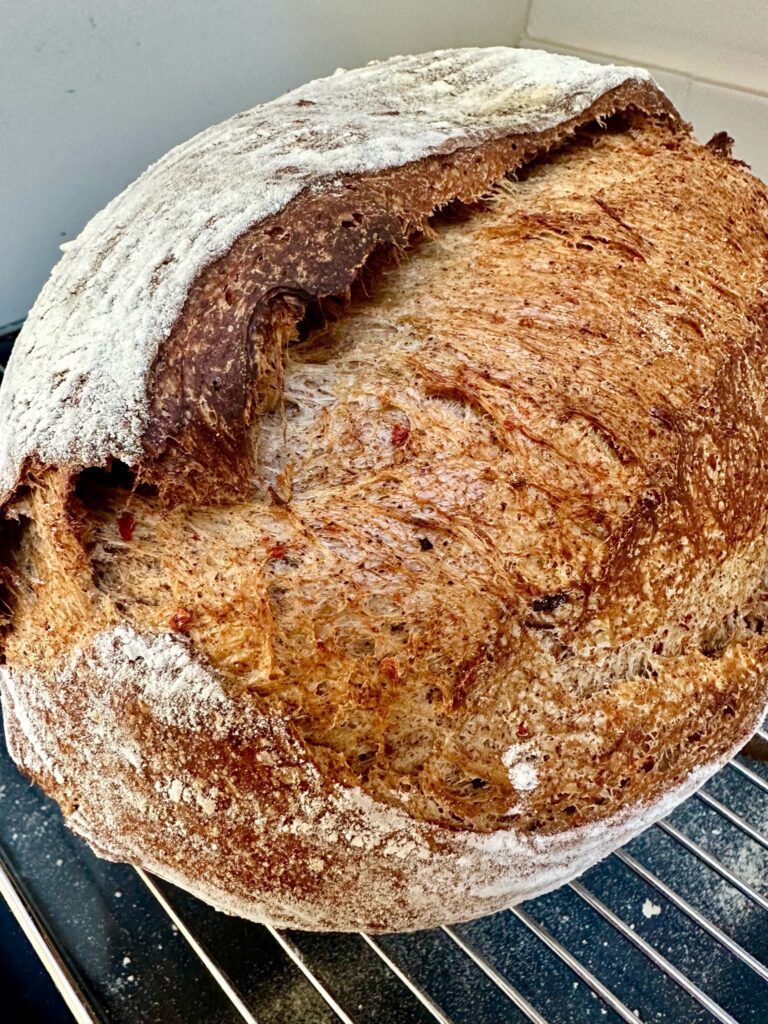
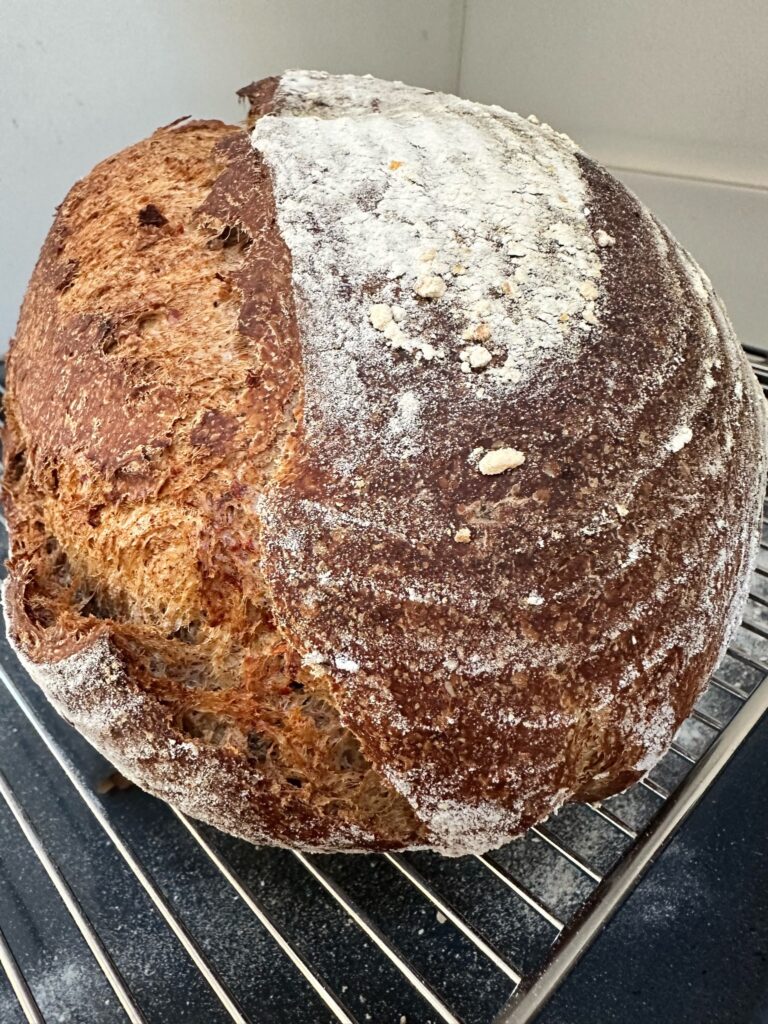
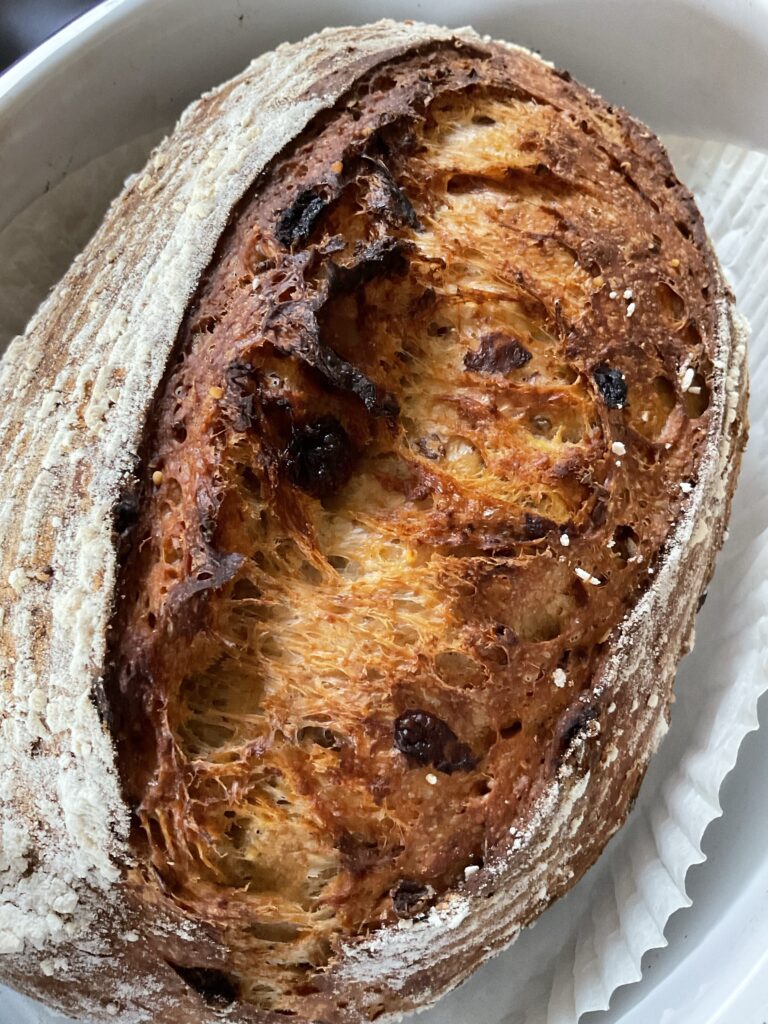
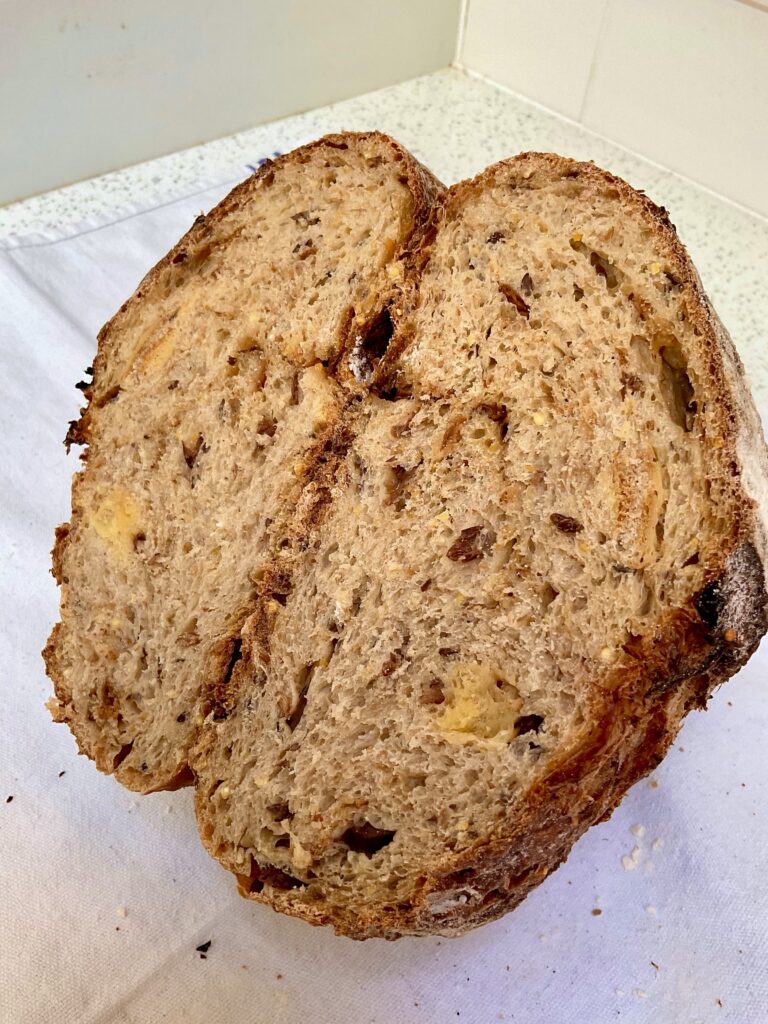
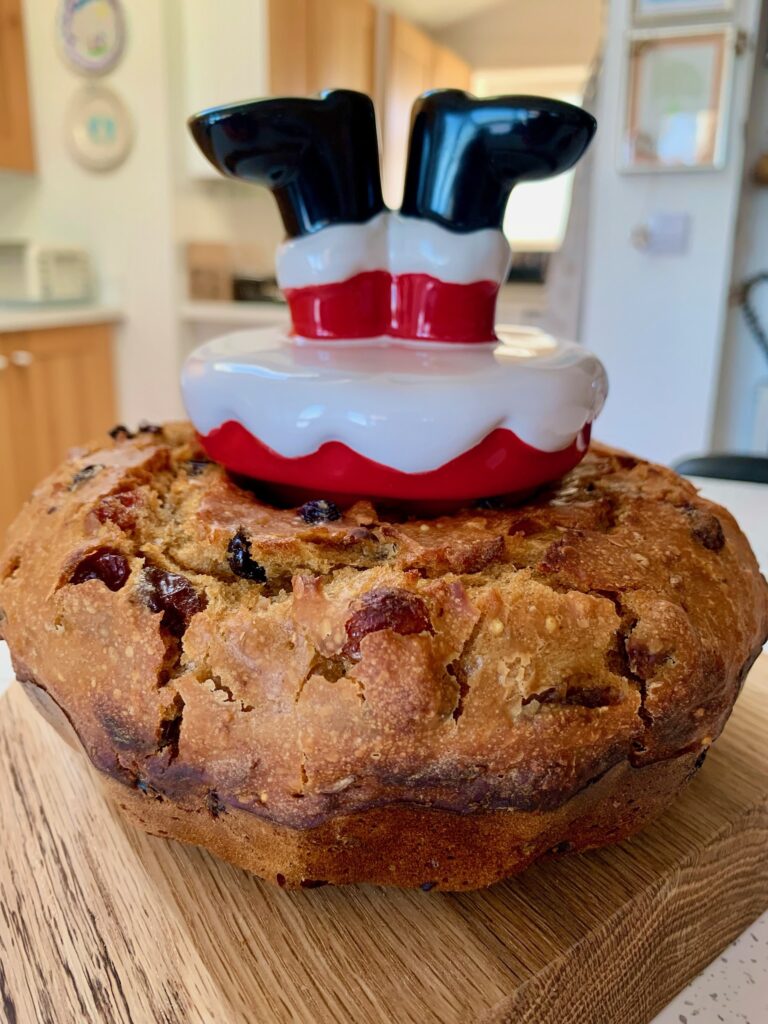
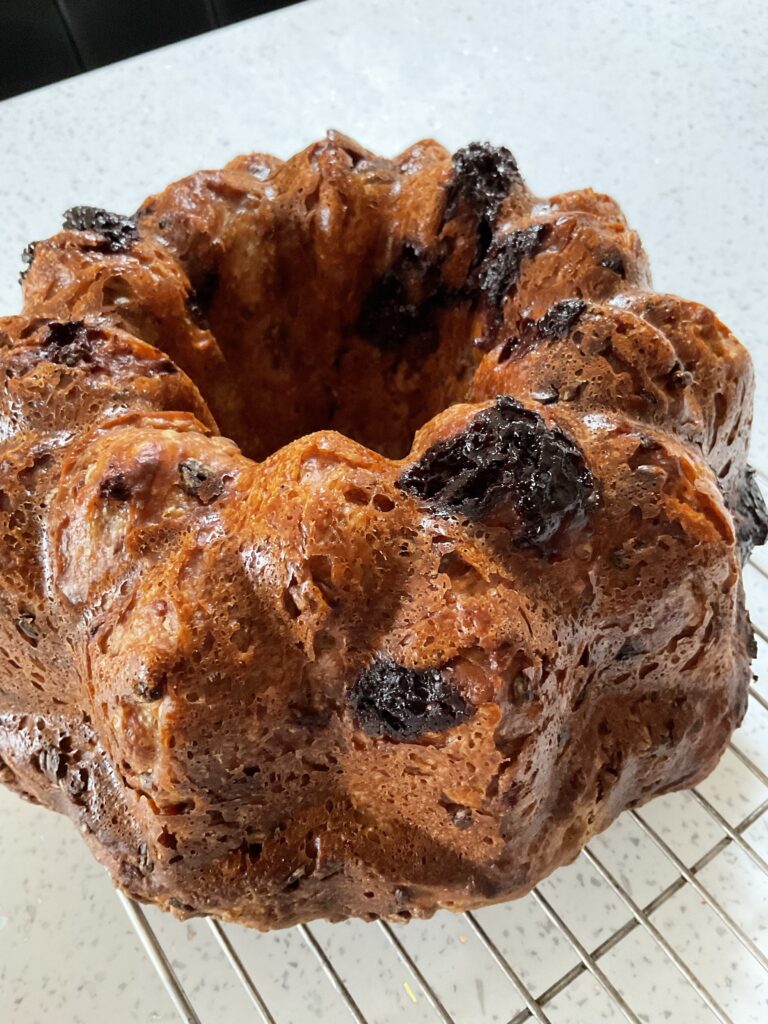
Let me tell you the story of this huge and beautiful loaf…
For this dough I used my ‘same day’ process as I planned to make and bake the dough within the same day. That meant I used 100g starter instead of my usual 50g, (see ingredients details below) and I mixed the dough up mid morning. I left it in my kitchen to do it’s thing, when really I should have put it in a warm space as per my same day process in my books, but I didn’t, I left it on the counter.
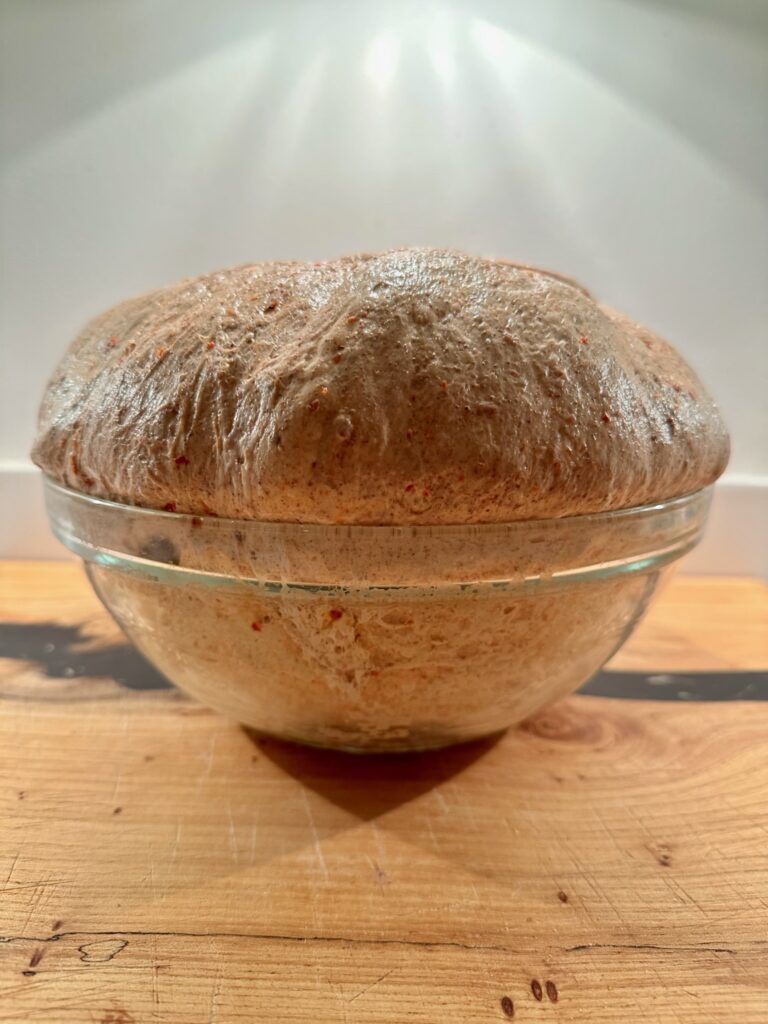
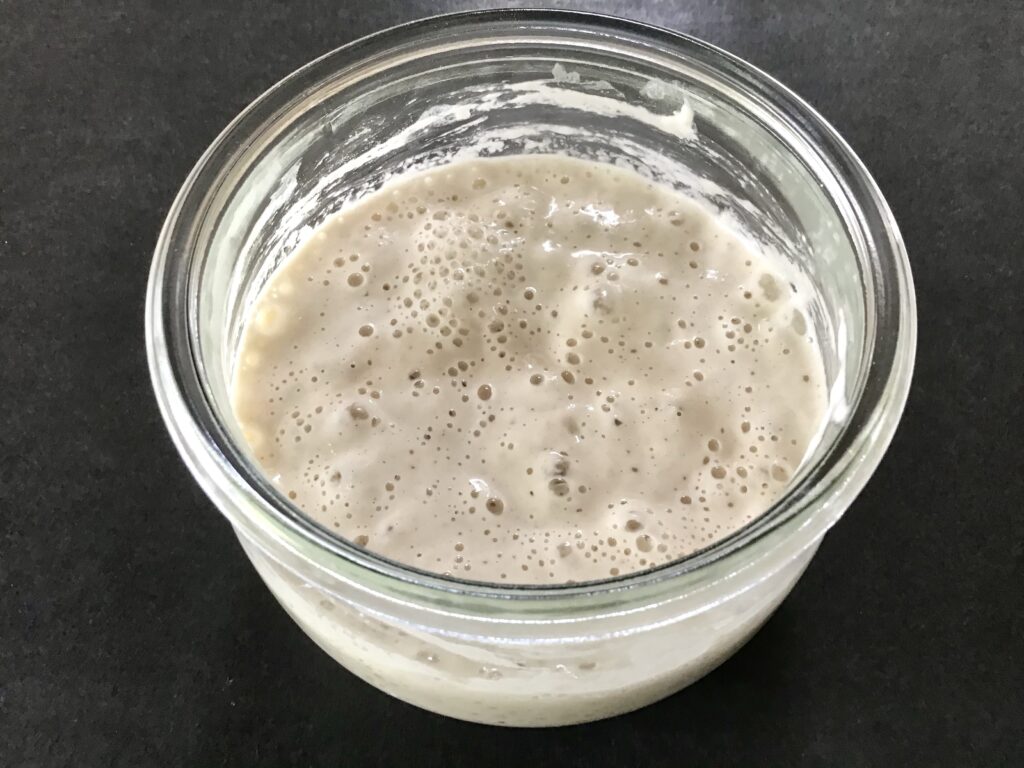
As it was cold, as the day went on the dough didn’t really do much, so I took a risk and left it out all night in addition to the time it had on the counter all day. It was so cold I decided it was worth a go…and luckily, it worked! This is what I woke up to…
A HUGE beautiful dough! And a beautifully structured dough too.
Due to the cold weather this dough had proved for around 18 hours in total and remained perfectly intact and ready to bake into a great loaf. The chilli give it a nice hit of heat and the chocolate adds a richness and brings out the chilli flavour nicely.
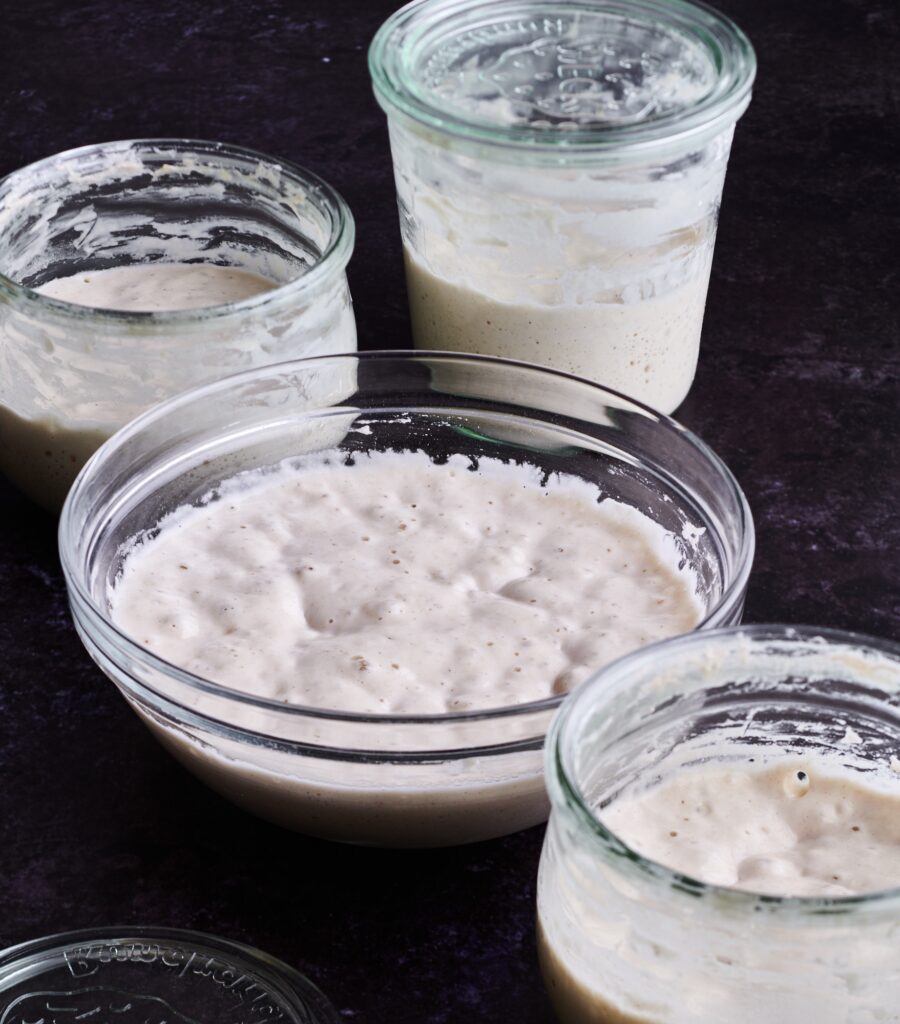
NOTE: Below are the ingredients I used, the mixture of the sugars in the chocolate and the oat milk, the added starter and the chilli all added to produce this beautiful dough which baked into such a big loaf it hit the top of my pan, as you can see by the slight dip in the top of the loaf in the first photo.
I wouldn’t necessarily recommend using this much starter typically unless you can watch the dough or manage the time and temperature. If I make this again I will use my usual 50g starter and my usual timings.
Ingredients
100g starter/50g starter
350g oat milk/400g oat milk (or milk of your choice)
500g strong white bread flour
50g grated/flakes 80% dark chocolate (use your own choice of chocolate)
30g pul biber/Aleppo chilli flakes (these are quite mild, and gives the loaf a nice heat, if you want more of a kick, use a stronger ground chilli powder/chilli flakes)
Salt to taste
Method
Follow my master recipe or use the same day process in either of my books.
Enjoy!
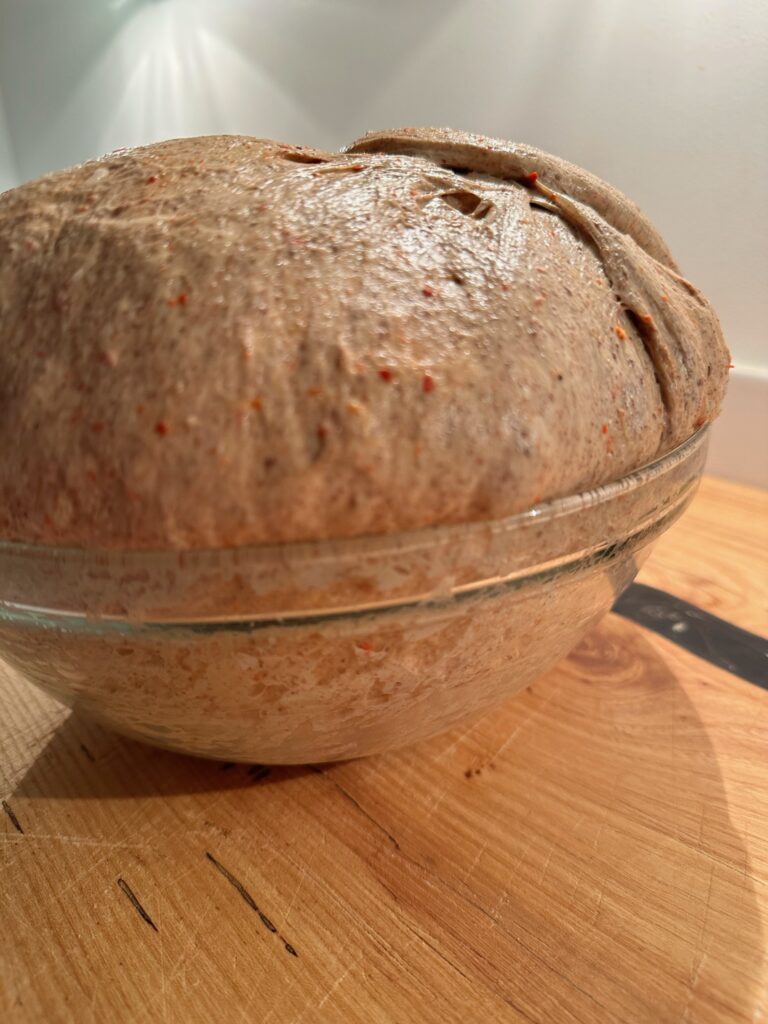
To answer the questions that came up when I shared this dough: this dough is not over proved. If it was over it would have collapsed and been bubbly and hard to handle; this was a perfectly proved well structured dough.
I am very excited to share that I have launched a brand new food based podcast, The Foodbod Pod, a total celebration of food, by food lovers, for food lovers. Focussed on celebrating home cooks and bakers, I’d love it if you fancied tuning in and having a listen, and let me know what you think.
Find the full details and how to listen on my new website Foodbod Pod, click to visit and hear all about it…
We will be bringing you monthly podcast episodes – click over to listen to our very first episode, available NOW, worldwide, and hear us tell you all about it and what’s coming up. I am so excited about this, I truly hope you love it, and that you’ll join us for the ride – let me know what you think!
Q. Want to know how to make your starter into a super starter?
A. Get to know it, intimately.
Before I explain… No one else’s starter is like yours; only yours lives in your kitchen, which is all part of what makes it unique. Add in the flour you use, the water, your management of it, and it is uniquely and solely yours. And to get the best out of it, you need to get to know it. You need to know every nuance of your little bowl of magic.
Here’s my tips and insights:
🌟 I have always used the same flour in my starter – you may see me play around with other flours or different starters but I’ve either made them from scratch or I’ve used a spoonful of my Star to experiment with – I never ever risk or experiment with my precious, loyal, consistent starter.
🌟 I know exactly what part of my kitchen my starter likes to sit in once fed.
🌟 I know which part of the fridge it likes best to sleep in.
(to answer the question about the best place to store your starter in the fridge: if it keeps getting hungry in the fridge, it may be in a part of the fridge that is too warm, or too near the front so that it gets warmed up each time the fridge is opened. The best place in the fridge will be where your starter remains still, gets thick, not frozen, and not hungry.)
🌟 I always feed her with equal WEIGHTS of flour and water, never volume.
How do I recommend you do that?
🌟 Be consistent.
🌟 Develop a good relationship with your starter.
🌟 Watch and learn how it looks, behaves and smells when it’s happy and healthy. This will help you to detect if there’s any issues or changes.
🌟 Take photos if it helps.
🌟 Give it the best food you can.
🌟 Use the best quality flour you can for your starter.
🌟 Test your tap water; mine loves tap water, yours might too; if you want to test it, take out a small portion of your starter and place it in another jar and feed it with your tap water and see what happens. For some people, tap water gives their starters the boost they’ve been lacking.
🌟 Keep it in a good environment, scrape down the jar after each feeding. Keep its home tidy and safe.
🌟 Learn it’s personality.
🌟 Do. Not. Compare. You really will be wasting your time if you compare your starter to others; they don’t live in your kitchen or use your flour or water so why would you think they should be the same?
🌟 Stop reading everything you find online, you’ll drive yourself crazy. Learn about YOUR baby and you’ll fly.
🌟 Don’t focus on bubbles. Not all starters are bubbly, and they don’t need to be; different flours produce different looking starters, in particular, white starters may have a bubbly surface, whole grain starters rarely have a bubbly surface, but they have wonderful texture throughout instead.
🌟 Give it what it needs: feed your starter with equal weights of flour and water too, UNLESS it needs it to be different, and here’s why it’s important to know your starter: by watching and noting it’s consistency and behaviour, you will be able to see if there’s any changes that you need to respond to. If it’s getting a little thin, use less water in the feed next time. If it’s getting a little slow, give it more time, or some warmth. If it’s give really flat and the consistency has become smooth like paint, try feeding some portions with a new/fresh bag of flour.
🌟 And always always make notes. 🌟
Log the following to build a picture of how your starter behaves:
1. The starting consistency before feeding
2. How it smells and looks
3. What time you feed it
4. What you feed it with
5. Exact flour you used
6. Exact water you used
7. Exact quantities you fed it with
8. The room temp at the time of feeding
9. What time it fully responding ie had grown to double in size
10. How it behaved in your dough.
Use this log to fully understand how your starter behaves throughout the year and you will benefit so much for taking that extra bit of time.
The biggest way to know if your starter is working well is if it lifts and grows your dough. If your dough grows, your starter works. Don’t focus on looks, focus on power and the job it does.
I hope this helps, you know where I am if you need me xx
It’s magic, it’s joy, it’s a bowl of happiness, excitement and possibility, it’s our love child, it makes us smile every time we use it…it’s all those things, and I truly love mine, but in reality…
🌟🌟 In basic terms: its our raising agent, and it’s what gives sourdough its texture and flavour. 🌟🌟
The key difference between a starter and other bread raising agents is that starter is in liquid form and lives and lasts forever, as opposed to other raising agents, such as commercially sold yeast or baking powder, which are in dried form and can be added straight from a package.
And that’s it, it truly is as simple as that, as scary as it can sometimes seem. I know that the idea of a ‘living’ thing that we keep forever can worry people, there’s that fear about keeping it alive, but I promise, they’re really hard to actually kill! It’s far easier to keep a starter alive than wiping it out – unless you mistakenly cook it of course, which has been done, or it gets mouldy.
🌟 Flour and water, that’s all it is, flour, water and time. My top tips to make and to keep your starter in good condition are:
🌟 Use good flour. You can use any wheat flour to make a starter, as a learner I would highly recommend using strong white bread flour or wholewheat/wholemeal flour. And choose the best quality that you can, it does make a difference and is worth the investment in your starter.
🌟 Water. In most places tap water is fine, but if you’re not sure, try filtered water, or boiling and cooling some to use.
🌟 Use scales. Weighing your flour and water makes a huge difference to its strength.
🌟 Keep it small. I only ever use small quantities for making and maintaining my starter. This saves on waste, and keeps it lean and healthy.
🌟 Give it time. Starters don’t work to a clock, they will be ready when they’re ready. There are some ways that you can encourage it along, but patience is key.
🌟 Be consistent. When you find what works for you, stick with it.
🌟🌟🌟 And if you’re new, please please don’t read too much. You can easily get overwhelmed with a flood of information. Choose a single source and stick with it whilst you learn how sourdough works.
For more details and all of the steps for making and maintaining a starter, you can find everything you need right here.
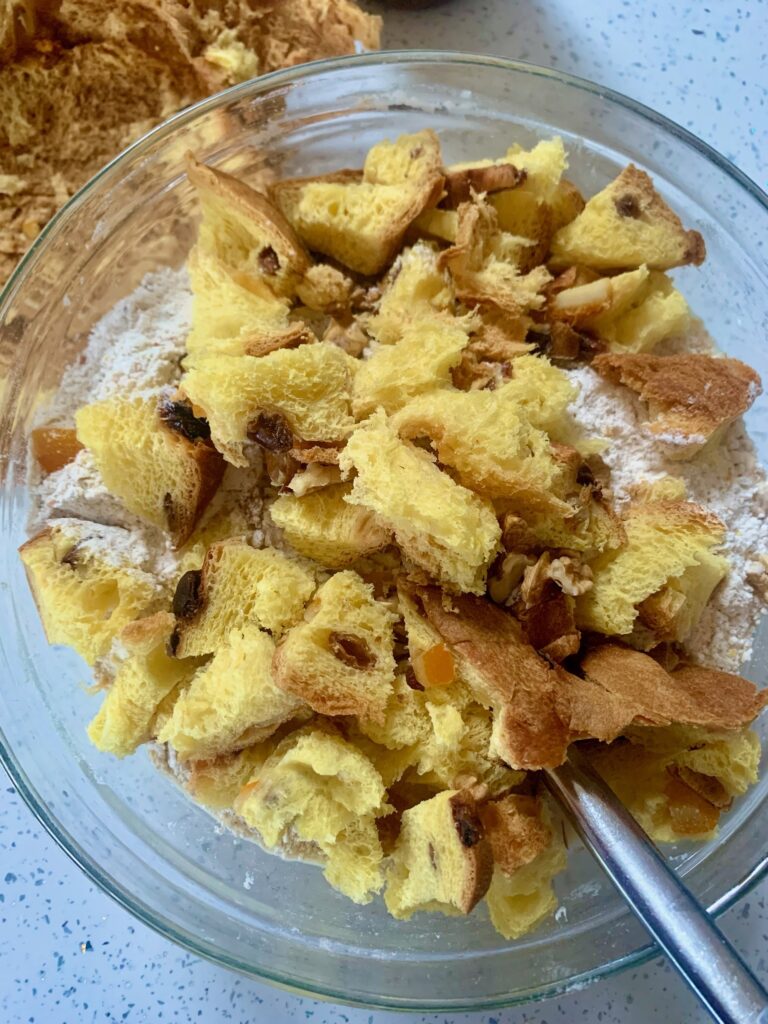
Leftover panettone? Do what I do and shove it into a dough and create a whole new fruit loaf..
In my dough I used:
50g starter
400g water
500g Cotswold Flour Eight Grain flour
200g ripped up leftover pannetone
Salt
You could use flour of your choice, you may need to feel your way with the amount of water. Start with 350g and see how it feels, you can always add more.
I then followed my master recipe as it is and made the loaf as an oval.
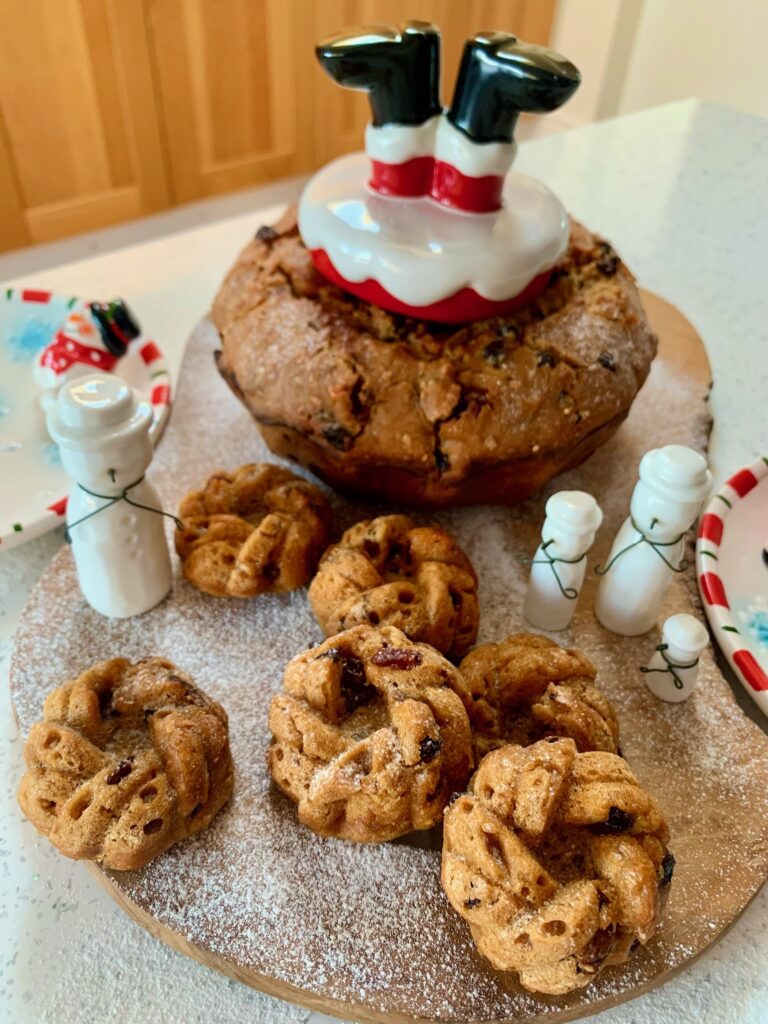
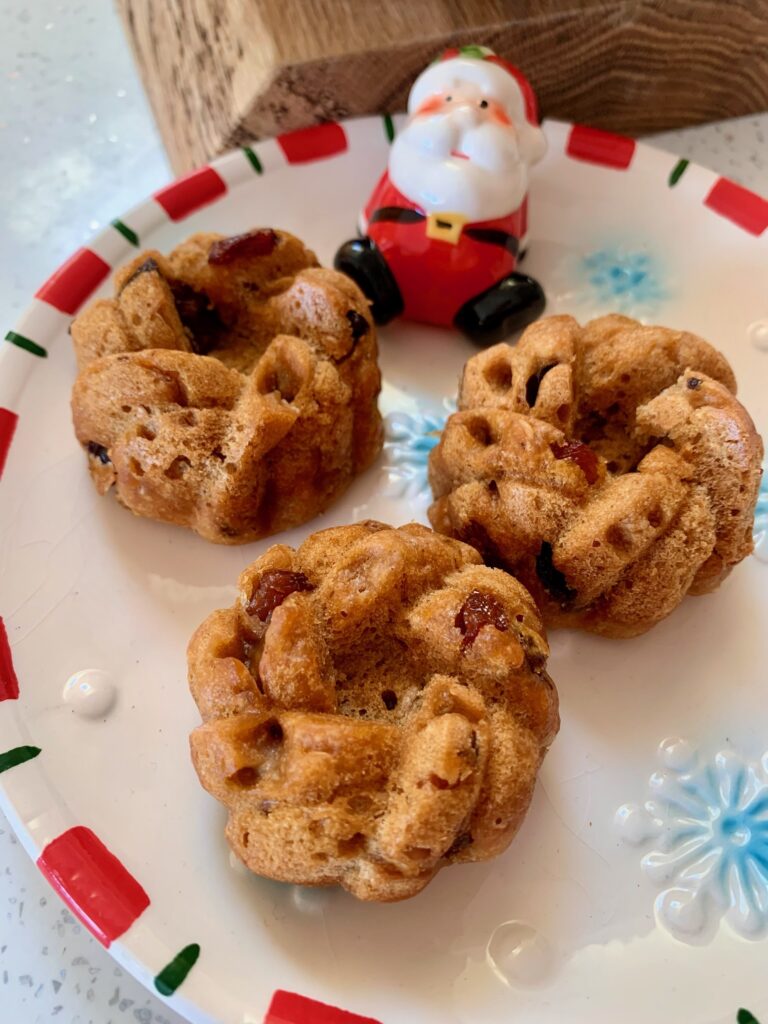
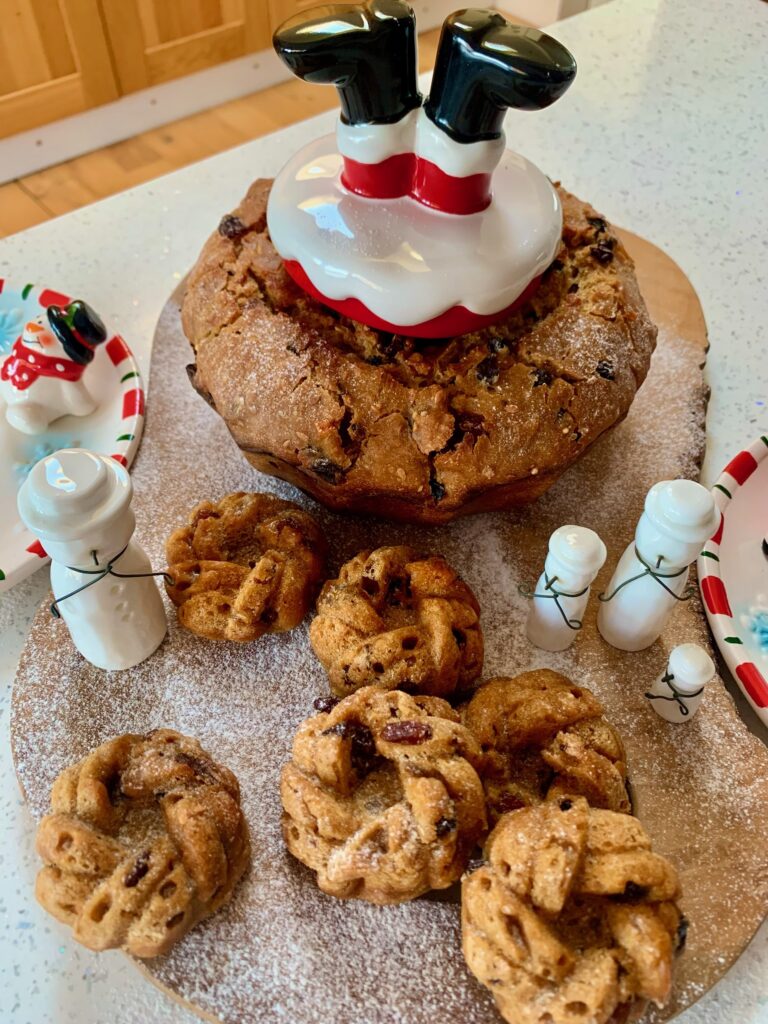
I had great fun creating this bake, I mixed up a batch of master recipe dough, and literally chucked in an entire jar of mincemeat! The outcome was fab, the little rolls had a great chewy base, and the bigger version is just like eating a fruit loaf.
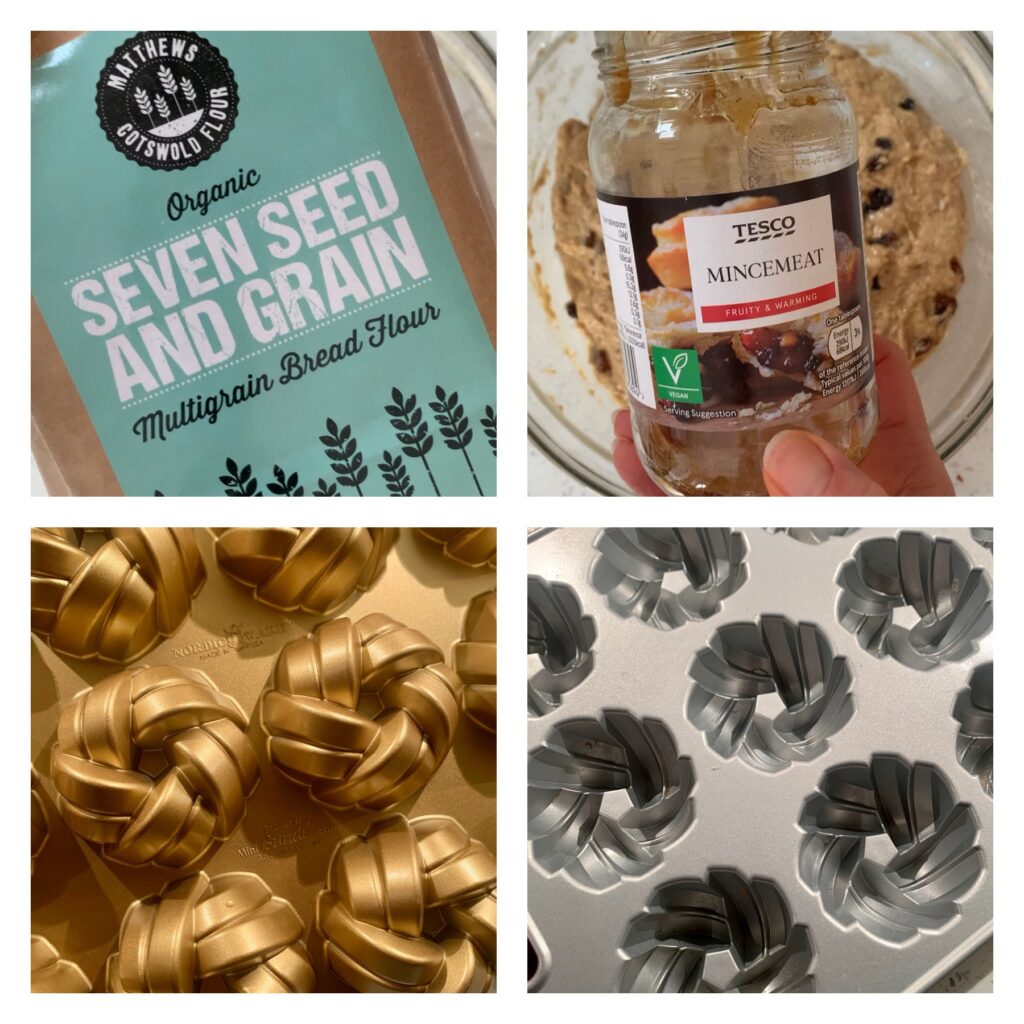
I used a new flour to me, it’s a lovely seven seed and grain flour from Matthews Cotswold Flour, I recommend trying it, but you could also use any flour of your choice. I threw in a 411g jar of mincemeat, both seen in the top 2 photos in the grid below. This made the dough very sticky and loose, and not something easy to shape in any way, but that didn’t matter as I baked it in a tin. I used a small bundt tin for the bigger round, and I used a bundtlette tin for the little ones as seen in the both 2 photos of the grid below.
The recipe therefore was my standard:
50g starter
350g water
500g flour of your choice
1 jar mincemeat, or if that’s not available where you are, trying making it up with jam/jelly and dried peel, dried fruits and spices.
Salt to taste
I mixed it all up and let it sit for a few hours before giving it some more agitation, it could not really be stretched and pulled around, I just made sure it was well mixed. I then left it to prove overnight. In the morning I just ‘handled’ it into my pans, left it to prove again and baked.
You can follow my Bundt tin recipe process in my book The Sourdough Whisperer, or my sandwich loaf process in either of my books to prove again and bake, or bake as you could a fruit loaf, just allow it enough time to fully bake.
This loaf is shaped from the tin on the other side, but I liked it this way up.
This is the Bundtlette tin I used, if you order from EcoBaker before 31.12.22 use code foodbodxmas for a discount.
If you try this or anything like it, let me know! Have fun 🤩🤩🤩🤩
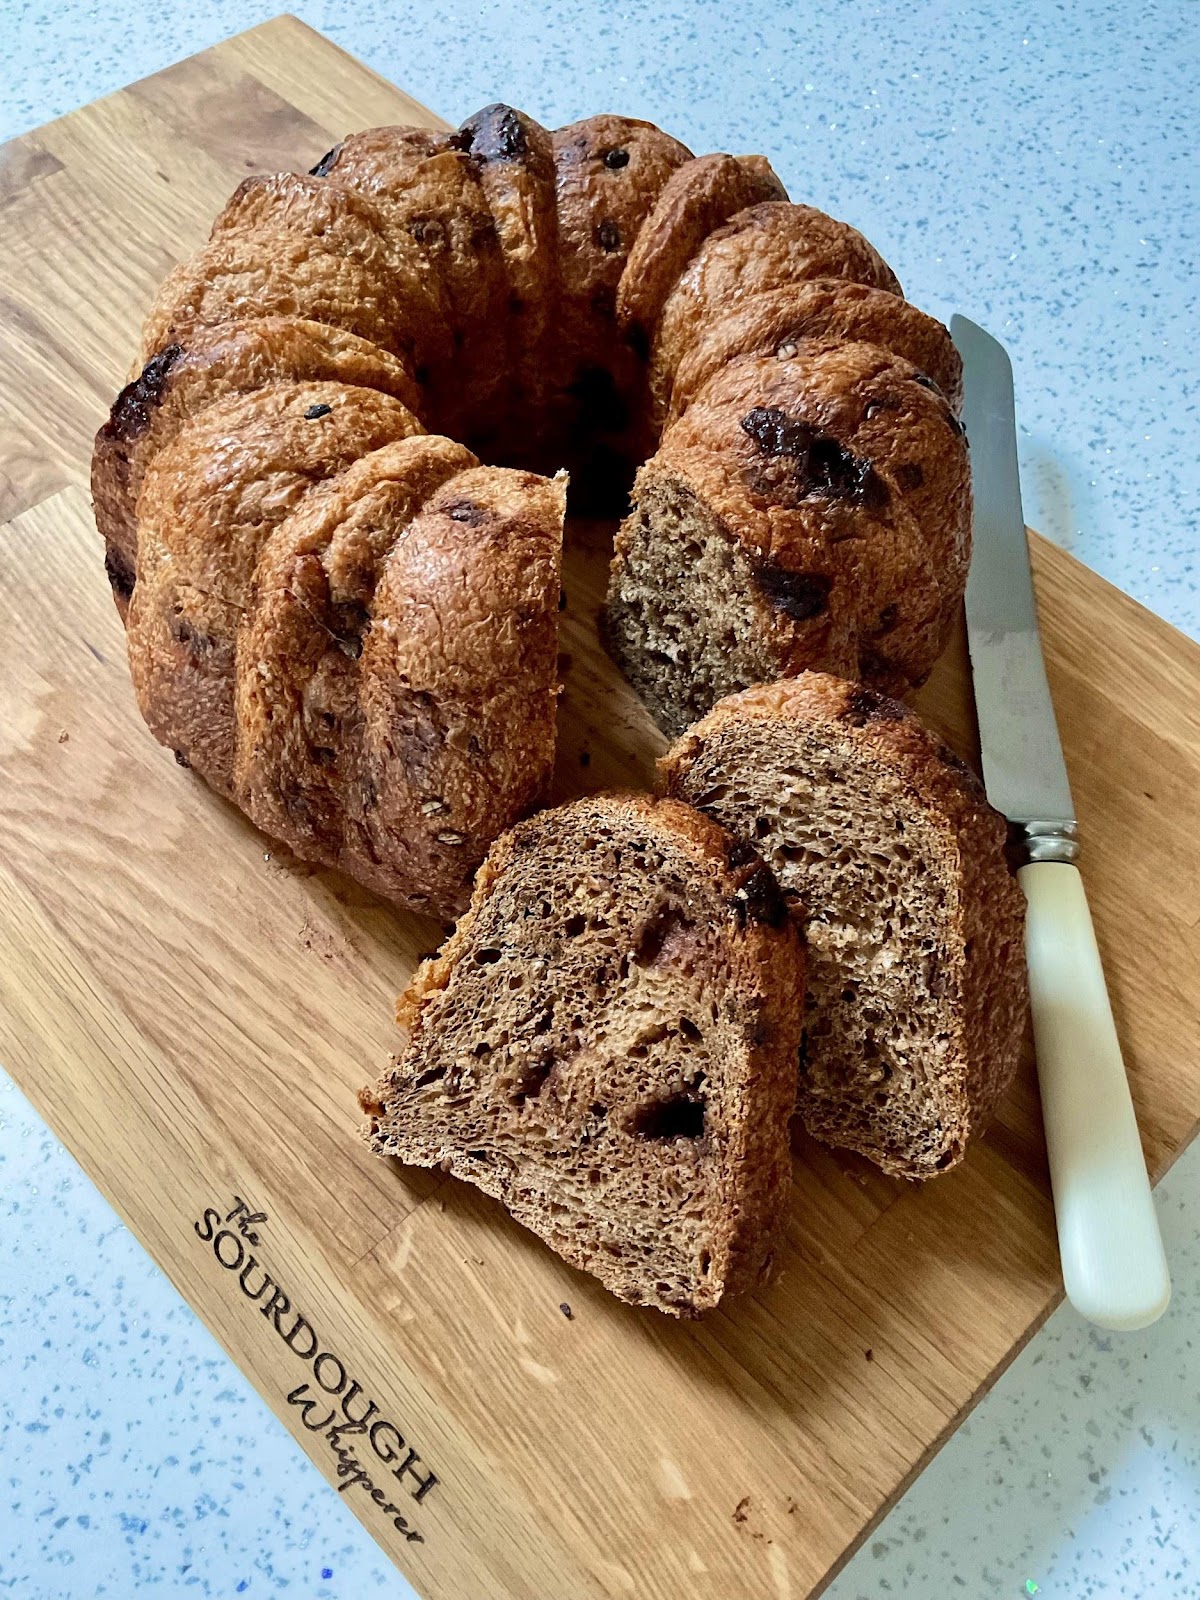
This loaf is a marriage of wonderful flour and yummy chocolate! Cotswold Crunch flour is the best flour in the world in my opinion, it’s so tasty, and so easy to use, and in this recipe I am using it to make an enriched dough, with the added extra of chopped up chocolate to create a moreish loaf, perfect for the festive season, as well as any time you fancy a treat.
🌟🌟🌟 NOTES: The sweetness in the flour and the oat milk all adds to making this a tasty loaf; the butter, or peanut butter, adds an extra richness. And of course, the bursts of chocolate are the jewels of fabulousness throughout! If you want extra sweetness, add honey or sugar to the dough at the start; for my tasters this has been sweet enough, but if your tasters prefer something sweeter, it is easy to tweak.
If you like the chocolate orange idea but do not have access to it, try using your choice of chocolate and some added orange flavouring, maybe an orange essence or extract, orange oil, dried orange powder, or some finely grated orange zest. Suggested amounts for a really good orange flavour: 1 to 2 tsp orange extract or the zest of 1 to 2 oranges.
EDIT: one of my lovely bakers has also suggested using a blood orange infused oil to add the orange flavour.
🌟🌟🌟 This recipe is inspired by a recipe I created for my new book, so if you like it, you might like my upcoming book 🌟🌟🌟
Prep time: up to 24 hours with maximum 30 minutes hands on time
Baking time: 60-70 mins
Essential equipment for this recipe: I bake this recipe in a ‘12 cup’ Bundt tin, measuring 26.7D x 26.7W x 11.4H cm, you could also use a loaf tin or cake tin.
Ingredients:
50g active sourdough starter
400g oat milk, or milk of your choice
500g Cotswold Crunch flour
100g butter or peanut/nut butter of your choice
150g chopped chocolate of your choice, or 1 whole Terrys chocolate orange, opened and chopped up
7g salt, or to taste
Yield: 1 full size loaf
NOTE: You can find Cotswold Crunch here. If you’re not in the UK, try your favourite flour/s, I think a mix of strong white bread flour and wholegrain spelt flour would be nice, and maybe a touch of rye flour too for its natural sweetness.
Method:
Step 1: Late afternoon/early evening, roughly mix together all the ingredients to a sticky lumpy dough; it does not need to be fully mixed at this point, it will become mixed in fully as you complete the next steps. Cover the bowl with a shower cap, and leave the bowl on the counter.
Step 2: After 2 hours, perform the first set of pulls and folds on the dough, lifting and pulling the dough across the bowl all the way round, until it starts to come into a soft chocolate studded ball, then stop. The dough will be sticky. Cover the bowl again and leave it to sit on the counter.
Step 3: After another hour, perform another set of pulls and folds on the dough, covering the bowl afterwards. This will be a big dough, it will be stretchy and textured between the chocolate pieces, and will come together into a soft ball. Cover the bowl again.
Step 4: Leave it counter overnight, it will typically require 8 to 12 hours to fully prove at room temperatures between 18 to 20°C/64 to 68F. If it has been colder, it may need longer.
Step 5: In the morning, the dough will have grown, if it has not doubled in size yet, allow it a few more hours to continue to prove. This is a heavy dough and may take longer to fully prove than others.
Spray a light layer of oil or grease the inside of your Bundt tin with butter if needed.
Once the dough is two times its original size, firmly perform a final set of pulls and folds on the dough to pull it into a ball. The dough will be big and studded with the chocolate pieces. Pick up the ball of dough in one hand, and with your other hand ease a hole into the middle of the ball of dough creating a big bagel shape, then place it into the Bundt pan, placing it over the top of the upright in the middle of the pan, then cover it with the same shower cap. Allow the dough to prove again, letting it fill approximately half to three quarters of the pan. The time this takes will depend on the temperature of your kitchen.
Step 6: To bake, you can bake in a preheated oven or from a cold start. Place parchment paper, followed by a baking sheet, on the top of the Bundt pan, to serve as a lid. As a tip, I then place ceramic baking beads in the pan to hold the pan in place on top of the Bundt tin. If preheating, set the oven to 160°C/320F fan assisted or 180°C/360F non fan assisted/conventional.
If you preheated the oven, bake, covered, for 55 to 65 minutes. If using a cold start, place the covered pan of dough in the oven, set the temperature as above and set a timer for 60 or 70 minutes, or until nicely browned.
Step 7: Remove the loaf from the oven, remove the baking sheet and paper, allow the loaf to cool for 5 minutes, then turn it out onto a wire rack to cool. If you would like the loaf to have more colour, return it to the oven, on the rack, sitting on an oven tray, and bake uncovered for 5-10 minutes. Then remove and cool slightly before slicing – but definitely tuck in whilst warm 🤩🤩🤩🤩🤩
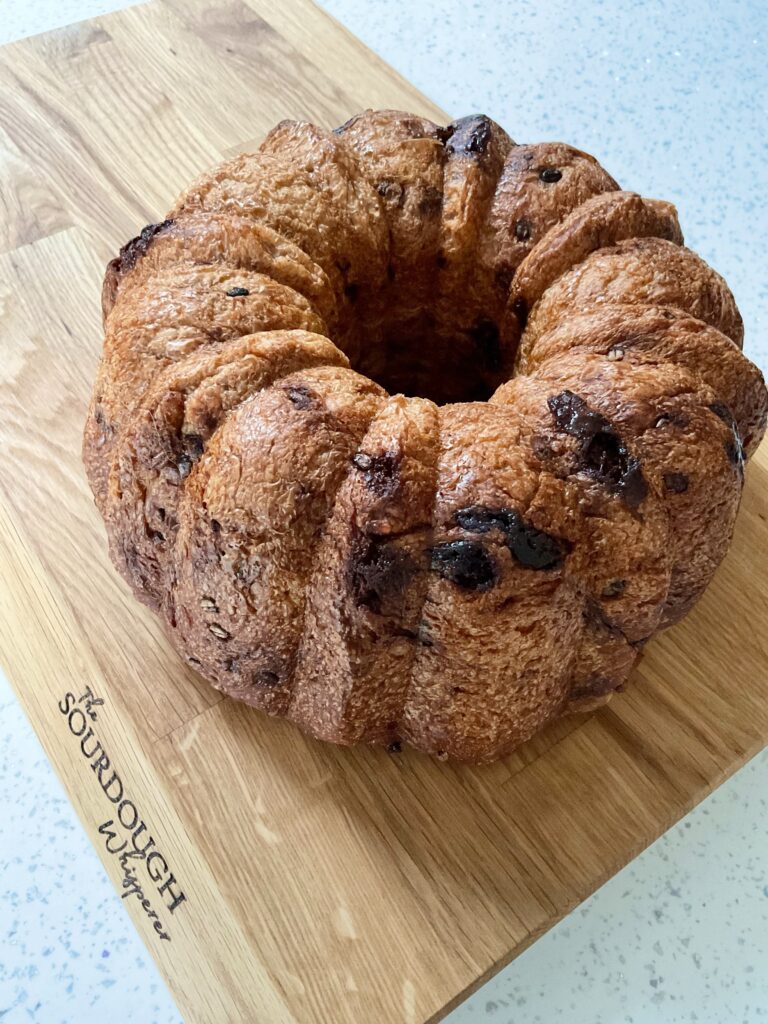
Another one that I made in a different shaped Bundt tin
Recipe notes: the dough will be sticky and heavy initially, and it will remain a heavy dough, but it will grow and will bake to something wonderful! If you can’t shape it into a smooth ball, don’t worry, just place it into the Bundt tin as evenly as possible, the tin will shape it for you.
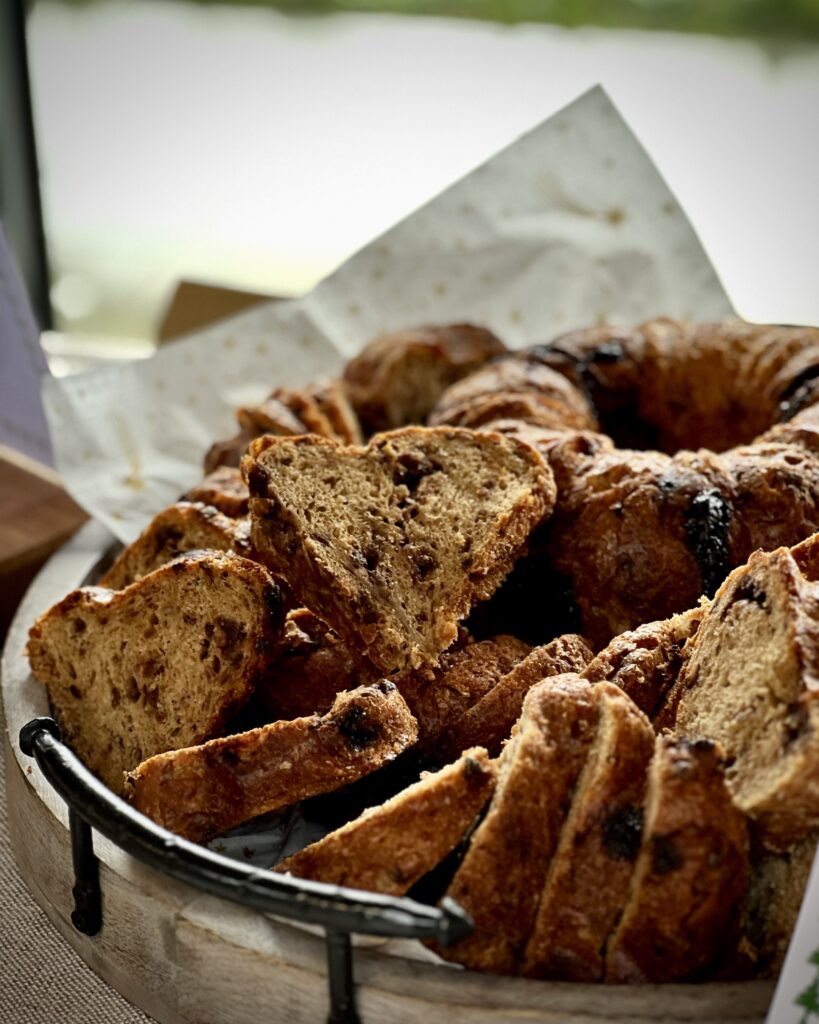
Photo from my Christmas Party where the loaf was shared. Photo credit Emma from @whipupastorm