Blog

How to have a super starter..

Q. Want to know how to make your starter into a super starter?

A. Get to know it, intimately.

Before I explain… No one else’s starter is like yours; only yours lives in your kitchen, which is all part of what makes it unique. Add in the flour you use, the water, your management of it, and it is uniquely and solely yours. And to get the best out of it, you need to get to know it. You need to know every nuance of your little bowl of magic.

Here’s my tips and insights:

🌟 I have always used the same flour in my starter – you may see me play around with other flours or different starters but I’ve either made them from scratch or I’ve used a spoonful of my Star to experiment with – I never ever risk or experiment with my precious, loyal, consistent starter.

🌟 I know exactly what part of my kitchen my starter likes to sit in once fed.

🌟 I know which part of the fridge it likes best to sleep in.

(to answer the question about the best place to store your starter in the fridge: if it keeps getting hungry in the fridge, it may be in a part of the fridge that is too warm, or too near the front so that it gets warmed up each time the fridge is opened. The best place in the fridge will be where your starter remains still, gets thick, not frozen, and not hungry.)

🌟 I always feed her with equal WEIGHTS of flour and water, never volume.

How do I recommend you do that?

🌟 Be consistent.

🌟 Develop a good relationship with your starter.

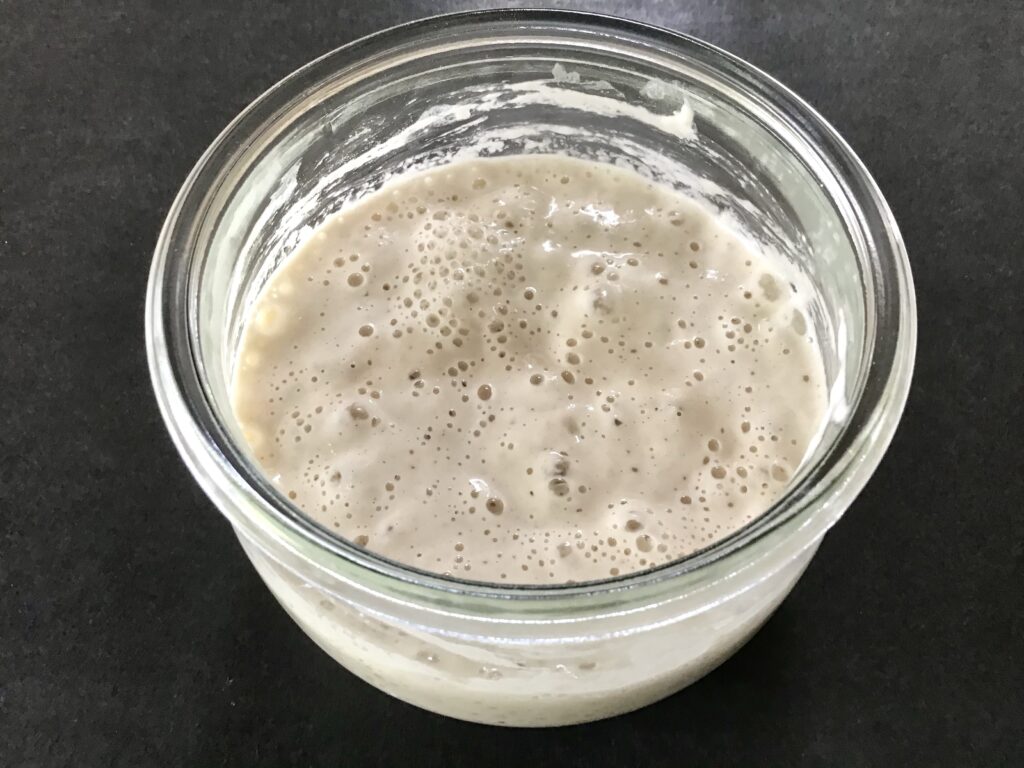
🌟 Watch and learn how it looks, behaves and smells when it’s happy and healthy. This will help you to detect if there’s any issues or changes.

🌟 Take photos if it helps.

🌟 Give it the best food you can.

🌟 Use the best quality flour you can for your starter.

🌟 Test your tap water; mine loves tap water, yours might too; if you want to test it, take out a small portion of your starter and place it in another jar and feed it with your tap water and see what happens. For some people, tap water gives their starters the boost they’ve been lacking.

🌟 Keep it in a good environment, scrape down the jar after each feeding. Keep its home tidy and safe.

🌟 Learn it’s personality.

🌟 Do. Not. Compare. You really will be wasting your time if you compare your starter to others; they don’t live in your kitchen or use your flour or water so why would you think they should be the same?

🌟 Stop reading everything you find online, you’ll drive yourself crazy. Learn about YOUR baby and you’ll fly.

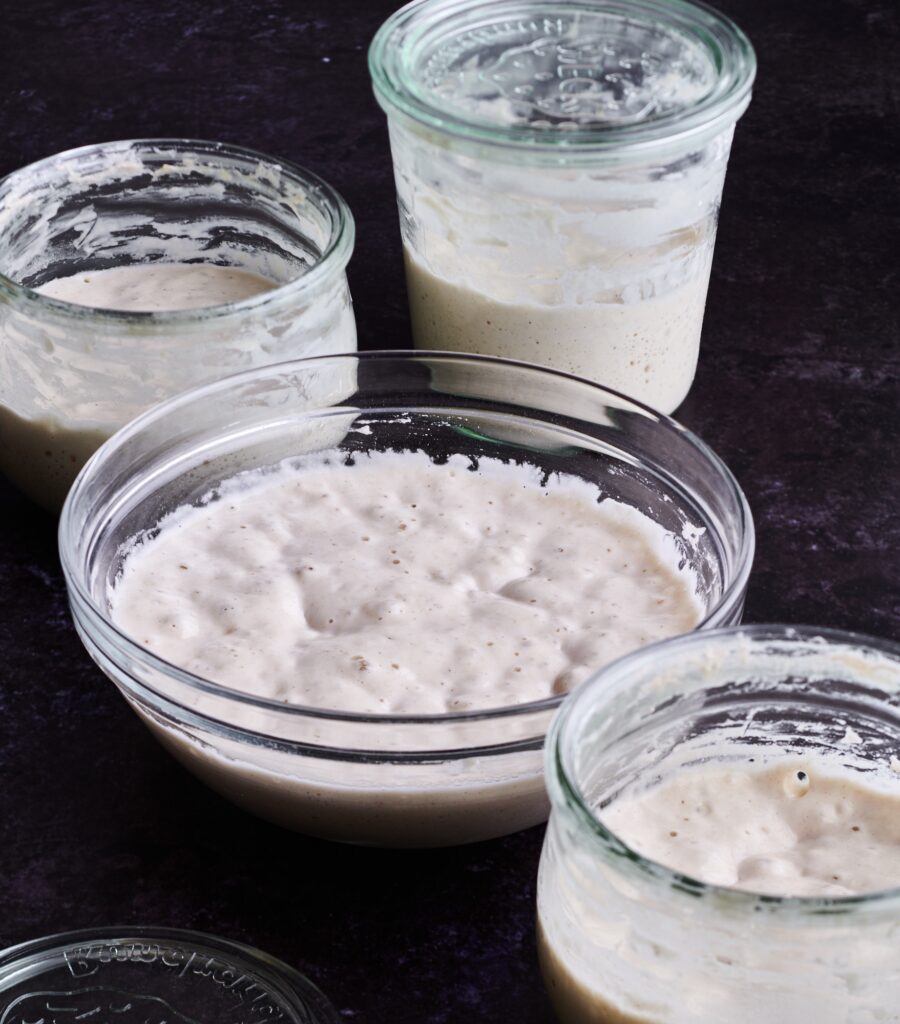
🌟 Don’t focus on bubbles. Not all starters are bubbly, and they don’t need to be; different flours produce different looking starters, in particular, white starters may have a bubbly surface, whole grain starters rarely have a bubbly surface, but they have wonderful texture throughout instead.

🌟 Give it what it needs: feed your starter with equal weights of flour and water too, UNLESS it needs it to be different, and here’s why it’s important to know your starter: by watching and noting it’s consistency and behaviour, you will be able to see if there’s any changes that you need to respond to. If it’s getting a little thin, use less water in the feed next time. If it’s getting a little slow, give it more time, or some warmth. If it’s give really flat and the consistency has become smooth like paint, try feeding some portions with a new/fresh bag of flour.

🌟 And always always make notes. 🌟

Log the following to build a picture of how your starter behaves:

1. The starting consistency before feeding

2. How it smells and looks

3. What time you feed it

4. What you feed it with

5. Exact flour you used

6. Exact water you used

7. Exact quantities you fed it with

8. The room temp at the time of feeding

9. What time it fully responding ie had grown to double in size

10. How it behaved in your dough.

Use this log to fully understand how your starter behaves throughout the year and you will benefit so much for taking that extra bit of time.

The biggest way to know if your starter is working well is if it lifts and grows your dough. If your dough grows, your starter works. Don’t focus on looks, focus on power and the job it does.

I hope this helps, you know where I am if you need me xx

Find more tips here, and here.

What exactly is sourdough starter?

It’s magic, it’s joy, it’s a bowl of happiness, excitement and possibility, it’s our love child, it makes us smile every time we use it…it’s all those things, and I truly love mine, but in reality…

🌟🌟 In basic terms: its our raising agent, and it’s what gives sourdough its texture and flavour. 🌟🌟

The key difference between a starter and other bread raising agents is that starter is in liquid form and lives and lasts forever, as opposed to other raising agents, such as commercially sold yeast or baking powder, which are in dried form and can be added straight from a package.

And that’s it, it truly is as simple as that, as scary as it can sometimes seem. I know that the idea of a ‘living’ thing that we keep forever can worry people, there’s that fear about keeping it alive, but I promise, they’re really hard to actually kill! It’s far easier to keep a starter alive than wiping it out – unless you mistakenly cook it of course, which has been done, or it gets mouldy.

🌟 Flour and water, that’s all it is, flour, water and time. My top tips to make and to keep your starter in good condition are:

🌟 Use good flour. You can use any wheat flour to make a starter, as a learner I would highly recommend using strong white bread flour or wholewheat/wholemeal flour. And choose the best quality that you can, it does make a difference and is worth the investment in your starter.

In the UK, I prefer this strong white bread flour for my starter, or this wholemeal flour.

In the US, I recommend King Arthur Bread flour.

For other countries, check out my flour page.

🌟 Water. In most places tap water is fine, but if you’re not sure, try filtered water, or boiling and cooling some to use.

🌟 Use scales. Weighing your flour and water makes a huge difference to its strength.

🌟 Keep it small. I only ever use small quantities for making and maintaining my starter. This saves on waste, and keeps it lean and healthy.

🌟 Give it time. Starters don’t work to a clock, they will be ready when they’re ready. There are some ways that you can encourage it along, but patience is key.

🌟 Be consistent. When you find what works for you, stick with it.

🌟🌟🌟 And if you’re new, please please don’t read too much. You can easily get overwhelmed with a flood of information. Choose a single source and stick with it whilst you learn how sourdough works.

For more details and all of the steps for making and maintaining a starter, you can find everything you need right here.

🌟🌟 Let me know if you need me 🌟🌟

Leftover panettone loaf…

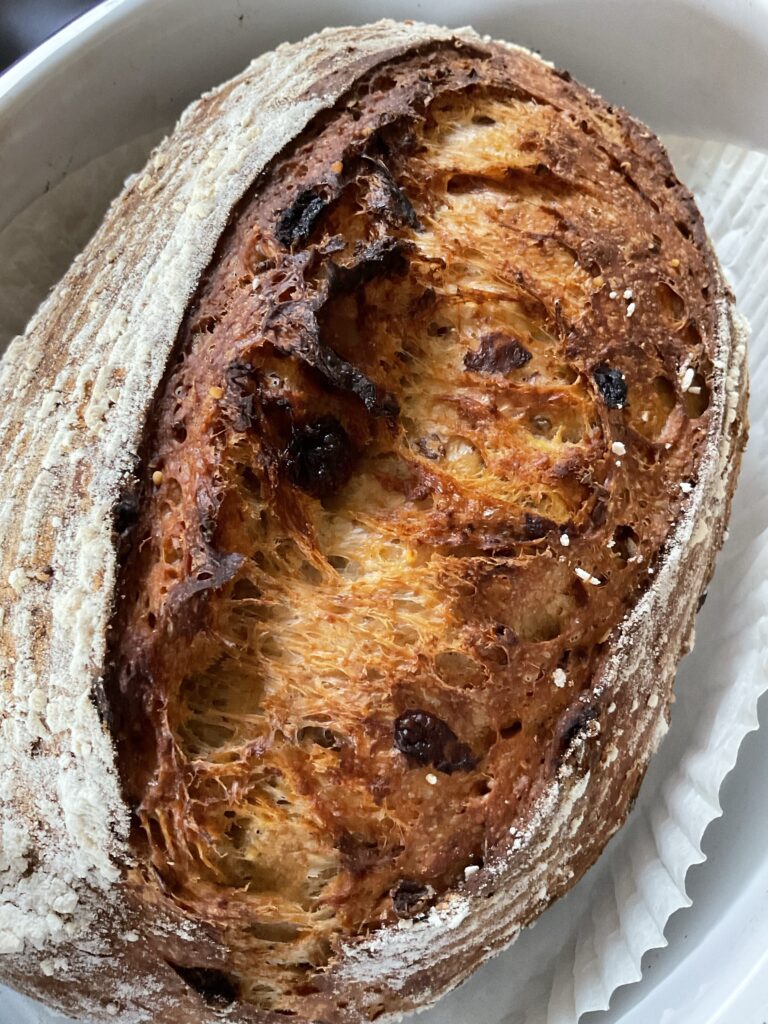
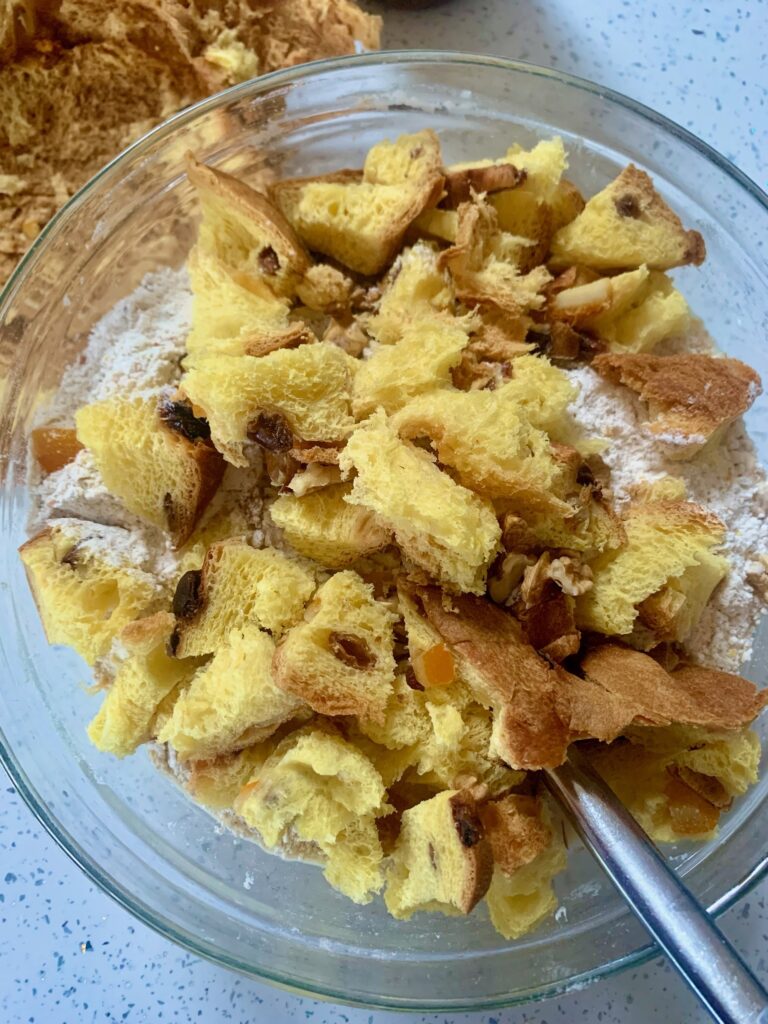
Leftover panettone? Do what I do and shove it into a dough and create a whole new fruit loaf..

In my dough I used:

50g starter

400g water

500g Cotswold Flour Eight Grain flour 

200g ripped up leftover pannetone

Salt

You could use flour of your choice, you may need to feel your way with the amount of water. Start with 350g and see how it feels, you can always add more.

I then followed my master recipe as it is and made the loaf as an oval.

In case you need it, this is my master recipe process

This is how I shape for an oval loaf (second part of the video)

This is the flour I used

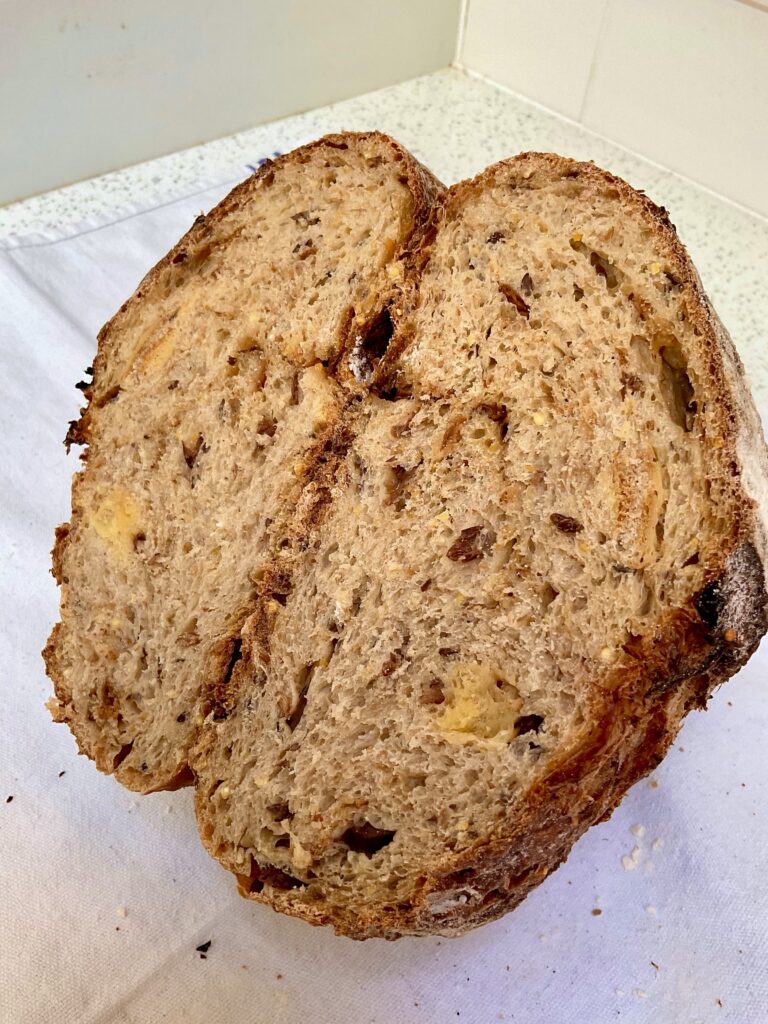
You can see the panettone spread throughout the loaf… it worked really well!

Let me know if you try it xx

Easy peasy sourdough fruit loaf…or, perfect Christmas sourdough goodies…

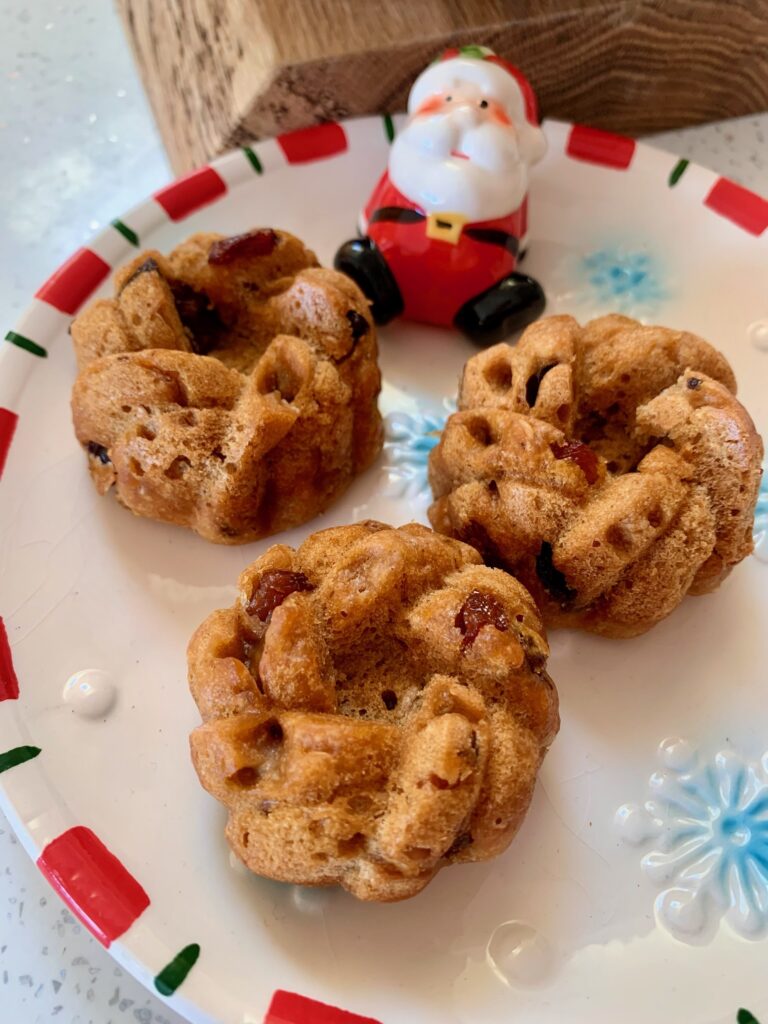
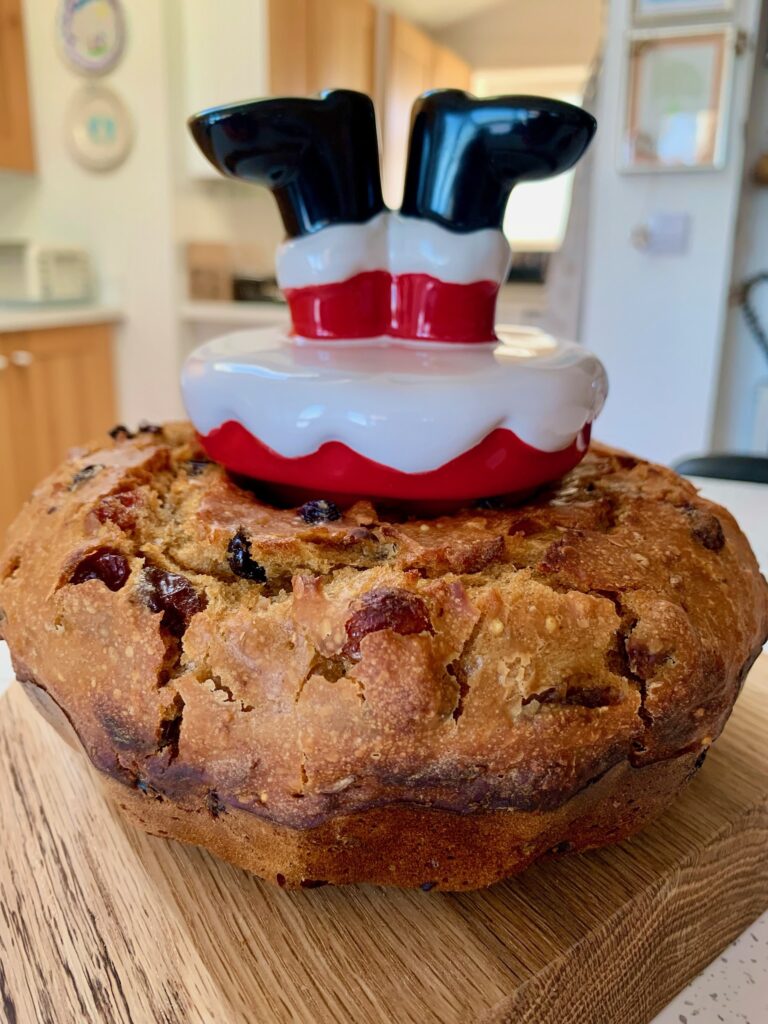
I had great fun creating this bake, I mixed up a batch of master recipe dough, and literally chucked in an entire jar of mincemeat! The outcome was fab, the little rolls had a great chewy base, and the bigger version is just like eating a fruit loaf.

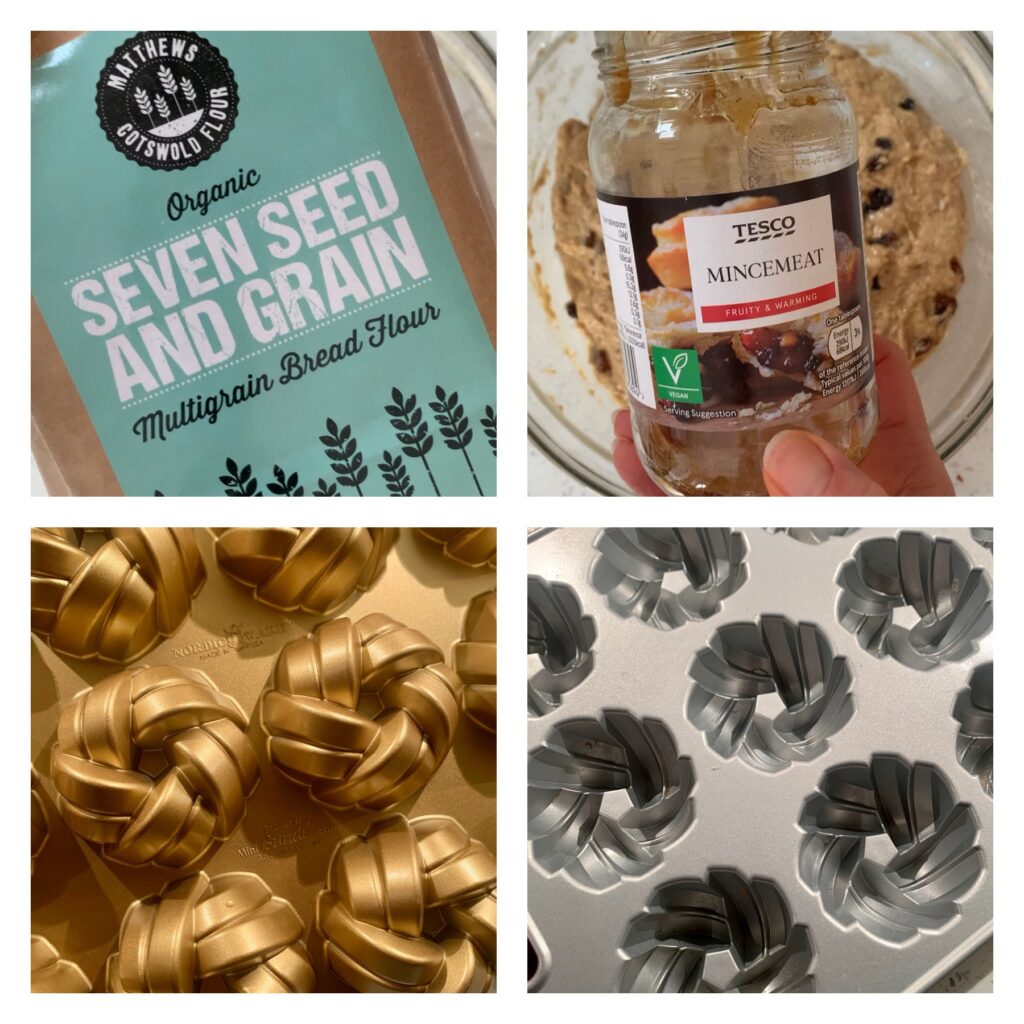
I used a new flour to me, it’s a lovely seven seed and grain flour from Matthews Cotswold Flour, I recommend trying it, but you could also use any flour of your choice. I threw in a 411g jar of mincemeat, both seen in the top 2 photos in the grid below. This made the dough very sticky and loose, and not something easy to shape in any way, but that didn’t matter as I baked it in a tin. I used a small bundt tin for the bigger round, and I used a bundtlette tin for the little ones as seen in the both 2 photos of the grid below.

The recipe therefore was my standard:

50g starter

350g water

500g flour of your choice

1 jar mincemeat, or if that’s not available where you are, trying making it up with jam/jelly and dried peel, dried fruits and spices.

Salt to taste

I mixed it all up and let it sit for a few hours before giving it some more agitation, it could not really be stretched and pulled around, I just made sure it was well mixed. I then left it to prove overnight. In the morning I just ‘handled’ it into my pans, left it to prove again and baked.

You can follow my Bundt tin recipe process in my book The Sourdough Whisperer, or my sandwich loaf process in either of my books to prove again and bake, or bake as you could a fruit loaf, just allow it enough time to fully bake.

This loaf is shaped from the tin on the other side, but I liked it this way up.

This is the Bundtlette tin I used, if you order from EcoBaker before 31.12.22 use code foodbodxmas for a discount.

If you try this or anything like it, let me know! Have fun 🤩🤩🤩🤩

My chocolate orange loaf…

A perfect festive table centrepiece… sourdough meets beautiful flour meets chocolate!

This loaf is a marriage of wonderful flour and yummy chocolate! Cotswold Crunch flour is the best flour in the world in my opinion, it’s so tasty, and so easy to use, and in this recipe I am using it to make an enriched dough, with the added extra of chopped up chocolate to create a moreish loaf, perfect for the festive season, as well as any time you fancy a treat.

🌟🌟🌟 NOTES: The sweetness in the flour and the oat milk all adds to making this a tasty loaf; the butter, or peanut butter, adds an extra richness. And of course, the bursts of chocolate are the jewels of fabulousness throughout! If you want extra sweetness, add honey or sugar to the dough at the start; for my tasters this has been sweet enough, but if your tasters prefer something sweeter, it is easy to tweak.

If you like the chocolate orange idea but do not have access to it, try using your choice of chocolate and some added orange flavouring, maybe an orange essence or extract, orange oil, dried orange powder, or some finely grated orange zest. Suggested amounts for a really good orange flavour: 1 to 2 tsp orange extract or the zest of 1 to 2 oranges.

EDIT: one of my lovely bakers has also suggested using a blood orange infused oil to add the orange flavour.

🌟🌟🌟 This recipe is inspired by a recipe I created for my new book, so if you like it, you might like my upcoming book 🌟🌟🌟

Prep time: up to 24 hours with maximum 30 minutes hands on time

Baking time: 60-70 mins

Essential equipment for this recipe: I bake this recipe in a ‘12 cup’ Bundt tin, measuring 26.7D x 26.7W x 11.4H cm, you could also use a loaf tin or cake tin.

Ingredients:

50g active sourdough starter 

400g oat milk, or milk of your choice 

500g Cotswold Crunch flour

100g butter or peanut/nut butter of your choice 

150g chopped chocolate of your choice, or 1 whole Terrys chocolate orange, opened and chopped up 

7g salt, or to taste 

Yield: 1 full size loaf

NOTE: You can find Cotswold Crunch here. If you’re not in the UK, try your favourite flour/s, I think a mix of strong white bread flour and wholegrain spelt flour would be nice, and maybe a touch of rye flour too for its natural sweetness.

Method:

Step 1: Late afternoon/early evening, roughly mix together all the ingredients to a sticky lumpy dough; it does not need to be fully mixed at this point, it will become mixed in fully as you complete the next steps. Cover the bowl with a shower cap, and leave the bowl on the counter.

Step 2: After 2 hours, perform the first set of pulls and folds on the dough, lifting and pulling the dough across the bowl all the way round, until it starts to come into a soft chocolate studded ball, then stop. The dough will be sticky. Cover the bowl again and leave it to sit on the counter.

Step 3: After another hour, perform another set of pulls and folds on the dough, covering the bowl afterwards. This will be a big dough, it will be stretchy and textured between the chocolate pieces, and will come together into a soft ball. Cover the bowl again.

Step 4: Leave it counter overnight, it will typically require 8 to 12 hours to fully prove at room temperatures between 18 to 20°C/64 to 68F. If it has been colder, it may need longer.

Step 5: In the morning, the dough will have grown, if it has not doubled in size yet, allow it a few more hours to continue to prove. This is a heavy dough and may take longer to fully prove than others.

Spray a light layer of oil or grease the inside of your Bundt tin with butter if needed.

Once the dough is two times its original size, firmly perform a final set of pulls and folds on the dough to pull it into a ball. The dough will be big and studded with the chocolate pieces. Pick up the ball of dough in one hand, and with your other hand ease a hole into the middle of the ball of dough creating a big bagel shape, then place it into the Bundt pan, placing it over the top of the upright in the middle of the pan, then cover it with the same shower cap. Allow the dough to prove again, letting it fill approximately half to three quarters of the pan. The time this takes will depend on the temperature of your kitchen. 

Step 6: To bake, you can bake in a preheated oven or from a cold start. Place parchment paper, followed by a baking sheet, on the top of the Bundt pan, to serve as a lid. As a tip, I then place ceramic baking beads in the pan to hold the pan in place on top of the Bundt tin. If preheating, set the oven to 160°C/320F fan assisted or 180°C/360F non fan assisted/conventional.

If you preheated the oven, bake, covered, for 55 to 65 minutes. If using a cold start, place the covered pan of dough in the oven, set the temperature as above and set a timer for 60 or 70 minutes, or until nicely browned.

Step 7: Remove the loaf from the oven, remove the baking sheet and paper, allow the loaf to cool for 5 minutes, then turn it out onto a wire rack to cool. If you would like the loaf to have more colour, return it to the oven, on the rack, sitting on an oven tray, and bake uncovered for 5-10 minutes. Then remove and cool slightly before slicing – but definitely tuck in whilst warm 🤩🤩🤩🤩🤩

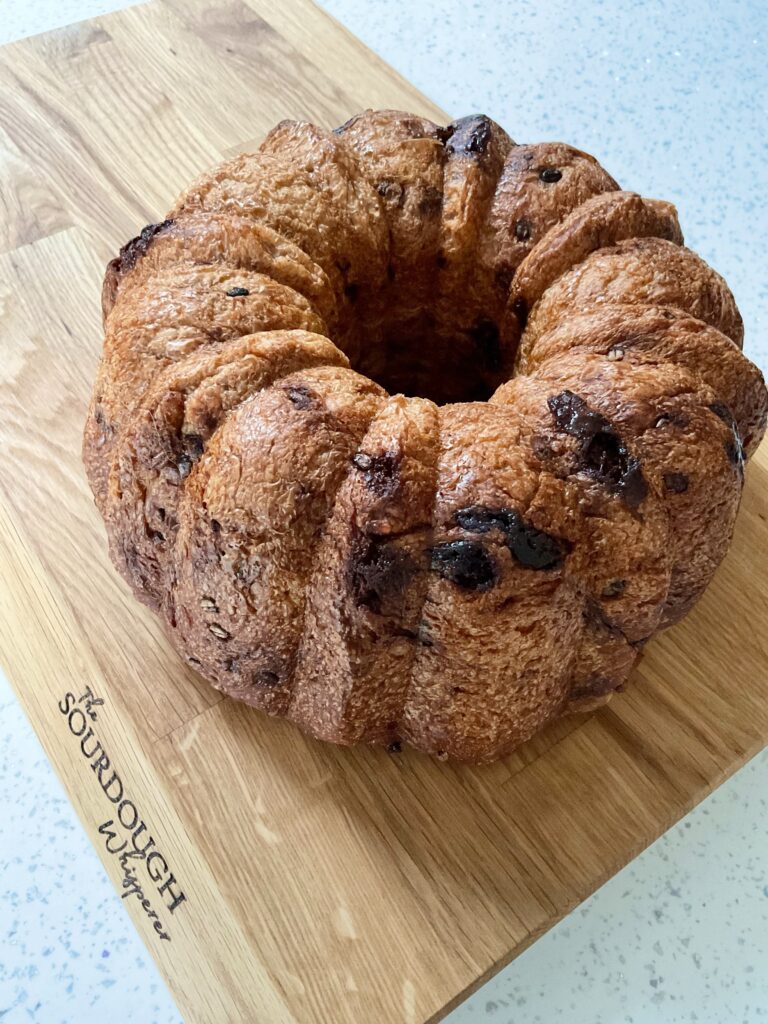
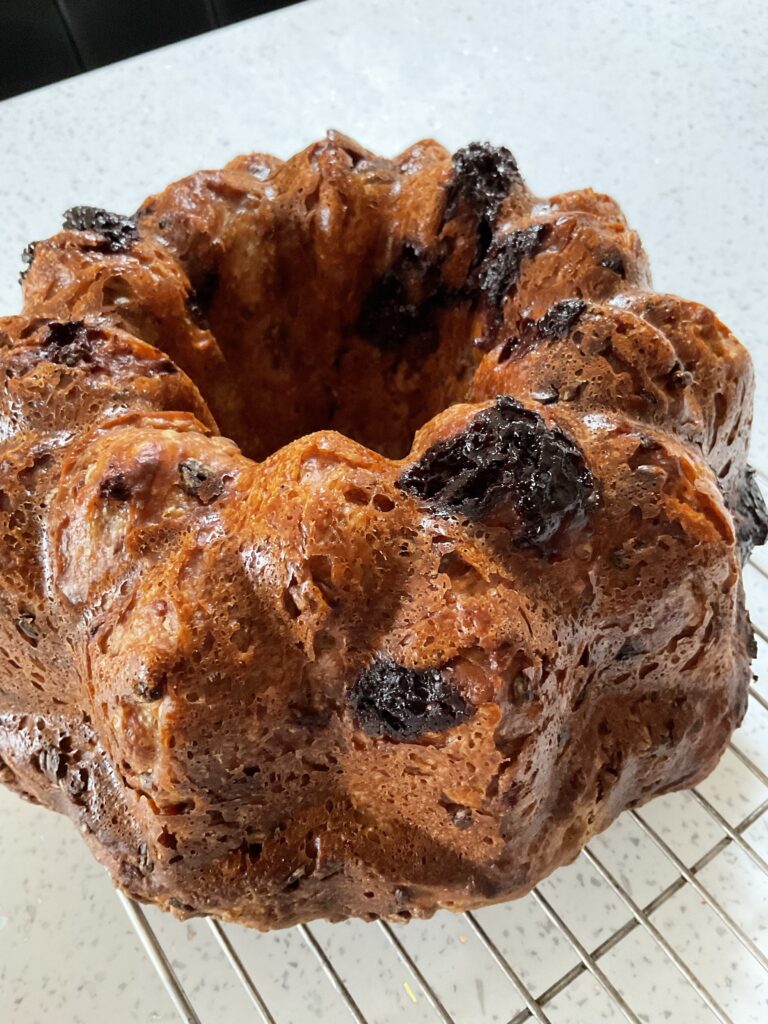
Another one that I made in a different shaped Bundt tin

Recipe notes: the dough will be sticky and heavy initially, and it will remain a heavy dough, but it will grow and will bake to something wonderful! If you can’t shape it into a smooth ball, don’t worry, just place it into the Bundt tin as evenly as possible, the tin will shape it for you.

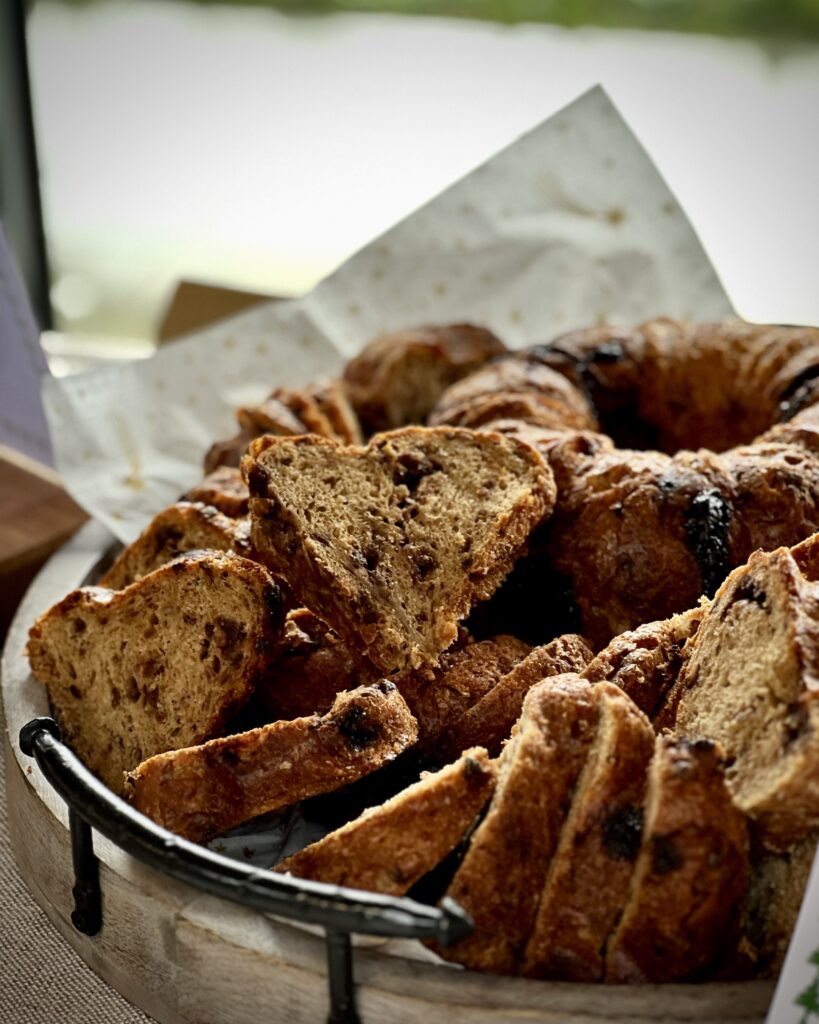
Photo from my Christmas Party where the loaf was shared. Photo credit Emma from @whipupastorm

Me and my sourdough story..

Hi, I’m Elaine, and I started baking sourdough in 2013. I was introduced to it by a wonderful blog friend, Selma, who sent me some dried starter and full instructions to revive the starter and bake my first loaf.

I’ll be honest, I was scared!!! I didn’t know anything about sourdough, I’d never even eaten any, so I bombarded Selma with questions which she happily answered (the sourdough community is a passionate sharing bunch), and then I went for it…and it worked like a dream. I baked a beautiful perfect loaf, below, I was so proud, and promptly ate half of it in one go right there and then, it was so good.

This is my first ever loaf:

From that point, I wanted to learn more about sourdough, so I played around with flours and processes, had some failures but lots more successes, and I eventually perfected a method that I could use every week to bake sourdough for my son, who now won’t eat any other bread. So I needed to know it works, which is why I can safely say that if you want to try it, I KNOW that my method works!

And I love it! I love everything about making sourdough, I love the process, the outcome, but mostly, I love watching other people enjoy what I’ve created. And I hope that you will have the same love and satisfaction from your own loaves.

If you’d like to know more, please do get in touch, or have a good look round my website for help and guidance and everything you need to know xx

A more recent loaf

Cotswold Crunch and my master recipe…

My master recipe made with 100% Cotswold Crunch flour

Matthews Cotswold Crunch flour produces the tastiest loaves as far as I’m concerned. It is a beautiful flour, lovely to work with, as well as to bake and it works perfectly in my recipes, but it does need some understanding for using it in my master recipe so below I have added some tips for you and how to use it.

But first, to give you some idea about how it tastes, this is how the flour is described on their website:

Matthews Cotswold Crunch flour is a speciality blend of strong bread flour, malted wheat flakes and malt flour for bread and rolls. The flour has a nutty taste and a signature darker colour. This flour is extremely popular due to its flavoursome, malty aroma with added texture from the wheat flakes. Great taste award winner and one of our best sellers!

100% Cotswold Crunch and my master recipe

To use 100% of this wondrous flour with my master recipe, follow the recipe exactly as it is. The dough will feel soft and sticky initially but stick with it, don’t think it needs less water or more flour, it will come together and the dough will firm up as you work with it, and the flour absorbs the water.

Alternatively use Cotswold Crunch in partnership with another flour, in any ratio it works well. It also produces amazing rolls and wonderful sandwich loaves, just use it in my recipes as they’re written.

This loaf was made with 50% Cotswold Crunch and 50% strong white bread flour
Inside a Cotswold Crunch master recipe wedge roll

I asked Bertie from Matthews to explain ‘malting flour’ to give me a better understanding and this is my rough explanation:

Malting is a process that is used in brewing beer by adding water to a flattened grain to ferment (germinate) it to develop its flavour; it is then dried on a ‘malting floor’ (a hard heated floor) to convert it to malt. This process of germinating the grains then drying them is also called ‘steeping’. The flavour that is dried into the grains is then unleashed when they are milled into flours and added to our doughs.

Because the grains have been soaked before drying, by adding malted flours to doughs releases some of that moisture again into the dough, hence the dough becoming so soft during the making process. I hope I’ve got that right!

My master recipe focaccia made with a mix of Cotswold Crunch and strong white bread flour

If you try it, have fun!

I apologise to those of you that don’t have access to this lovely flour yet, hopefully you will soon. For any of you in the UK, you can find it here.

What aren’t you telling me?

Talk to me!

Is this you: you feel that your sourdough could be better, it doesn’t look or taste or resemble what you want it to, you know you shouldn’t compare yours with others but you can’t help it and you want to figure out what you need to do differently? So, you’ve read everything, followed the steps, done everything you think you can to get this ‘right’ for you, but you still think it could be something more, and you still don’t know what you’re missing? So, what’s the missing piece of the puzzle? What’s your missing detail?

Well, I’m here to tell you, there’s always an answer, there’s always a specific reason something is happening, or not happening as you’d like it to. Whether you feel your loaves are flatter than you’d like, whether your starter isn’t behaving as you feel it should, whether your dough didn’t grow, or it’s too soft, or it’s liquid…whatever the issue, there’s always always a particular reason.

The trick is to find it.

There isn’t any one single answer for everyone, all sourdough experiences are different, which is why you’ll find lots of help and suggestions throughout my site and my book, but first, let me ask you:

What’s your missing detail?

And this is why I ask that question: when people contact me for help I ask as many questions as possible to solve the mystery, but there is so often something they don’t say and it’s that that tends to be the main missing piece of the puzzle. The things that people often think aren’t important, or forget to tell me, or are a throwaway afterthought, are often the vital piece of information that can fix things. And it can be as simple as that one thing being the answer to your sourdough question.

So what aren’t you telling me?

What is the missing piece of your puzzle that’s right in front of you without you releasing that it’s your answer. Let me give you a few examples of what this might be…

“I wet my hands each time I handle the dough”

“I live at high altitude”

“I changed my flour”

“I have an aga”

“My kitchen is always warm”

“I have been putting starter/dough in the oven with the light on all night”

“My flour is quite old”

“I use distilled water in my starter”

“My banneton is 25cm wide”

“I’m really gentle with the dough, I don’t want to squash the bubbles”

“I just tip the dough into my banneton”

“The temperatures here have risen/dropped recently”

“I didn’t do this step…”

These scenarios are all from many conversations that I’ve had, each of which has come up more than once, and they all make a difference to the outcome of your sourdough making, so if any of these things ring a bell for you, there’s your issue…and even if it’s not one of these, if you are having an issue, don’t skip any tiny detail, it could be your very simple answer.

To answer those comments above:

“I wet my hands each time I handle the dough”

This means you’re constantly adding more water to your carefully measured dough. The dough will therefore be wetter than you planned it to be and it will be unlikely to be able to hold the shape you hoped it would.

“I live at high altitude”

This will affect the doughs behaviour and easily leads to over proving. Use less starter to prevent that.

“I changed my flour”

Changing flour makes ALL the difference, they are not merely interchangeable without needing to make adjustments in your dough.

“I have an aga”

And..

“My kitchen is always warm”

This will affect how the dough proves and can lead to over proving. To prevent this, use less starter.

“I have been putting starter/dough in the oven with the light on all night”

This will make a starter thin and weak, and dough will over prove. It’s too warm for too long a time and not necessary.

“My flour is quite old”

The flour will have therefore lost some oomph and not behave as you expect it to.

“I use distilled water in my starter”

This can prevent your starter from growing.

“My banneton is 25cm wide”

Assuming you are using 500g flour in your dough, this is too big and your loaf will bake wide and flat.

“I’m really gentle with the dough, I don’t want to squash the bubbles”

Or..

“I just tip the dough into my banneton”

Your dough will have no structure and will spread as soon as you turn it out.

“The temperatures here have risen/dropped recently”

Weather and room temp massively affect how dough proves.

“I didn’t do this step…”

Leaving out a step in a sourdough recipe is your prerogative of course, but all of the steps are there for a reason.

I hope this all helps x

Don’t overthink it…

I have said this before and will keep on saying it because I think it’s so important. Overthinking spoils making sourdough for so many bakers and it truly doesn’t need to.

🌟

Sourdough making is a thing of simplicity and joy, but all too often bakers overthink it and it ruins their enjoyment of making it. I have no doubt that this comes from an expectation that making sourdough is going to be complicated or hard to do due to the overwhelming amount of over complicated, conflicting information that can be found on the subject.

🌟

My advise is always: don’t read too much. Find a single source that resonates with you and stick with it whilst you learn the basics of sourdough. Don’t confuse things, don’t get pulled in a thousand different ways by unnecessary advice from a thousand different directions. Only you are in your kitchen.

🌟

Once you feel comfortable and confident that you understand how to use your starter, how the dough works, your best baking process, that’s the time to experiment and expand your knowledge, but never forget the basics. Once you know what works for you, stick with it.

🌟

There are no rules here, there are no sourdough police, there’s just great healthy tasty bread – enjoy it!

Can I freeze my dough?

If you’ve ever wondered if you can freeze your dough, this post is for you. Or you’ve ever thought that a dough is just never going to do anything in cold weather, or if you’ve ever assumed that sourdough has to take control of your life with its timings, this post is for you…

Let me explain…following a course last year, I had two bowls of dough that had had their first initial mix, a rest, two sets of pulls & folds & had been sitting around for a few hours. I knew I wouldn’t be able to bake them the next day, so I decided to test the idea of freezing the dough as I’ve been asked about this many times.

I gave both doughs another round of pulls & folds, pulling them both into very tight balls then put them into small containers with tight fitted lids & into the freezer.

A few days later, I took them out & set the bowls on the side; as they started to slowly warm up I was eventually able to turn the doughs out into bigger bowls, covered with shower caps. It took several hours for each dough is to fully defrost, I gave them both a couple of sets of pulls & folds once they had, & left them on the counter overnight to prove again.

It was a cold day, followed by a very cold night, plus the dough had been very cold to begin with, so it took a few more hours than usual to fully prove, but they did and they did fill the bowls as they always do; I then put them into bannetons & into the fridge. This was now mid afternoon & as a result of life happening, they ended up being in the fridge until the next morning when I could finally bake them.

This loaf above shows the outcome of one of them, the other one I turned into rolls. And both doughs behaved and baked perfectly, the baked outcomes were light and fluffy and oh so tasty!

So as you can see there are many morals to the story: firstly that you can freeze dough at any point along the way, just allow it enough time to warm up again to continue with the process; that sourdough is forever & endlessly forgiving; that sourdough does not have to dictate to you & you do not have to jump to its tune; that we can make sourdough making & baking as simple as we need it to be.

Happy baking!