If you would like to understand exactly how to manage your dough making, control the timing, and work WITH your room temperature and not against it, you can hear me explaining all of this and more in my latest podcast episode. I explain exactly how I manage my dough making and how you can too.
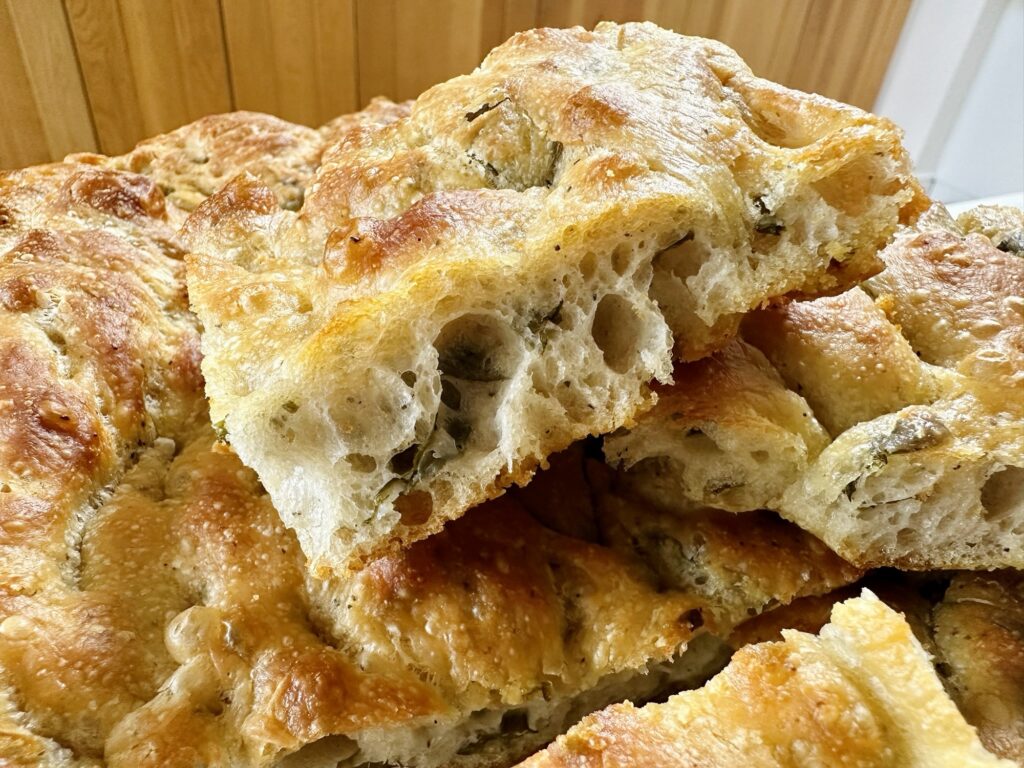
AND I’ve got new recipes for you – including this focaccia!
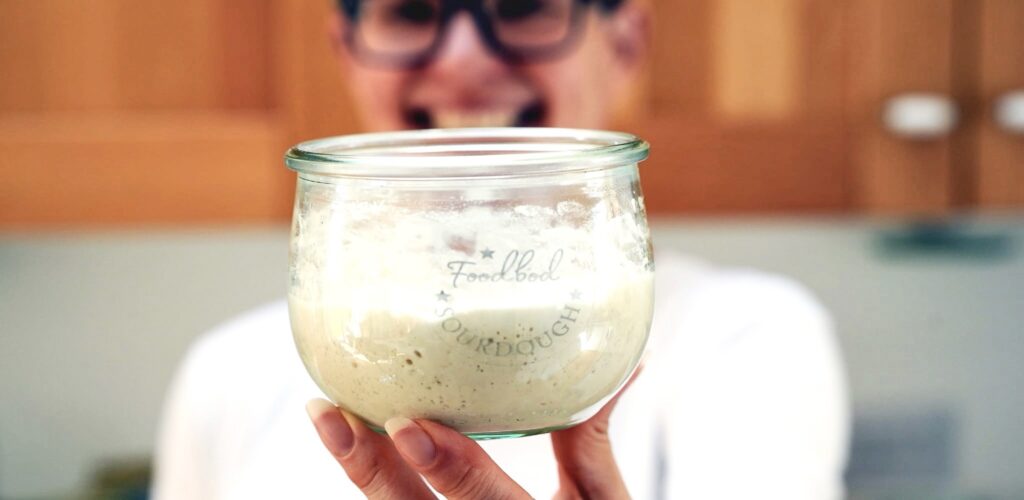
I am very excited to announce the new season of my podcast, The Foodbod Pod, and this year we’re packing in LOTS of sourdough chat. Recipes, answers, hints, tips, we’ve got them all. Listen from the links below to hear what we’ll be bringing you – and my latest bigs news 🤩
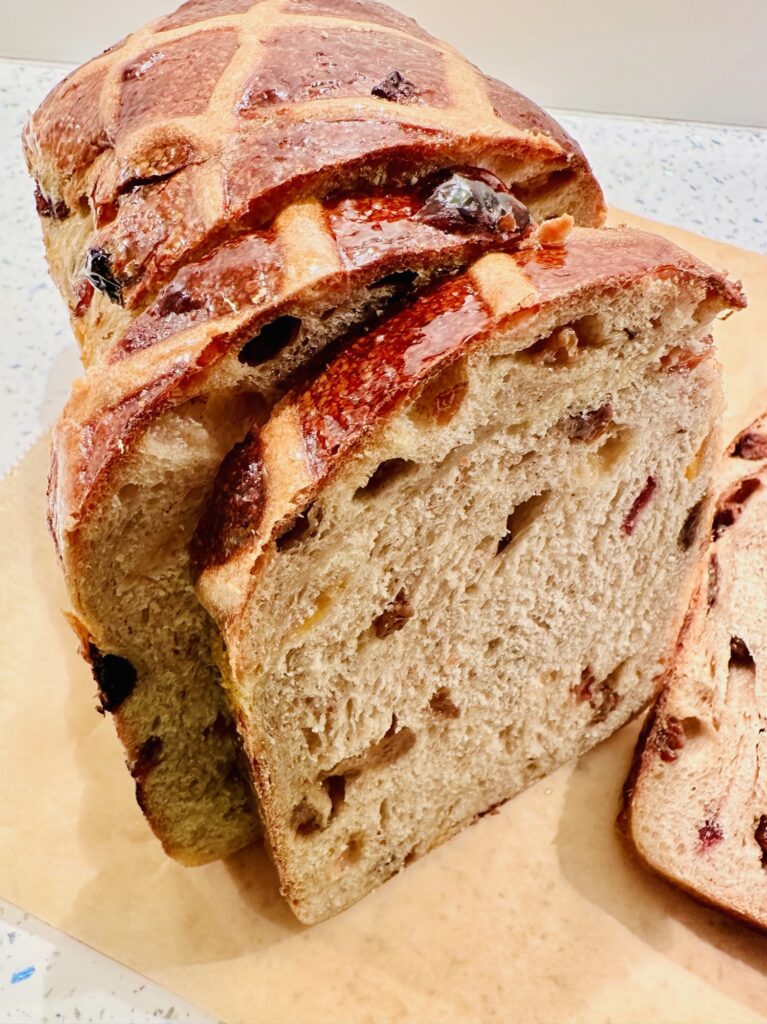
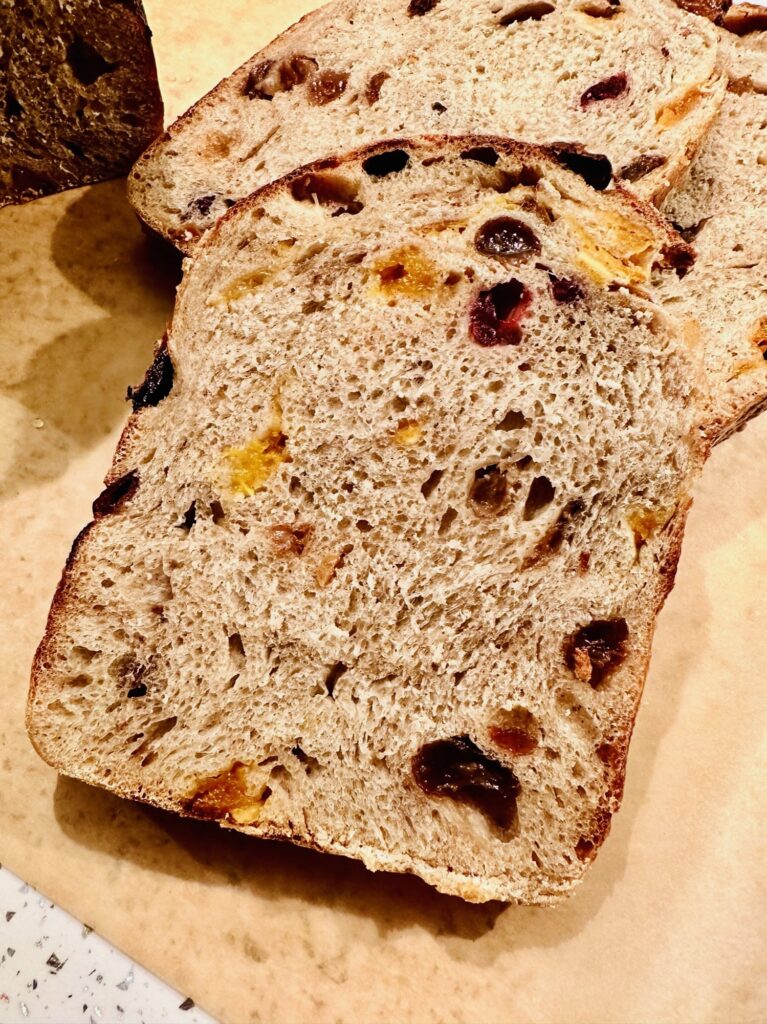
I made the dough for this loaf and baked it in a sandwich tin, but it could also be used to make buns in the same way as my hot cross buns.
I have used oat milk and maple syrup so this loaf is ideal as a vegan option, you could also use milk of your choice and honey if you’d prefer.
Makes 1 loaf or 12 rolls
Ingredients for the dough
50 g active starter
375 g oat milk
500 g strong white bread flour
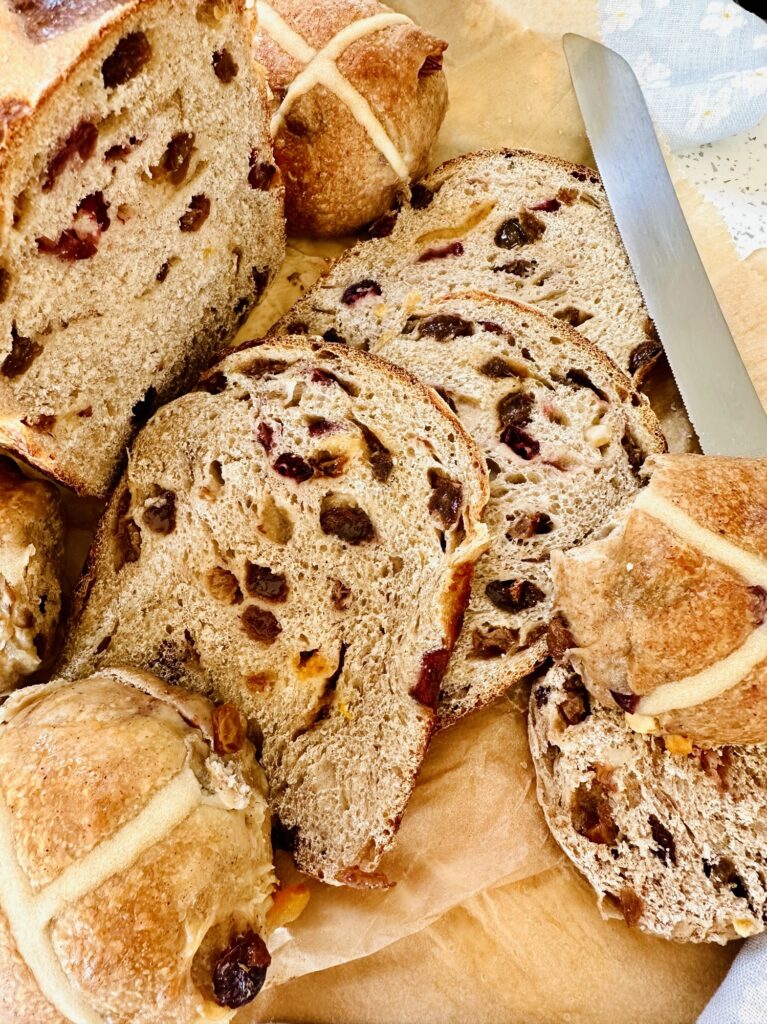
150 g mixed dried fruits and peels
50 g maple syrup
7 g salt, or to taste
1 1/2 tsp ground cinnamon
1/2 tsp ground nutmeg
1/2 tsp ground allspice
Optional for the criss cross design
50 g plain/all purpose flour
50 g water
Equipment
A lined loaf tin, I used my Pullman tin, minus its cover, 21.5 x 12.5 x 11.5 cm (81/2 x 5 x 41/2 inches)
An icing bag with tiny nozzle or sandwich bag with tiny hole cut in one corner
Method
Step 1: In the early evening, in a large mixing bowl, roughly mix together all the dough ingredients until you have a shaggy, rough dough. Cover the bowl with a clean shower cap or your choice of cover and leave the bowl on the counter for 2 hours.
Step 2: After 2 hours, perform the first set of pulls and folds until the dough feels less sticky and comes together into a soft studded ball. This will be a heavy dough. Cover the bowl again and leave it on your counter.
Step 3: After another hour of rest, do one more set of pulls and folds on dough, covering the dough again afterward.
Step 4: Leave the covered bowl on the counter overnight, typically 8 to 10 hours, at 18 to 20°C/64 to 68°F.
Step 5: In the morning, hopefully the dough will have grown to double in size, with a smooth-ish dough surface around the dried fruits and peels. If the dough hasn’t grown sufficiently, give it more time, this is a heavy slow dough. Have your pan ready and place the paper liner on the counter. Gently lift and fold handfuls of dough from one side of the bowl into the middle in a line, using the same pulling and folding action as used previously. Turn the bowl 180 degrees and do the same on the other side so that you have a thick sausage of dough in the middle of the bowl.
With a wetted hand, place your whole hand over the dough, turn the bowl upside down and gently ease the dough from the bowl into your hand. Place the dough, seam side down, on the paper and slip your hand out from underneath the dough. Use the paper to lift the dough into the pan, cover it with the same shower cap and leave it on the counter. Allow the dough to proof again, letting it grow level with the edge of the pan until it is just peeking over the top. This may take 2 to 3 hours, depending on the temperature of your kitchen. The surface will become smooth and the dough will spread to fill the pan.
This step can also be done in the fridge for a longer, slower second prove, up to 24 hours, and can be baked directly from the fridge.
Step 6: When you are ready to bake, decide whether you would like to bake in a preheated oven or from a cold start. If preheating, set the oven to 200°C (400°F ) convection or 220°C (450°F) conventional.
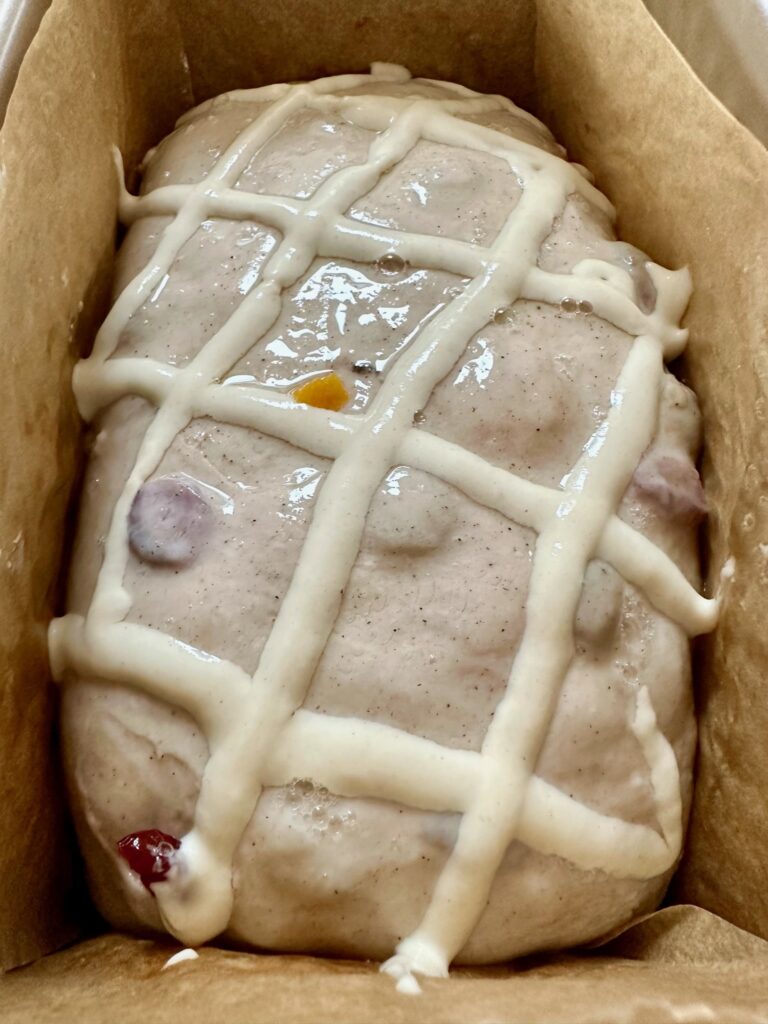
Option: to add the criss crosses, pipe a flour paste design across the top of the loaf before baking. Mix 50 g plain/all purpose flour with 50 g water until it makes a smooth paste, and use a piping bag to pipe lines across the top of the loaf.
A bit rough but it was my first ever attempt!
Step 7: If you preheated the oven, bake the loaf for 45 minutes. If you are using a cold start, place the pan of dough in the oven, set the temperature as above and set a timer for 50 minutes. If the surface of the loaf looks like it is going to bake darker than you would like, cover the top of the loaf with another pan or some foil.
Step 8: Remove the loaf from the oven and the pan, tap the base of the loaf and if it sounds hollow, the loaf is baked. If not, return it to the oven, out of the pan, directly onto the rack to bake it for a further 5 to 10 minutes. Remove it from the oven and allow it to cool briefly on a wire rack before slicing.
To glaze, brush with warmed, melted apricot jam or golden syrup after baking and while still warm.
I must say a huge thank you to the very brilliant Cherie Denham for holding my hand through making these, Cherie is a brilliant baker and cook and helped me hugely! If you’d like hear us in conversation do check out my recent podcast episode – Cherie is wonderful and a true inspiration. Find us talking here:https://foodbodpod.podbean.com/e/the-foodbod-pod-episode-2/and subscribe to the channel so that you don‘t miss future episodes.