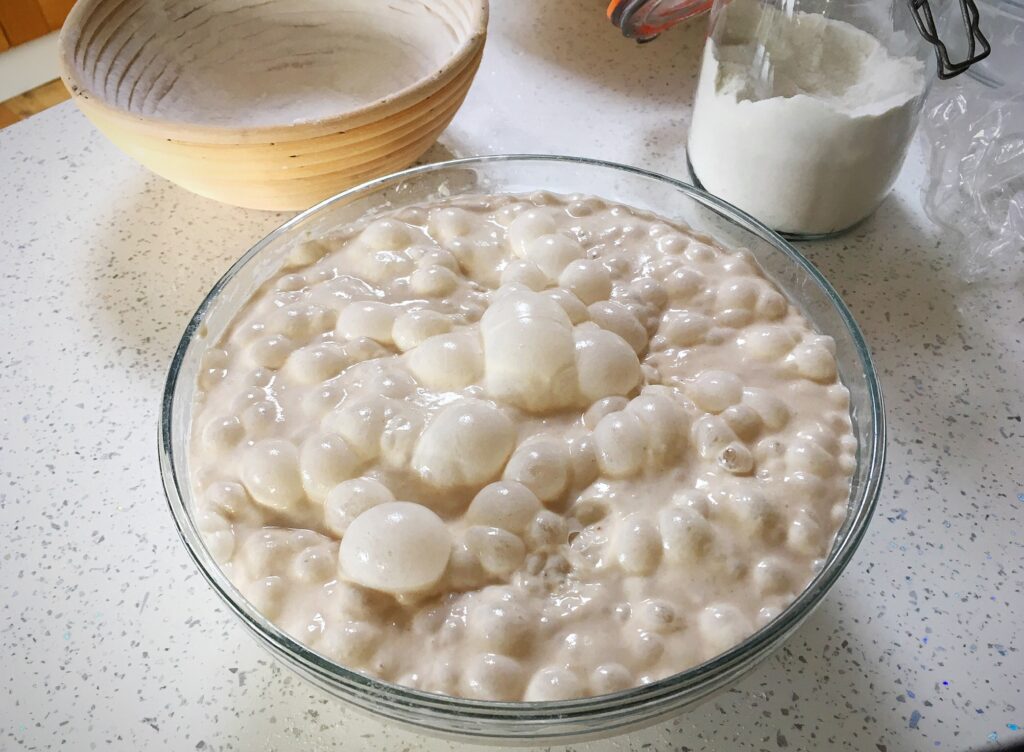
It’s not all about looks…

I thought that I would share again some information about starters that I’ve shared before in case you missed it, are new to sourdough, or to me, or in case there’s some useful reminders…apologies for the repeated info if you’ve seen it before, but I think they’re points worth repeating…

🌟🌟

Starters do NOT need to look a certain way. Not all starters will be bubbly and vivacious, because not all flours produce that. And it doesn’t matter. Focus on growth and how they bounce back after stirring them. Look for life and activity, not appearance.

🌟🌟

Your starter does NOT need to look like mine, and there’s no reason it should. You’re using different flour, different water, and you live in a different place, it all makes a difference to your starter. So don’t compare; if your starter looks and behaves totally different from mine but it WORKS and makes bread that you love, it’s a happy working starter!

🌟🌟

Here’s a rule of thumb for you: if your dough grows, your starter is fine, it’s working perfectly. (If your dough is struggling in the cold, that’s another story, but it’s not about your starter.)

🌟🌟

If yours is a new starter, new starters do not need to be a certain age before being used, they just need to be ready. That might be 5 days or 5 weeks, there is no fixed single answer here. They are all individual, just like their makers. For everyone who’s ever asked me when theirs will be ready to use, the simple answer is: it will be ready when it’s ready, its all part of the joy of sourdough. That time, that waiting and nurturing, and it’s all so worth it. And as your start to use it and work with it, it will gain strength with every use. It’s a win:win! The more sourdough you make, the more strength you build in your starter.

🌟🌟

So please, don’t focus on how your starter looks, focus on how it behaves.

Making sourdough post lockdown…

If you began making sourdough during lockdown and are wondering how it fits in with life as restrictions lift, this post is for you….

🌟

Your starter can sit in the fridge unused for weeks at a time, it does not need to be fed or used unless you’re going to use to it.

🌟

If you make sourdough once a week, your starter will be fine; I only use my starter once a week.

🌟

Batch baking is a great way to remain stocked with sourdough; I always make sourdough in batches.

🌟

Sourdough freezes perfectly; I batch bake and always have stocks in my freezer.

🌟

Sourdough defrosts perfectly; to defrost, place your loaf, or rolls, or whatever you made, uncovered on a wire rack until defrosted. They defrost as crusty as they bake.

🌟

Change up your making and baking timetable to fit in with life and work.

🌟

Find a selection of baking timetables on my site, there is a link from my main page, and others in my book. I also have same day recipes and timetables in my book you might find useful.

🌟

Happy baking!

Don’t blame your starter..

I get many messages from people who are questioning why their loaves aren’t as they expected, and I see posts and comments in groups along the same lines, and people are very quick to blame the starter. It’s an easy conclusion to jump to, but usually unfairly. Because, your starter is rarely the actual issue.

🌟

So when people ask me: why is my loaf flat/gummy/dense/uneven, is it because of my starter? Or, is my starter too weak? Or, should I throw my starter away? Or, do I need to make a new starter?

🌟

This is always my question back:

did your dough grow?

If the answer is yes, then your starter is fine.

Because, if your dough grows, it shows your starter is working perfectly, it’s doing the job it’s meant to do. And in which case, if your loaf is not as you expected it to be, it is for another reason, not because of your starter.

🌟

Note:

If your dough was slow to grow, it could just be cold; if your dough didn’t grow at all, it could just be cold. In both cases, check what the overnight temperature was before immediately assuming your starter is the issue.

If it’s been 18C and under, just allow your dough more time to fully prove and grow to double in size. That’s all it needs.

If it’s been 18C – 20C consistently all night and your dough didn’t grow, only then might there be an issue with your starter.

🌟

Our beloved starters get so much unfair blame when a loaf doesn’t bake as expected, when usually the answer is a proving issue, or some other reason. Look back at my FAQs and posts for tips about doughs and behaviour before throwing some other flour or feeding programme at your starter. And never ever throw your starter away unless it’s mouldy and truly dead.

🌟

And if your starter really does need some help, give it a boost, or some fresh flour, or a new flour. Give it a chance to do it’s thing. There’s life in there, it might just need some encouragement to show itself. Your starter is a living beautiful thing, and as with all living beautiful things, they can have dips in energy, and that’s the time to give it some love and encouragement.

🌟

For more help visit my website. Have fun!

How long…?

A question I am asked daily is ‘how long…?’

This could be ‘how long will it take for my new starter to be ready to use?’ or ‘how long will it be before I can use my starter after feeding it?’ or ‘how long will it take for my dough fully proved?’, these are the main questions that come up.

There is only one answer to all of these, or any question of ‘how long…?’ when talking about sourdough which is…

I literally cannot tell you “how long”. There is no fixed, definitive answer to any of these questions.

I cannot ever tell anyone how long any of that things will take because there are too many factors involved. And understanding that and what these factors are will enhance your sourdough exponentially. Time and patience are the bedfellows of sourdough success, hand in hand with flour, temperature and environment. Which can all sound confusing and impossible to manage, but it’s truly simpler than people think, and as soon as you grasp those elements, sourdough making becomes relaxing and more enjoyable.

If I answer those earlier questions, this will give you a guide to what the main considerations are which you can the apply to your kitchen…

Question: how long will it take for my new starter to be ready to use?

Answer: honestly, it will take as long as it takes. All starters are different. Some take 5 days, some take 5 weeks, they’re all individual. It depends on the flour you use, the temperature in your kitchen, the wild yeast activity in your flour. The key is to let it happen, because it will.

Question: how long will it be before I can use my starter after feeding it?

Answer: this will all depend on the strength of your starter, and the room temperature. If it’s chilly, it will be slower; if it’s warmer, it will be faster. Watch it and it will show you when it’s ready, it will have grown and become active and lively.

Question: how long will it take for my dough fully proved?

Answer: again, this will depend on the strength of your starter, and the room temperature. If it’s chilly, it will be slower; if it’s warmer, it will be faster. This is why all of my recipes include time and temperature hand in hand for the main prove. Read my site and my book and lots of my posts on here for more info.

And one final question, that we all ask: how long do I REALLY have to wait to slice into my freshly baked loaf?

Answer: to eat it at its absolute best, at least an hour, otherwise it will be gummy, but truly, it’s totally up to you!

Time, patience, and understanding how room temperature affects sourdough making, are the keys to success. Read my other posts and hints and tips for more information.

I hope this is all helpful. My best advice is:

🌟 Make notes.

🌟 Watch your starter.

🌟 Watch your doughs.

🌟 They will tell you when they’re ready.

🌟 And most of all, enjoy the process xx

Isabelle’s review…

“Pragmatic no knead, no mess, one bowl sourdough recipes with a 100% success rate. Cannot recommend highly enough.

How much do I love thee? Let me count the ways. I cannot recommend this book highly enough.

I have been baking and cooking for many years. I had a food blog. I collect cookbooks, I read recipes to relax, in bed, at breakfast, for inspiration, for fun.

I have followed Elaine’s meteoric rise from blog writer, to Instagram sourdough goddess, to now published author. Over this period we have had discussions on following recipes. She would say, you have to follow the recipe and I would say, I always wing it. After this exchange I started paying more attention to the recipes in my books. Often crucial information is missing, the writers assume the reader doesn’t need additional information, or else they didn’t think of everything. The difference here is Elaine thought of everything. She is in the kitchen with you the whole time. Her clear instructions, her calm presence and her love of all things sourdough shine through on the page. There is nothing she has not thought of. She is a perfectionist, a pragmatist and a brilliant teacher and her desire for you to succeed is clear as you read. Her creativity is astonishing. Her enthusiasm infectious.

The relevance of this book for the home baker can be summed up by the fact that it includes this FAQ:.

“I have mixed my dough, but I suddenly need to go out, what do I do?”

This tells you the author is a home baker, she understands that there is sourdough and there is your life. She integrates the two. So you can bake sourdough every day for your family, with little effort and no fuss.

What you need to know:

The recipes – you will find

  • How to make your own sourdough starter, how to maintain it, and why it is easy to do
  • One bowl, no knead, no mess master recipe
  • Breads and biscuits, rolls, crackers, sweet and savoury, some examples:
    • Crusted pumpkin seed sourdough
    • Einkorn, cinnamon and cranberry biscuits
    • Focaccia
    • Almond and raisin spelt bread

There are breads with chilies and breads with cheese…and crackers, with buttermilk, with beer. A generous book that could easily have been split into two works.

What makes this book extra special is the level of detail provided to ensure your results are perfect

  • An introduction to the different types of flour and how they will influence the way your dough behaves
  • When to expect your dough to be wet, how to use a scraper, what to do if your kitchen is cold, hot, humid, dry. Ingredient substitutes and alternatives.
  • Stopping your recipe in the middle, flexing it to your schedule.
  • Making your loaf crusty, making doughs more sour, less sour, softening the crust, scoring the bread, issues with scoring, using a lame, stickiness and gumminess, overproofed doughs
  • What I especially love is the level of detail, in the focaccia recipe the author specifies a pan size, she then writes “if you want a thinner,  crunchy focaccia use a bigger baking sheet”

Beyond the book check out Elaine’s website, where I first came across her, or her instagram pages and her youtube videos for a taste of what the book will contain.”

Thank you so much, Isabelle, I’m so glad you like it xxx

Festive enriched sourdough babka…

Take one portion of my enriched sourdough dough, add some mincemeat, roll up, cut up, plait, and bake….and create a lovely Christmas loaf! That’s what I did here…

It tastes so good!!!!! And I don’t even like mincemeat! But partnering it with this dough worked perfectly…here’s what I did…

I made a standard portion of my enriched sourdough using all white spelt flour (you can use flour/s of your choice).

This is a long slow proving dough so it wasn’t fully proved until mid morning, which was the perfect time for the next step: I turned the dough out onto the kitchen counter then stretched it out to a rectangle, matching the width to the length of my loaf pan. I then spread several tablespoons of mincemeat over the dough…

Stretched out dough covered in mincemeat

I rolled this up to a fat sausage, still matching the length of my loaf pan..

Rolled up to a fat sausage

Cut the sausage length ways to make 2 long pieces…

Cut into two

Then plaited the two pieces and lifted the whole thing into a loaf tin liner and into the loaf tin…

Plaited and placed into a liner and tin

I then covered this again with my shower cap and left it on the counter to prove again for a few hours…

And left to prove again

After a few hours the dough had puffed up…

Puffed up a few hours later
Ready to bake

I brushed the top with egg white as per my main enriched recipe, and baked it uncovered, from a cold start, at 160C fan/convection, 180C non fan/convention, for 45-50 mins. It can be baked from a cold or hot start, bake for 5 mins less in a preheated oven.

Golden baked loaf

After an agonising wait, I cut into it…

Perfect topped with cream cheese

I hope you like the look of my babka…if you don’t have, or don’t like, mincemeat, try it with jam, chutney, or any filling of your choice. And if you do make a enriched sourdough babka with my recipe, please do share it and tag me, or send me a photo of your creation…happy baking!

Cherie’s review of me and my book…

As you read this review, I invite you to imagine Cherie’s wonderful Northern Irish accent as you read her words…she makes everything sound wonderful as she speaks…

Cherie says:

“I tried making a sourdough starter seven times and seven times I threw it out.

The more I tried to get it right, the more frustrated I became when it went badly wrong. I tried the “organic apple skin in the starter to bring in the wild yeasts” method; I tried the “organic grapes in the starter” method; and I tried the “very expensive spring water” method. Every single one was a disaster but then, THEN I “insta met” Elaine on Instagram (@elaine_foodbod) and my sourdough life took a wonderful turn.

I promise you it was an epiphany! The mystery, the fear, the nonsense was taken out of sourdough making for me by Elaine and it was just FANNNNTASTIC!!!!

My starter – Esther, named after my Mummy, lives in my fridge until I need her. I take her out, she warms up, gets fed, bubbles and rises and I swear she calls to me to say she’s ready. At this point I’ve made a dough with her and I’ve dried some of her on sheets so that I’ll always have her.

I love Elaine’s tip of “pour tap water, let the chlorine evaporate off overnight and use as normal”. I mean every other recipe was basically saying “use water blessed by 25 Saints at £20 a bottle”. It was a huge thing to me as I had bought so much expensive spring water in the quest for an edible loaf, beautiful looking, beautiful tasting and ready for an instagram debut.

Elaine talked me through a few hiccups along the way…basically because I could not believe things were actually working and effortlessly so.

I never tire of lifting the lid off my pot to see what’s happened in the oven…and the “baking starting in a cold oven!!!!!!” Flip me….. a revelation! I now bake sourdough bread for anyone I can!

Due to Elaine’s informative, easy to follow and great photos in her book I now mix nuts, prunes, raisins, oats, seeds, bacon & cheese into my doughs (but not all at the same time).

Filled with dried fruits

I make cinnamon buns with Elaine’s enriched starter recipe and they are beautiful. Through Elaine I “insta met” Ahren @thegarlictun…his lames are fabulous and my bread took on another new, more grownup look.

Using Elaine’s enriched sourdough recipe

Elaine and her book have taught me so much about grains, what can go into a dough, stretching and folding and MOST IMPORTANTLY relaxing into sourdough making life.

I cannot thank Elaine enough for fixing my sourdough problems she’s so calm gentle and kind. I’ve conquered sourdough, made lots of lovely different breads and made a friend. How lucky I say!

THANK YOU ELAINE XX”

Find Cherie on Instagram @cheriedenhamcooks and enjoy more of her lovely creations!

I even took my starter on holiday and baked this in an unknown oven!

Karin’s review…

“I am a professional Chef/Instructor and have been baking sourdough bread for years.

Today I put all my “old habits” aside and followed, word for word, Elaine’s Master Recipe from her new book, “Whole Grain Sourdough at Home”.

In one weekend I created three of the loveliest loaves of sourdough I have ever baked in my life. Not only were they beautiful on the outside – golden brown and sky high with beautiful little “ears”, blisters, and banneton swirls, but they tasted out of this world. Crunchy, flakey crusts with chewy and airy pockets of soft bread inside.

Thank you, Elaine!”

Chef Karin J. Davis

Sturgis, MI