
One of the key things to know about making sourdough successfully, and something that I write about in everything I produce (and talk about endlessly) is how the weather, especially heat and cold, affects making sourdough.
As soon as I understood this connection, it exponentially improved my sourdough making and this is what I try and pass on to all of my foodbod Sourdough bakers: the weather is a key ingredient in the success of making sourdough bread, and as soon as you understand that, your bread making will fly!
Making sourdough can seem challenging in any environment, but when you throw in heat and humidity it can seem even more so, and as a consequence there will be tweaks and allowances that you need to make, so this is my guide to help you.
My first and strongest advice is to get a thermometer for your kitchen that reads temperature and humidity (see below). This will be your best friend in understanding how to make sourdough successfully and consistently in a hot and humid environment. Alongside that, I highly recommend starting a journal, or keeping a notebook, to log the activity of your starter and your dough making to assist you with making sourdough throughout the year where you live. This can become an invaluable reference book for you.
The key factors are that heat will make your starter and your doughs work faster, it can therefore make your starter become thin and hungry and therefore weak, and the heat can risk over proving doughs. Humidity will only increase that but will also add moisture into your starter or your dough, and can also affect your baked loaf. So here are my tips…
🌟 Starter 🌟
Every time you feed your starter (or make dough) always note the times, temperature, and humidity percentage. Once your starter has responded and grown in size to where you want it to be, make a note of how long it took to get to that point and note again the temperature and humidity in case they have changed. Repeat this across an entire year and you will be able to produce a pattern of behaviour that you can refer back to whenever you want to make sourdough in the future. To achieve this, I highly recommend feeding your starter when you will be able to watch it.
In high temperatures starter could very easily only need 2-3 hours after feeding before it is ready to use.
Beware not to leave your starter out for too long in the heat otherwise it will work through its feed quickly, it will rise and fall then become thin and therefore weak and will need feeding again before you can use it.
If needed, feed it more flour than water to keep it strong, especially if it starts to become thin with tiny tiny bubbles. You can do this as often as you need to; the key is to give your starter what it needs to stay strong and healthy. In this instance, do not worry about feeding it equal weights of flour and water, watch your starter and get to know its behaviour and what it needs. This is far more important than equals weights of flour and water in hot and/or humid environments.
When you feed it, allow your starter to be a good thick mixture, giving it sustenance and body.
And forget ratios or percentages. I never use them, neither are necessary.
Water: Also consider using cold water in your starter and your dough to help protect them and slow down their activity in the heat.
🌟 Dough 🌟
In doughs, to successfully prove overnight on the counter:
Use less starter to offset the heat, literally go right down, even as far as 5-10g if you need to. This will slow down the proving process and prevent over proving. Nothing else in the recipe needs to be changed unless you need to amend the water for the following reasons. To read about making sourdough in the heat, click here. For details about making sourdough in hot AND/OR humid places, keep reading.
In high humidity: dough will absorb extra moisture so use less water to offset the humidity, again, go down in 25g drops. And take notes.
If your dough starts off quite stiff as you’re working with it, don’t worry, it will loosen up.
It’s okay to use 275-300g water if that’s what works. In a humid environment the dough will take on moisture from the air as it proves.
If you also live somewhere where you do not have access to very strong flour: use less water to offset weak flour if needed, reduce it by 25g if you cannot get hold of good flour this will help your dough to be firmer.
If in doubt: if you are worried about leaving the dough out overnight, put the dough in its bowl into the fridge when you go to bed and take it out again the next morning to finish proving on the counter whilst you can watch it.
To prove during the day, use the standard amount of starter but still less water if it is humid. And watch the dough like a hawk. Move it into the banneton and into the fridge as soon as it doubles in size.
If your dough becomes very bubbly in the surface and soft and sticky and hard to manage, it is too wet either from added moisture, or over proving, or both. In this instance, if it still has some body, try moving the dough into a loaf tin to give it support, prove again and bake. Or follow my process to make focaccia. If it’s really liquified, stir in milk and make pancakes, or yoghurt and make flatbreads.
Never ever waste dough, it can always be used. Plus, over proved dough has a lot of great flavour!
Watch this video to learn all about over proving.
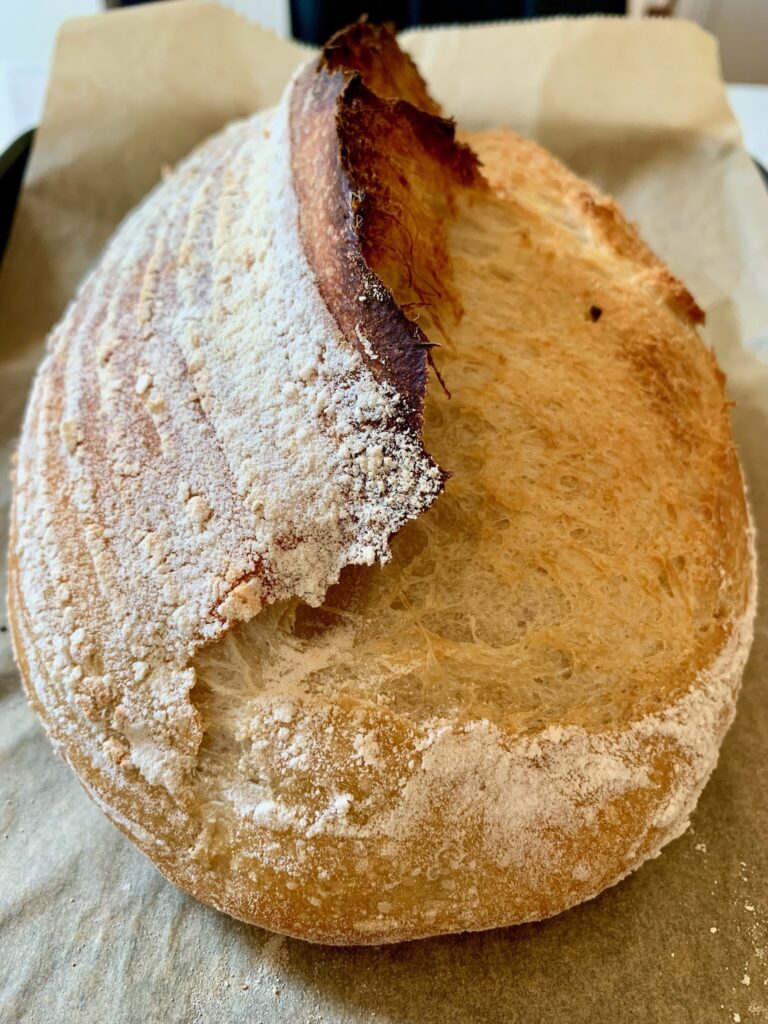
🌟 Baked loaves 🌟
Once baked, leave it an hour before slicing into it, but don’t leave it for several hours on the counter otherwise the humid can make the crust soften and the inside become damp.
A top tip: if you are trying a sourdough recipe that does not refer to room temperature or anything along those lines, you are missing information; I highly recommend you ask the recipe writer for more details, especially if you have had any issues with the outcome.
A rough guide: This is the result of some information I’ve been gathering, all of the doughs have been made using my standard master recipe with strong white bread flour. These amounts allow the dough to prove fully in 9 hours in your counter. The temperatures cover the time that I start making the doughs and overnight. Please note that these are the temperatures IN YOUR KITCHEN, across the making and proving time, not the outside temps.
Between 18-20C: use the standard 50g starter.
Between 21-24C: use 15-20g starter.
Between 23-25C: use 10g starter.
Over 25C overnight, use 1-5g starter. For temps well over 25C consider proving during the day so that you can watch the dough.
These smaller amounts of starter can seem tiny, and you may not believe it will work, but I promise it does.
I hope this all helps.
🌟 This is the thermometer I use: Therm Pro.
🌟 These are notes sent directly from the lovely, Nargess, a foodbod sourdough baker from the UK who I currently residing in Thailand and therefore having to allow for the change of climate in her baking:
“The thermometer and taking notes is so vital.
I found that the weather temp.(heat) dictates the amount of time needed for dough to proof and starter to rise and humidity dictates the amount of water that needs to be added to your dough and starter. I know this sounds like common sense but not having experience with baking in such conditions I didn’t realise this until now. I say this because sometimes its very HOT but not humid.
For MY kitchen and weather I have found that when humidity is between 80-96% my dough needs approx. 2-21/2 hours to prove and then I fold and into banetton and when humidity is between 60-79% then approx. 3-4 hours to prove and as you said, I watch it like a hawk and check on it regularly and as you already know these times can still be variable.
Another thing I do for the starter feeding (the water part) is that I start with less, about 8grams (approx. 1 tablespoon) and if it looks stiff and feels dry after stirring then I add a little bit more, about another 8grams. I check it again after one hour to see how its doing to make sure it has enough water.”
If you’ve had similar experiences please do add them in the comments below…