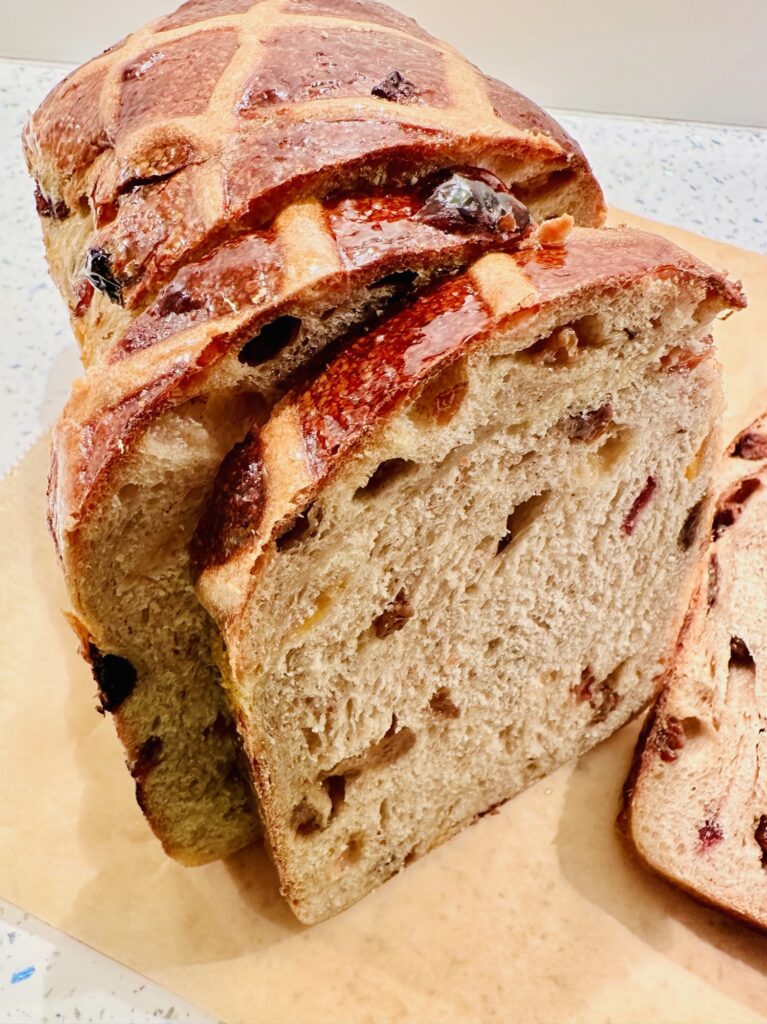
Dispelling sourdough starter myths…

Okay, let’s dispel some myths about sourdough starters, these are all from the various things I’ve read and get asked:

You don’t need to wait at least 14 days to use a starter.
Your starter doesn’t need to rise and fall 28 days in a row before you can use it.
You don’t need to keep them at a particular warm temperature.
You don’t need starter heating gadgets.
You don’t need special water.
You don’t need to stir your starter with a wooden spoon.
Your starter doesn’t need to grow in 4 hours.
You don’t need to discard starter ever again once it’s ready to use.
You don’t need big jars of discard to make ‘discard’ or fast recipes.
You don’t need to feed your starter two or three times, or for several days, to ‘build it up’ ready to use to make dough.

These are just a few of the common things I come across, there’s more, but these are the main ones, regarding starter anyway…so the facts are:

You can use your starter to make dough as soon as it routinely grows after feeding, for me, if it’s grown after feeding on days 4, 5 and 6, then by day 7 I’ll use it to make dough. Aim for yours to grow after feeding 3 days in a row, then use it.
You can use starter from any age in discard/fast recipes, I’ve used starter from 3 days old to make various recipes.
Your tap water is fine for your starter, it’s only in very rare cases that it isn’t.
Your kitchen counter is all you need to make your starter, if it’s really cold, you might want to find a warm spot for short periods of time but that’s all (see previous post about this).
You can stir your starter with stainless steel cutlery, the old adage about metal spoons being bad for starters is based on a time when metal wasn’t the quality we have now and would contaminate starters. Nowadays, stainless steel is perfect and wood/plastic utensils are more likely to carry odours or leftovers from other food stuffs.
You don’t need to collect ‘discard’ to make those kind of recipes, all you need to do is feed your starter produce what the recipe needs. It’s all just starter.
Your starter doesn’t ’have’ to grow and be ready to use in 4 hours, the time it takes to be ready to use will solely depend on your room temp, and if that is indeed 4 hours, that great, but it’s not a requirement or a fixed rule.
You only need to feed your starter once in preparation to use it, all this feeding it 3 times, or for 4 days before using is unnecessary and wasteful.

I hope these tips are helpful. Find more starter tips here.

A plea to stop over heating starters…

This is a copy of a post I added to my Facebook page that I am copying here because I want it logged on my website too…

This autumn and into winter, I have seen a real trend for overheating starters, and consequently many poor starters are over fermenting, and getting thin and hungry as a result from being too warm for too long.

The fact is: A thin starter is a weak starter and will not lift a dough. And by putting starters in so much warmth for so long that’s what will happen.

So please pass this onto anyone you think it might help:

First and fore mostly, please tell anyone that you see doing do so, to stop putting their starters in warm places, places like ovens with pilot lights on/the top of the fridge/the airing cupboard/near the stove/by your Aga/or by wood burners, for hours on end, and days and nights at a time. It’s much too warm for much too long. The starter will ferment like mad and get thin and weak as a result.

I understand that people worry when it gets cold, but I’ve just made 14 brand new starters in my kitchen over the last week, including the one above, and they all just sat on my kitchen counter, at whatever the temperatures happened to be, which happened to be between 13C – 19C that week, and did their thing very happily. I didn’t put them anywhere special, or anywhere warm, just on my kitchen counter.

The fact is: They really do not need to be coddled so much.

A little bit of warmth is fine, but mostly your kitchen counter, or some part of your kitchen, is ideal. You don’t need special gadgets or anything else just your kitchen counter.

I understand that people worry about starters, especially new ones, but they really are far more resilient than people think, just give them a chance to do their thing…yes, some need tweaks along the way, but they don’t need to be cooked.

These are the facts:

If your starter is growing quickly, getting almost frothy, it’s too warm.
If it’s got a layer of dark liquid on the top, it’s too warm.
If it’s got a flat surface with teeny tiny bubbles it’s become thin from being too warm.
If it smells very strongly of acetone, or just very strongly at all, it’s too warm.

These scenarios can all be fixed by feeding your starter less water than flour, making it nice and thick again, then continuing on with the process, on the counter.

Follow the process, follow my tips, and it will be fab!

How to make a sourdough starter, the full step by step video…

You can now watch the full steps of how to make a sourdough starter on my YouTube channel, everything you need to know all in one place!

Find it HERE

Happy making!

Some top tips for your dough making..

Give your dough the time it needs to fully prove.

Watch your dough and not the clock, this is key to ensuring the dough proves as it needs to.

Do not leave dough on the oven overnight with the light on, it?s too warm for too long and it will over prove.

Give your dough time to double overnight; depending on the temperature overnight this may take shorter or longer than my usual times stated in my master recipe.

But if your dough does over prove, use it to make fabulous focaccia or flatbreads. NEVER EVER throw dough away, always use it.

If you dough spreads when you turn it out in the pan, but bakes up to a lovely loaf, don?t worry about the spreading, enjoy your loaf.

If your dough does not look like mine but bakes to a fabulous loaf, that is perfect, it does not matter what the dough looks like if the loaf is everything you hoped for.

Sourdough is a wonderfully slow process, let it happen and enjoy it, it will be worth it.

If you do not have a banneton, line a same sized bowl with a clean tea towel and sprinkle it with rice flour.

If you do not have rice flour, grind some uncooked rice, it is the same thing.

You can use any covered oven proof pan just make sure it is big enough.

You do not need to preheat your oven, or your pan.

Always my biggest and most important tip: If it tastes good IT IS GOOD!

Do not focus on looks and holes and scoring, they do not make it taste any better, plus sourdough is not defined by having ears, or being big round loaves, or full of holes. Sourdough is bread that has been made with a sourdough starter, that is it.

Enjoy what you are creating, do not spoil it by being pulled into the beauty contest.

But, if your loaves are not as you hoped, there?s always ALWAYS a particular reason and an easy tweak.

Check out all of the info throughout my site about flour, weather, scoring, storing, the FAQs, baking times takes, there is lots of free info here for you.

These are just some of the tips I share regularly, but are hopefully useful. Happy baking!

Making my master recipe in a mixer..

This loaf was made using my master recipe with the first mixes done in my KitchenAid mixer. The details below explain how I made it for anyone that would like to, or needs to, use a mixer when making my recipes.

Sourdough can be made in many ways, I love to make mine by hand, but sometimes using a mixer is useful when I have lots of doughs to make, or I want to give my arms a break; as always, there is no mess, no faff, no unnecessary steps with my process. Just simple straightforward steps.

You can use any size of KitchenAid mixer, I used my tilt head one to make this loaf, using the dough hook and the stainless steel mixing bowl that comes with the mixer, and baking in my usual enamel roaster.

PLEASE NOTE: if you are in the UK the amazing people KitchenAid UK have given me a discount code ELAINE15 to share with my bakers.

This code provides a 15% discount across the site and is valid to 31st December 2023 (perfect for Christmas shopping!). Please note that there are a few products excluded from this offer.

This is what I do:

*I use my standard master recipe: 50g starter, 350g water, 500g flour, salt
*I mix the ingredients in the standard stainless steel bowl with the dough hook on setting 1 for 4-5 mins.
*I take the dough hook out and place it in a covered bowl in between uses so that the dough does not dry on it.
*I then cover the bowl and let it sit on the counter for 1.5-2 hours, I then mix it again using the same dough hook on setting 1 for 3-4 mins. I cover the bowl again and let it sit.
*After an hour I perform a set of pulls and folds on the dough with the dough still in the mixer bowl. I cover the bowl again and let it sit.
*Before going to bed I do another set of pulls and folds then cover the bowl again and leave it to prove overnight.
*In the morning, with the dough still in the mixer bowl, I pull the dough into a tight ball and place it into my usual banneton. Covered it and put it into the fridge.
*After a few hours, I turn the dough out into my usual enamel roaster pan, scored, put the lid on and bake at 220C/450F fan/convection for 55 mins from a cold start, with the lid on the whole time.
*And the lovely loaf above and below is the outcome.

The proved dough in the morning
The dough turned out from the banneton
Scored
Baked

I made this loaf using my KA with the standard size 4.3l bowl. I also have a larger sized machine with a 4.8l bowl which is perfect for making 2 doughs at once and still all staying in the bowl the whole time, the double batch fits in it perfectly for mixing and proving. Or you can use whatever mixer you have.

My mixers

TOP TIP: soak your mixer bowl and dough hook in cold water to soak off any dough, not hot water, it will cook the dough onto the bowl.

I also tested using the KitchenAid Bread Bowl with my master recipe and it works well!

The ceramic finish is lovely, the dough does not stick at all, there are lines etched on the inside that are a very useful guide, AND once the dough has been proved in the banneton and in the fridge for a while, you turn the bowl over and bake in it. It works PERFECTLY from a cold start, and the size encourages a beautiful round loaf.

AND I used my brand new Foodbod Sourdough lame to score it.

How I line my Pullman pans for making sandwich loaves..

I use pullman pans a lot in my recipe and when I first got my pullman loaf pans/tins I did not need to line them, but as time has gone on and the coating has started to come away, I find it best to line my pans and the video below shows how I do it.

I use good quality parchment paper, the paper is already 30 cm wide, which is perfect for folding all the way over the top of the pan, and I cut it to 40 cm long, this makes it a perfect size for doing this. When you finish baking and you remove your loaf from the pan, if you then carefully remove the paper from the loaf you can use it many more times so this does not have to be a one off.

To make this loaf I used my standard sandwich life process. For this loaf, I did not use the lid, for many of my other loafs, I do, please refer to my books for more details and recipes. This page will tell you all about my books and how they differ: https://foodbodsourdough.com/which-book/

You can find this exact size of Pullman pan that I use in the US from https://shanassourdough.myshopify.com which works for all of my recipes in my new book, or find it online in other countries.

The size is 21.5×12.5×11.5cm (8.5x5x4.5â€).

Don’t blame your lame..

A question that I am often asked is: where can I get a better lame, mine does not seem to work that well?

And as much as I have a very beautiful new branded lame I might very happily wish to sell you, usually the issue is not actually the lame, it is the dough.

If you are having issues scoring your dough, it truly is unlikely to be an issue with the lame. Instead my questions to you would be:

Was your dough soft and sticky after the overnight proof?

When you turned your dough out from the banneton did it spread?

When you tried to score your dough did the lame just drag through it?

Did the dough collapse and not hold any shape?

But first and foremost, I would ask, how did your loaf bake?

The answer to all of the questions that I get posed about dough and loaves, is always, how did the loaf bake; because if your dough bakes to a wonderful loaf that you thoroughly enjoyed, then it does not matter how the scoring went, or how your dough behaved.

However, if you feel you would like your loaf to be somewhat enhanced or different, then read on..

If you have a nice sharp lame, or a thin sharp blade that you use, and still it drags through your dough, your dough needs some input. If your dough is soft and sticky it either needs less water from the start, or it over proved, or just needs to be pulled tighter for the banneton.

And in which case, this post will help you.

If you are happy with your dough but would like an cleaner surface to score, or more time to score pretty patterns, before baking, place your banneton full of dough into the freezer for 30 minutes, then turn it out, score and bake.

If you would like to purchase one of my lames, of course you would be more than welcome and you can find them here. But to get the best out of using them, or whatever you have got, work on firming up your dough first. Then score slowly, be decisive, and score deeper than you probably think you need to. If I can help, get in touch.

Happy scoring!

Blueberry and goats cheese waffles…

How about a special breakfast, or just a great snack, or brunch, or lunch, or any meal really? I give you my blueberry and goats cheese waffles…

If you don’t like goats cheese, swap it for cream cheese or leave it out completely. If you don’t have a waffle maker, use the batter to make pancakes instead. If you prefer something sweeter, throw in some chocolate chips, the possibilities are endless…

Have fun!

Fast sourdough flatbreads/naans…

How about some fast tasty sourdough flatbreads? These can be used as naan breads, wraps, manaeesh, and easy fast pizza bases. They are great eaten immediately, or can be reheated and refreshed perfectly in the toaster!

You can feed your starter for the job, or use discard if you’ve been making a new starter. The starter provides flavour and texture in these flatbreads rather than lift.

Find full details here…

Have fun! Let me know if you try them xx