This loaf came about from pure experiment because I had some lovely lively starter and wanted to do something different with it, plus I have always got various cartons of buttermilk to hand nowadays, and so this idea was born.
This recipe produced a lovely silky dough which baked into a crusty loaf with a wonderfully soft interior and a great flavour, and the smell was amazing! Due to the inclusion of plain all purpose flour the crumb is pillow soft rather than the usual chewy sourdough crumb, and the buttermilk only adds to that.
I made this loaf with a ‘sponge’ method…
The evening before you want to bake the loaf mix:
100g of very bubbly lively starter
284ml carton of buttermilk (or 300g)
150g of plain/cake flour
Mix it all together really well, get it as smooth as you can, then cover it and leave it out on your kitchen counter overnight. (Top 2 photos below)
 Next morning it should have grown and be spongelike. (Bottom 2 photos above – you can see how much it’s grown between the two sets of photos)
Now add:
300g strong white flour
1tsp salt
2-3 tablespoons of warm water as needed to loosen the dough
Mix it all together roughly, cover again and leave for an hour. (Top 2 photos below)After that hour, bring it into a dough, not too tight, not too sticky, performing some pulls and folds in the bowl to pull it into a smooth dough. (Bottom 2 photos show before and after pulls and folds)
Cover and leave on the counter again.
After a couple of hours you should already see this dough growing happily, the dough may even be starting to grow out of the bowl already; perform just enough pulls and folds to pull it into a ball with a smooth finish, don’t handle it too much.
Place the dough, smooth side down, into a well floured banneton.
Cover with a plastic bag or shower cap and place in the fridge to slow down the proving process and to increase the flavour. You should find that it keeps growing nicely over the next few hours, even in the fridge, as below. This was how the dough looked after only a few hours in the fridge. It grows very fast!
 When you’re ready to bake, take the banneton from the fridge and leave the dough to warm up to room temperature whilst your oven warms up.
Heat the oven to 200C fan/230c non fan.
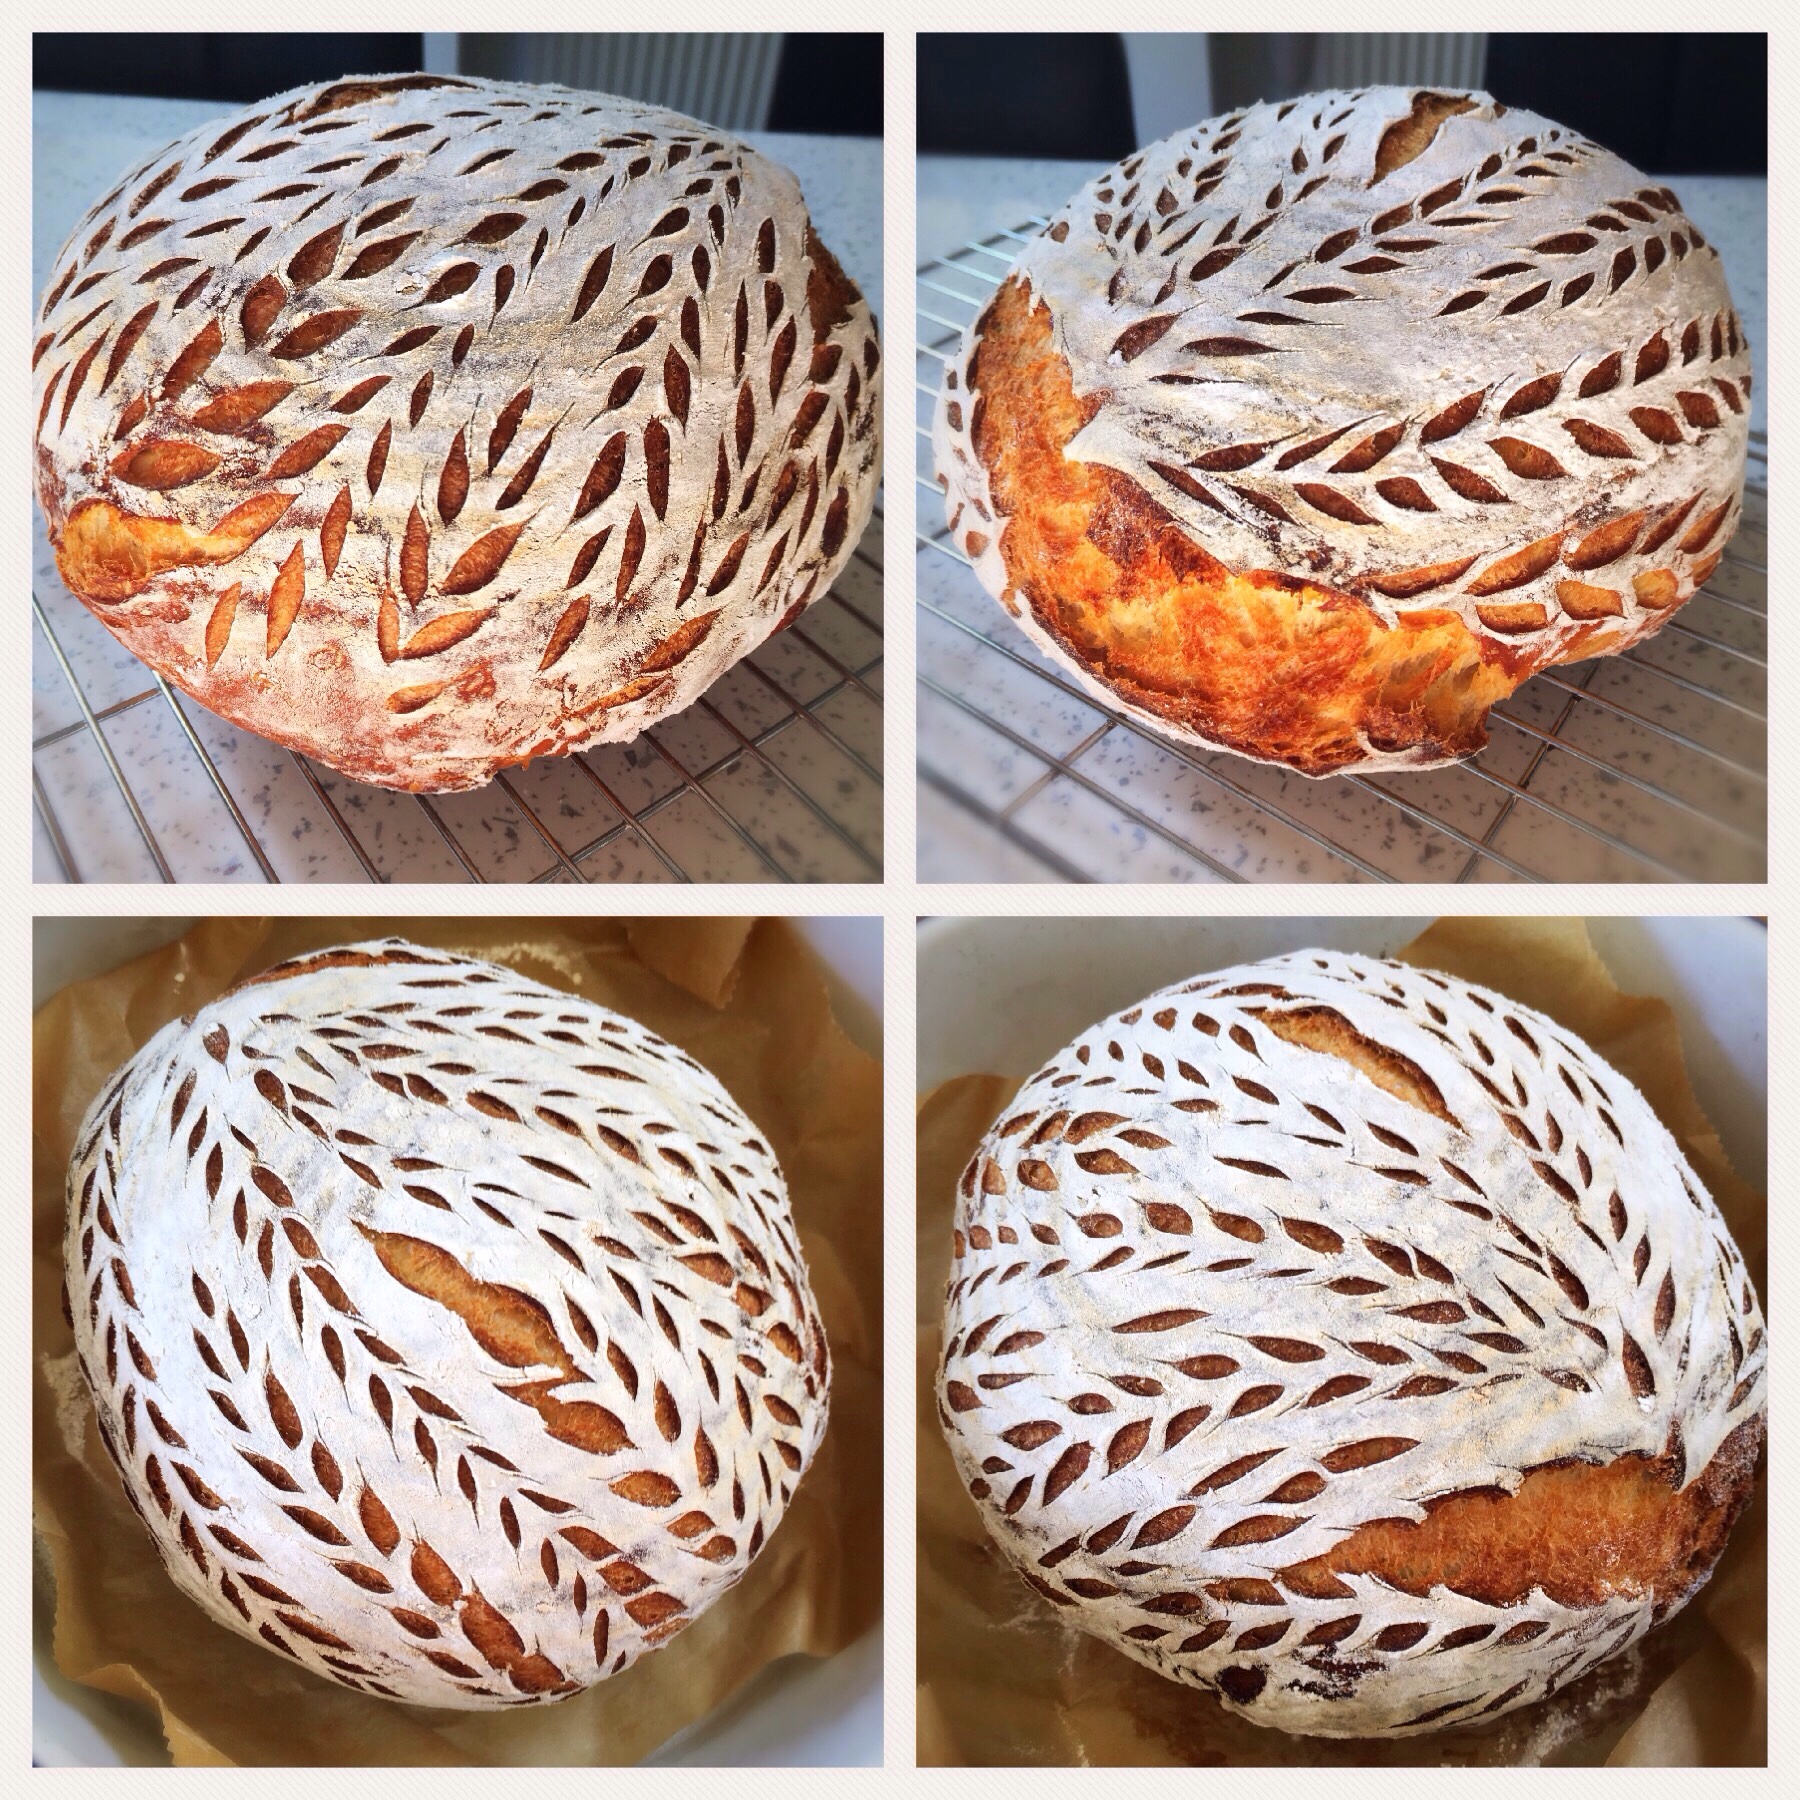
When the oven is ready, place a piece of baking parchment over the top of the banneton, then place the pan you are baking it in over the top and invert it all together to turn the dough out into the pan. You should have a lovely pale dough that holds a good shape.
Slash as you like, then put the lid on the pan and put it in the oven to bake for 50 minutes.
 After 50 minutes carefully turn the loaf out onto a rack to cool. Allow the loaf to cool for at least an hour before slicing.

 As you will see, the crumb is closer than a standard sourdough, which is perfect for making my son’s school sandwiches. In fact, the interior of the loaf was softer than any bread of any type I’ve ever baked. I’ll definitely be baking loaves like this again and again.
And I have now made 3 loaves the same way, this was the third one, and again, the interior is beautifully soft…

NOTE: please always keep in mind that flours differ around the world, yours may need more or less liquid than mine, just as your oven may behave differently from mine.