

This recipe utilises my master recipe as a base, and the dough is made with Cotswold Flour pizza flour, link below. This flour has been created specifically for making pizza bases (but is also great for making sourdough loaves too as I can fully attest) and is made with strong white bread flour plus a flour conditioner, vitamin C powder (aka ascorbic acid), which helps to produce not only a great structure in the dough but mostly to give us a wonderfully relaxed and easy to stretch dough which is ideal for making pizzas.
If you don’t have access to this flour, try using straight strong bread flour, all purpose flour or type 00, the same guidelines will apply, all you may need to do is tweak the amount of water but I’d still suggest using my quantities as your starting point. Or you could try adding a tablespoon of lemon juice to your mix or some vitamin C powder (ascorbic acid) to see how it changes the feel and behaviour of the dough.
What you need to know about my pizza dough recipe…
Water: I have got 2 versions of the same recipe, the only difference being how much water is used in the mix. I never talk about hydration percentages as I find it redundant information, I’m only using them here as an example to explain what I’m sharing. For information only and to compare, my standard master recipe is 70% hydration; all that means is that as a standard, the water content (350g) is 70% of the flour content (500g).
The first version of the recipe therefore uses what equates to 60% hydration and the second version equates to 65%. The one with less water is a perfect starting point for your pizza making as it produces dough that is easy to work with and not too soft and scary. This version is also ideal if you are doing the first mixes in an electric mixer.
If you feel comfortable with that level of water then try to slightly higher one and see how it feels.
Both options produce perfectly light and airy pizza crusts and tasty bases.
Starter: I have used less starter than usual in these recipes as it is summer at the moment, and summer is often a pizza making time. Feel free to increase it to my standard 50g if you feel it’s needed taking into account all of the information about making sourdough and how it is affected by the weather and heat.
Yield: as there are 3 of us in my family, these recipes produce 3 balls of dough, and each ball is perfect for a 12” pizza base.
You can easily scale this up or down based on your requirement.
Flour: As mentioned above, click HERE for the pizza flour I have used in these recipes.
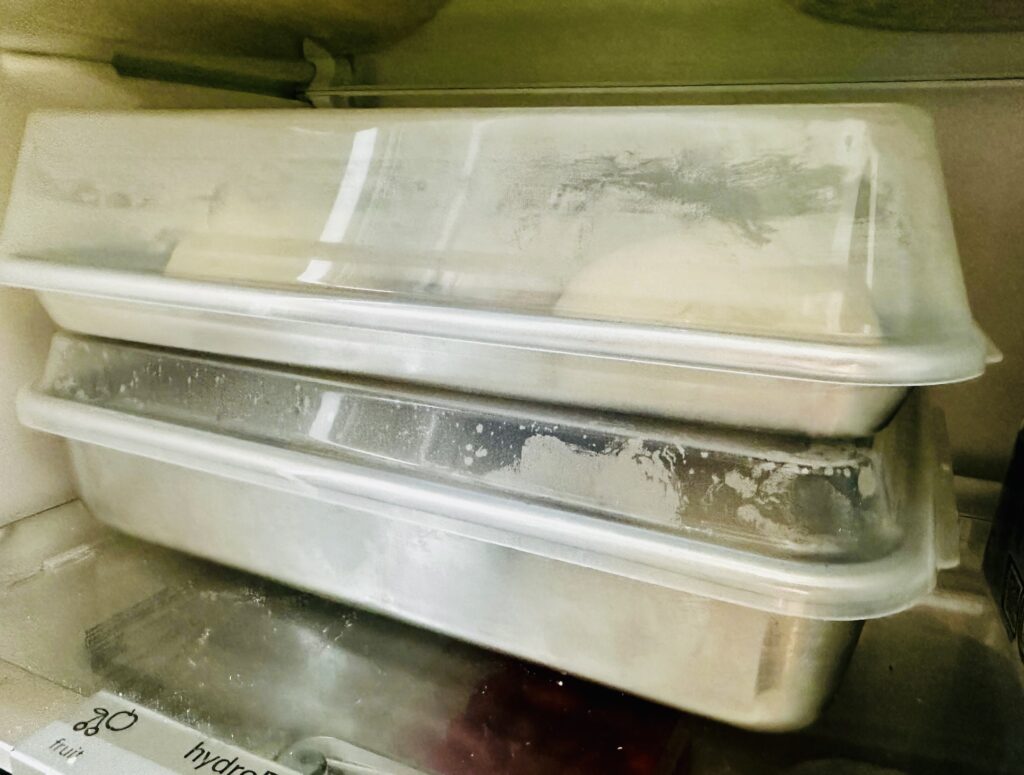
Timing: these doughs REALLY benefit from a long rest in the fridge, 2-3 days works well, I’ve even left them for 5 days before using the dough balls and they’ve been fine. This can really help with planning ahead.
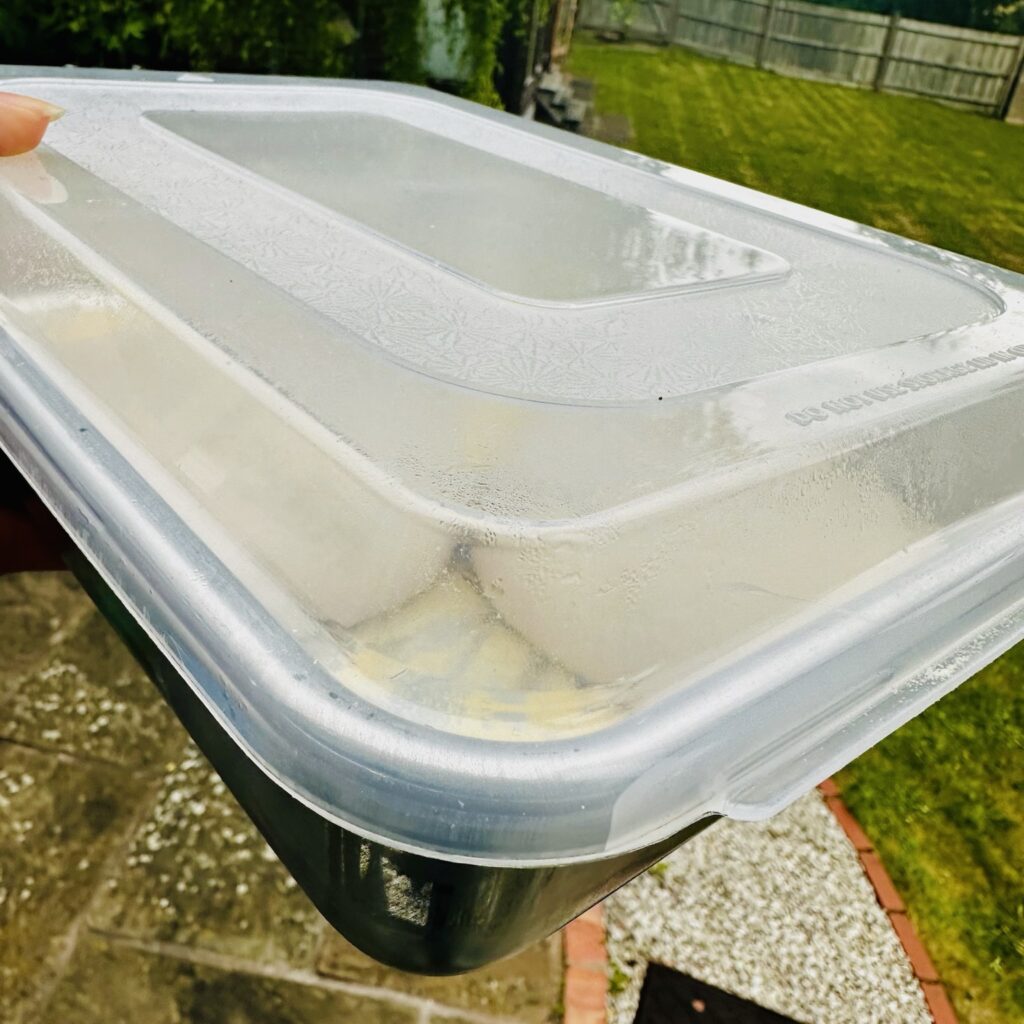
Equipment: a covered pan like the one I use is perfect for proving the dough balls in the fridge, if you can I highly recommend getting one or some, plus these will work well for making focaccia and other things. Mine is a ‘Nordic Ware Naturals Baker’s Quarter Sheet with Lid, Aluminium Baking Tray’.
You can find the ones I use here in the US. Or here in the UK.
Also needed:
Mixing bowl
Digital scales
Bowl scraper
Shower cap

Version one (60%):
20g starter
270g water
450g pizza flour (see intro)
Salt to taste
Version two (65%):
20g starter
290g water
450g pizza flour (see intro)
Salt to taste
Fine semolina flour or rice flour
Method
Step 1: late afternoon/early evening, roughly mix together all the ingredients in your mixing bowl, cover with your shower cap and leave the bowl on the counter.
Step 2: after 2 hours, perform one set of pulls and folds on the dough, lifting and pulling the dough up and over and across the bowl, repeatedly, all the way round and round the bowl, until it becomes smooth. The dough will be stretchy. Cover the bowl again and leave it on the counter.
Step 3: After 1 hour, perform two more sets of pulls and folds, each time the dough should come into an easy bouncy smooth ball. Each time it comes into a ball, cover the bowl again and leave it on the counter. These actions do not need to be a set time apart.
For more details about how I make my dough and what this recipe is based on, visit my full master recipe: https://foodbodsourdough.com/the-process/
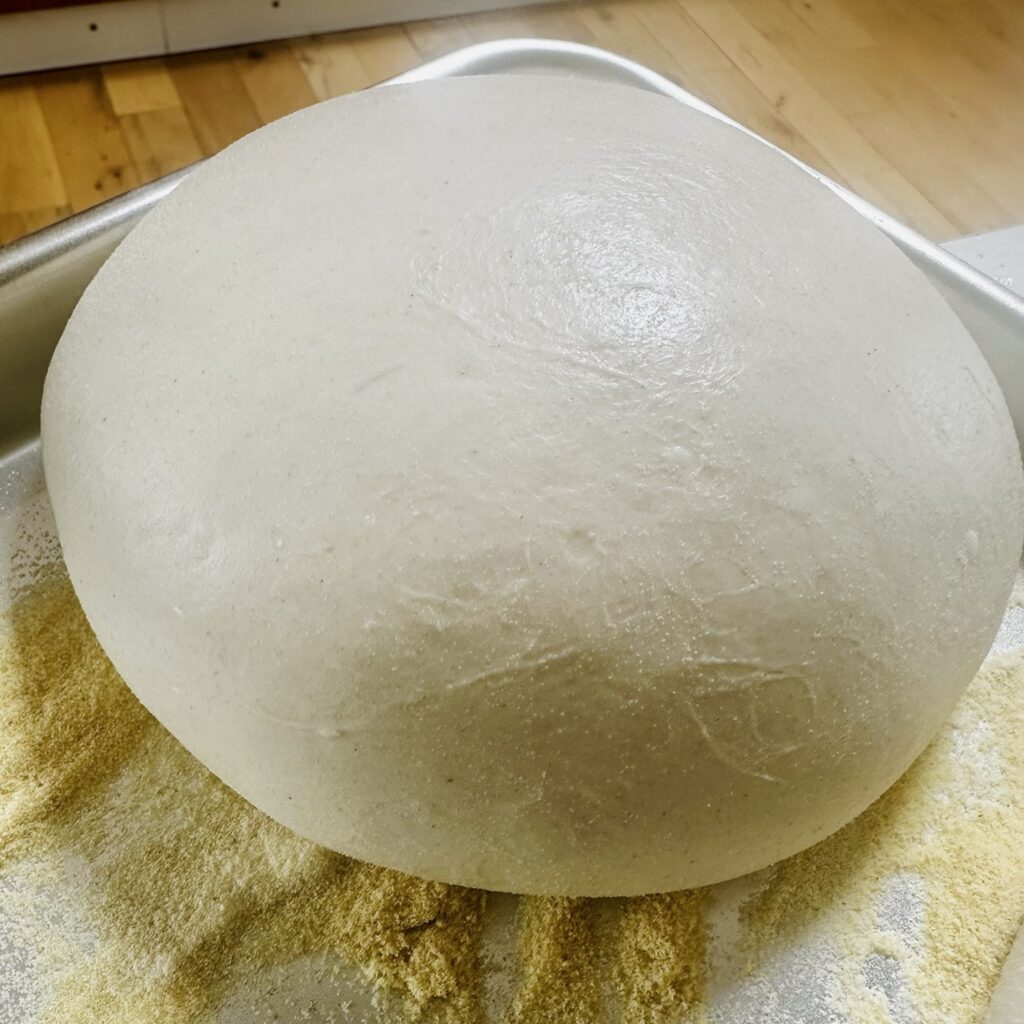
Step 4: Leave to prove overnight/until doubled in size.
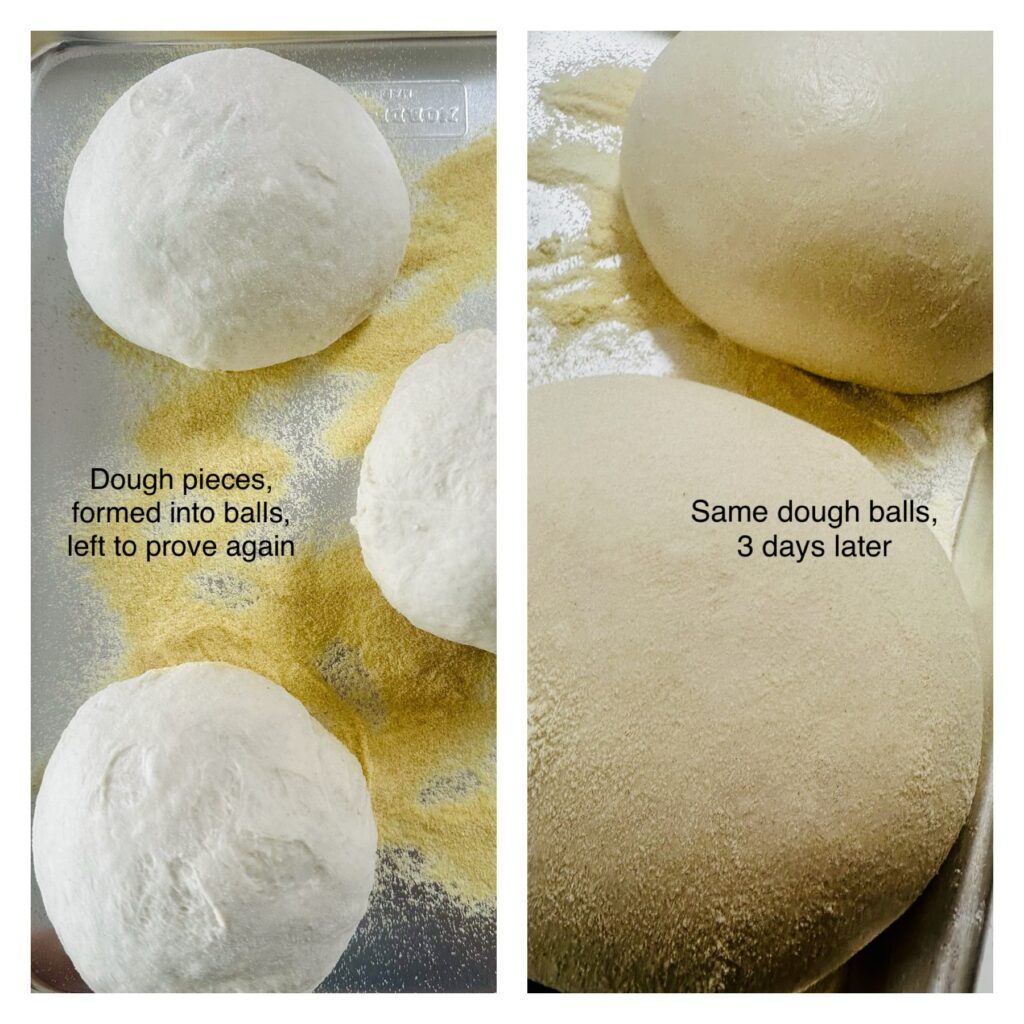
Step 5: Split the dough equally into 3 pieces. Sprinkle semolina or rice flour in your pan/tub and over the counter. Shape the dough pieces into tight balls, place them smooth side up in your prepared pan, cover it, and place it into the fridge. It will prove again and the dough will develop into the beautiful orbs of dough you can see in my photos.
Step 6: to then use the dough, my pizza advisor, Scott’s (see below) best advice, and what I’ve been doing as a result, is to take the covered pan holding the balls of proved dough from the fridge a few hours before needing to use them, this helps the dough to relax which makes them easier to stretch and handle.
To use: shape your base, top with your favourite toppings and cook/bake it as you always do.
Or for lots of tips and to see and hear more about this, watch our new podcast episode with Scott and see him give me a lesson in shaping pizza bases – and in that episode I am using sourdough pizza doughs made exactly as above so you’ll be able to see it in action. Have your dough made and ready!
Listen:
Apple: https://podcasts.apple.com/gb/podcast/the-foodbod-pod/id1670904926?i=1000665566081
Spotify: https://open.spotify.com/episode/1a7lsV2w51qYRq8zSw5ucx?si=IK29cjJ0T8a5wu1CjRSuVA
Or search for the Foodbod Pod on all podcast platforms.
Watch:
YouTube: https://youtu.be/xWwv1-6IK0o?si=40MUvD_Gx26Lk7YJ

all coming up on the next episode!
Looks amazing, thanks for sharing!
Hi Elaine… superb, detailed video! I’m trying to locate your tomato base recipe please? Thanks again, Peter
Thank you 🙏🏻🙏🏻 it’s Scott’s recipe I’m afraid, it’s in his book..
Elaine when’s the best point to freeze the dough ball please.
Hi, before or after the main prove 👍🏻
Hi, can you freeze the pizza once it is made and cook from frozen?
Sorry, I haven’t tried it 🙏🏻
Hi Elaine, I have followed this recipe and the pizza’s were delicious!
I froze some of the dough and am thinking of using it over the next few days. What process do you recommend for defrosting ready to use?
Thanks
Great news 👍🏻 literally defrost it in your mixing bowl then use it 👍🏻
Please give me the starter recipe and how much of starter do I use for three balls of them thank you
How to make a starter (written steps):
https://foodbodsourdough.com/how-to-make-a-starter/
How to make a starter (full step by step video):
https://m.youtube.com/watch?si=Qq0eK9V9-O1v7nmj&v=o9R79a4s-BI&feature=youtu.be
Hi Elaine, today my pizza dough is day #3 in the refrigerator and I’m planning to make pizzas this evening. My balls of dough really don’t look any different than when I put them in the refrigerator 3 days ago. I don’t see any growth. I used King Arther bread flour as I usually do for your Master Sourdough recipe. I’m just wondering if this indicates a problem?
No, they should be fine
Hi – if using supermarket 00 flour (in UK), should we reduce the amount of water by 25g as you recommend for your master recipe? And, more generally, is it ok to just double the recipe for 6 pizzas? Thanks!
Hi, you can scale the recipe up or down as you want to, and you shouldn’t need to reduce the water with 00 flour 👍🏻