
These rolls were made using my master recipe, link to the left, using Shipton Mill finest bakery no.1 white bread flour, but I also think that their Canadian bread flour would work well as it creates a slightly firmer dough in my experience. I also think they’d be lovely with various mixes of flour..
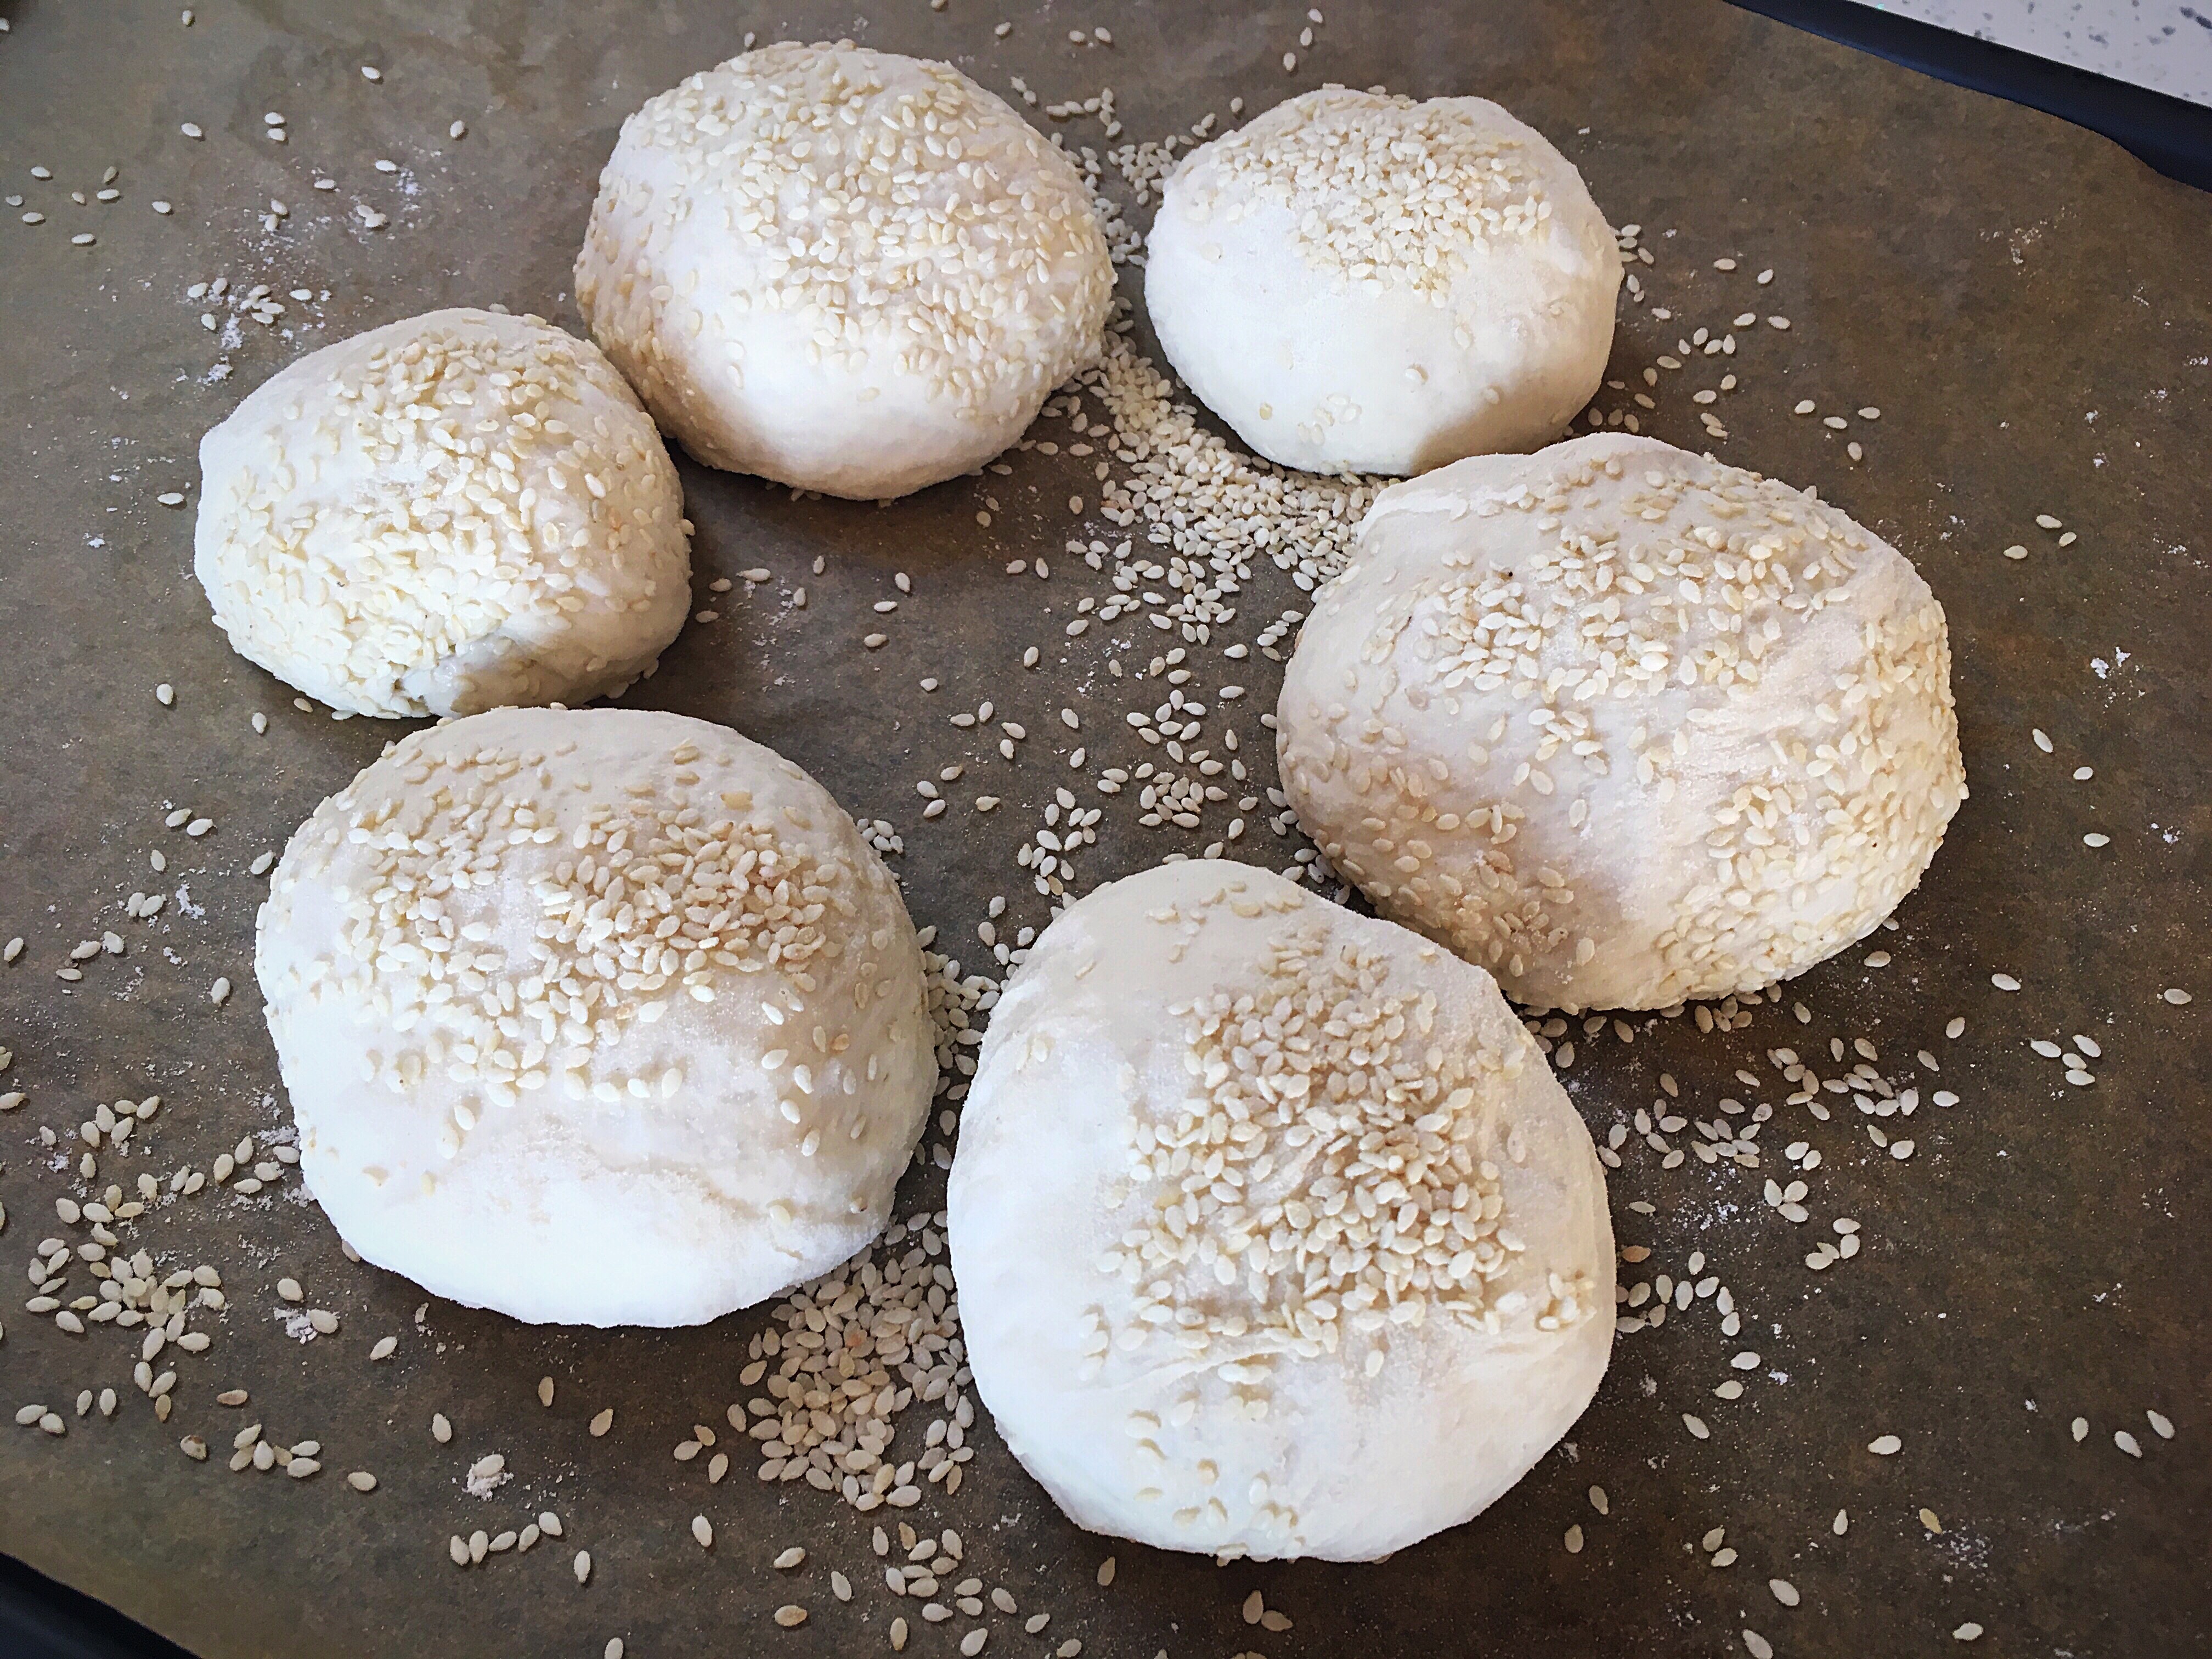
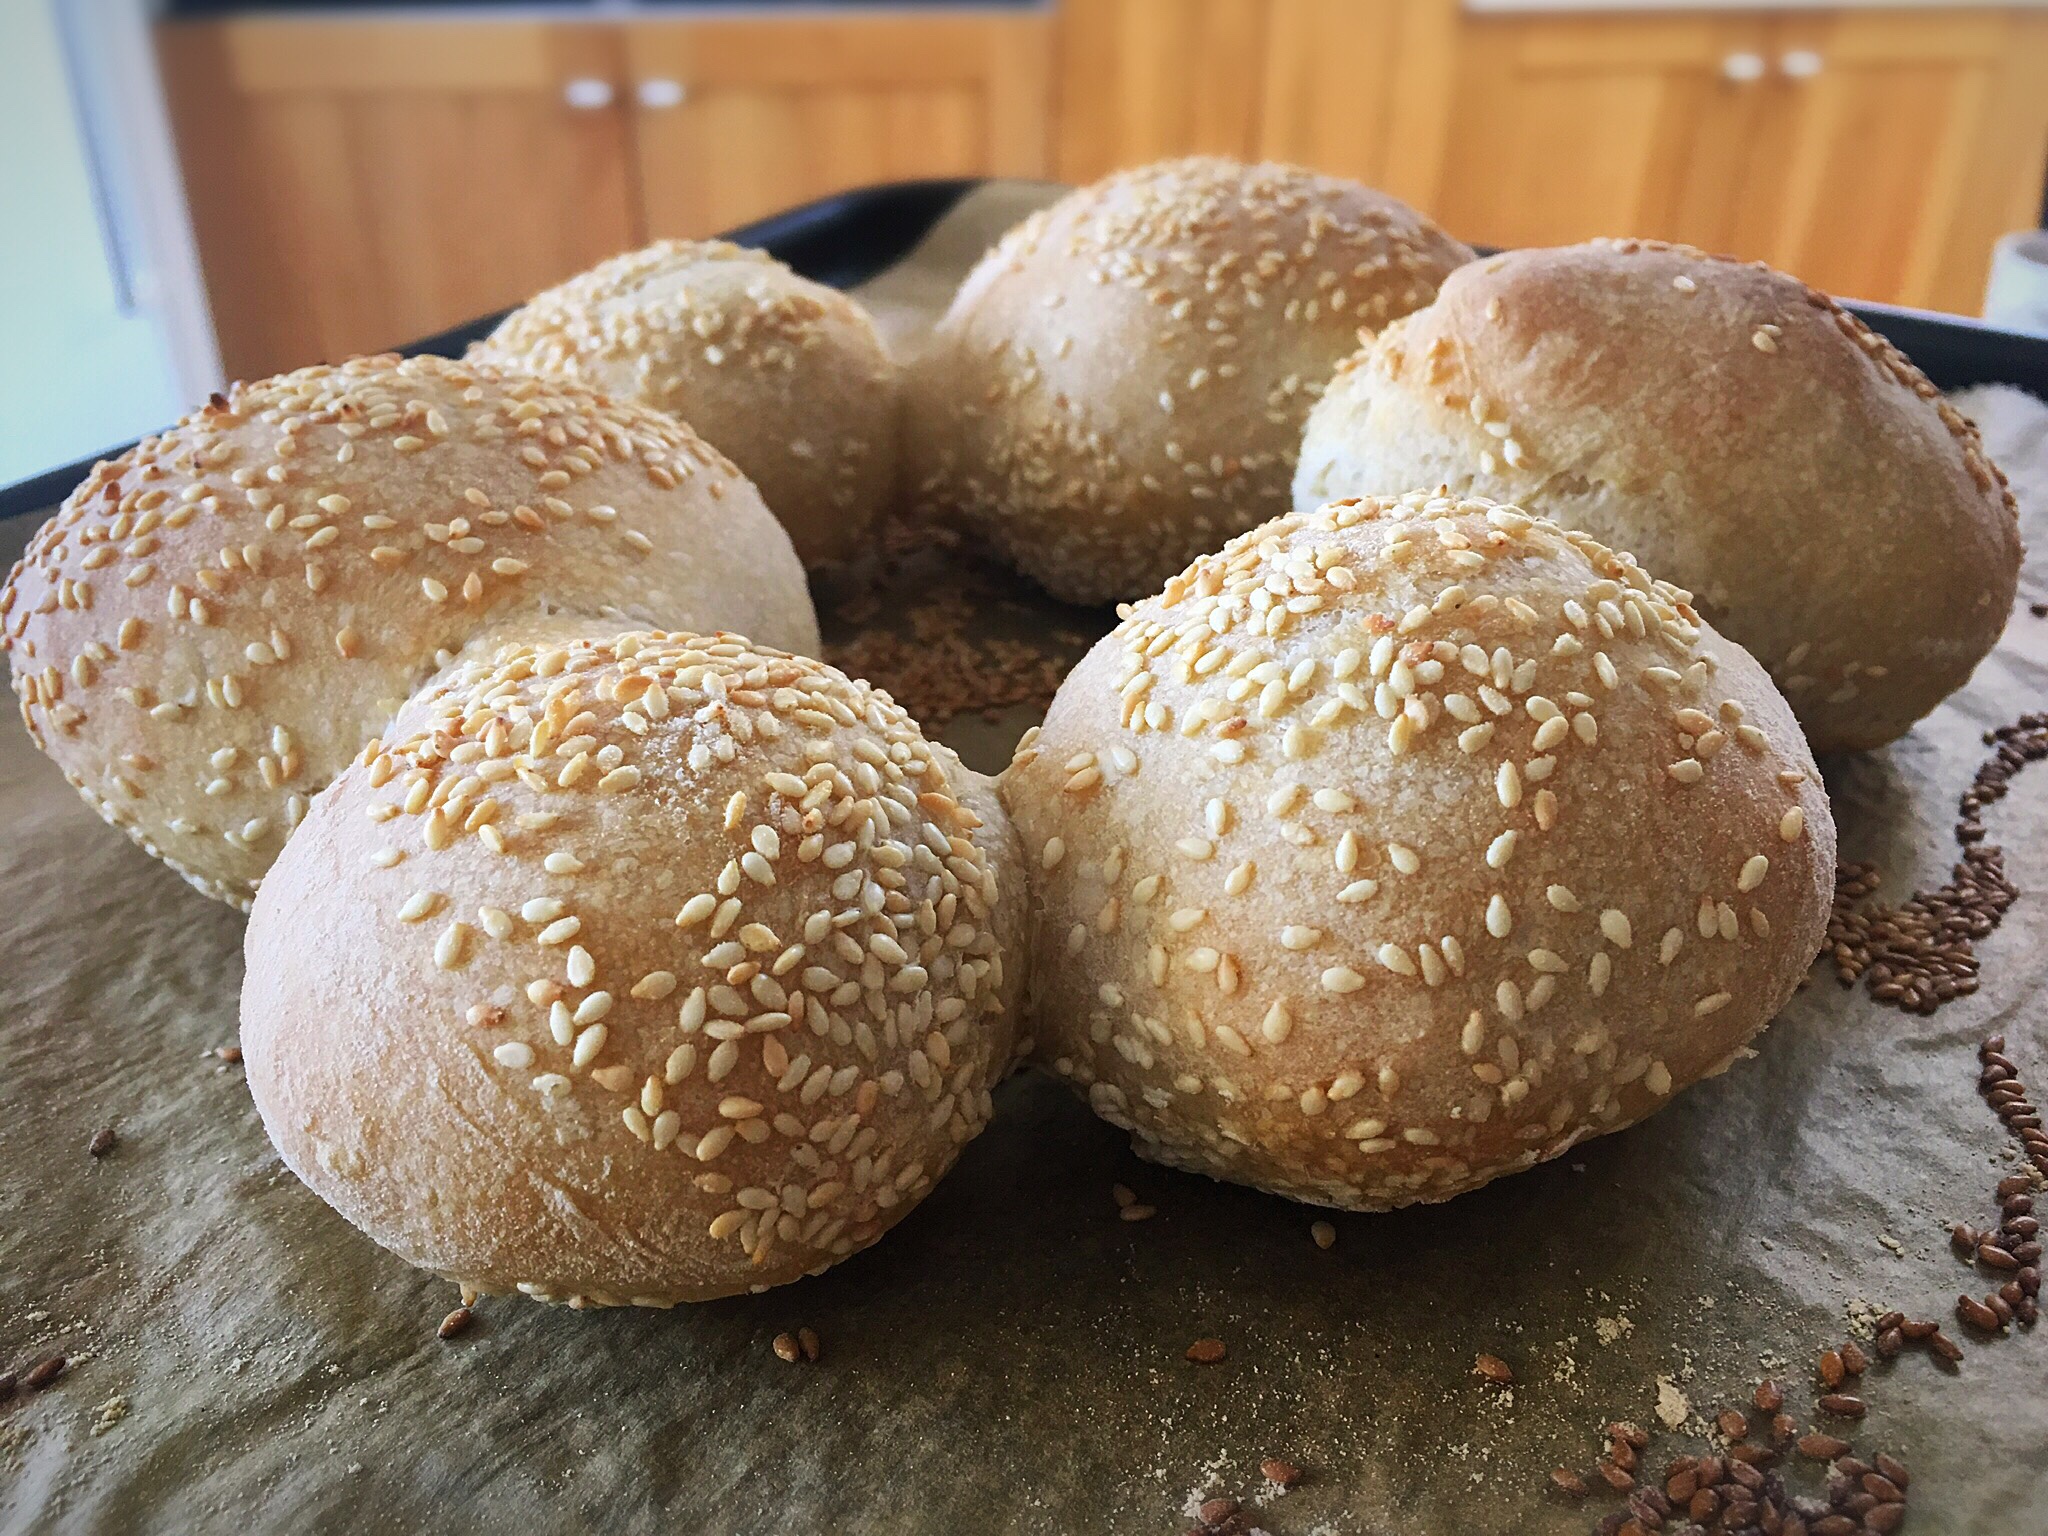
This week my lovely baking friend Steve and I made sourdough rolls together; I followed my master recipe exactly as it is, then after the overnight prove I pulled the dough together gently, placed it onto a floured surface then we cut it into 16 equal portions..as modelled by my lovely helper…
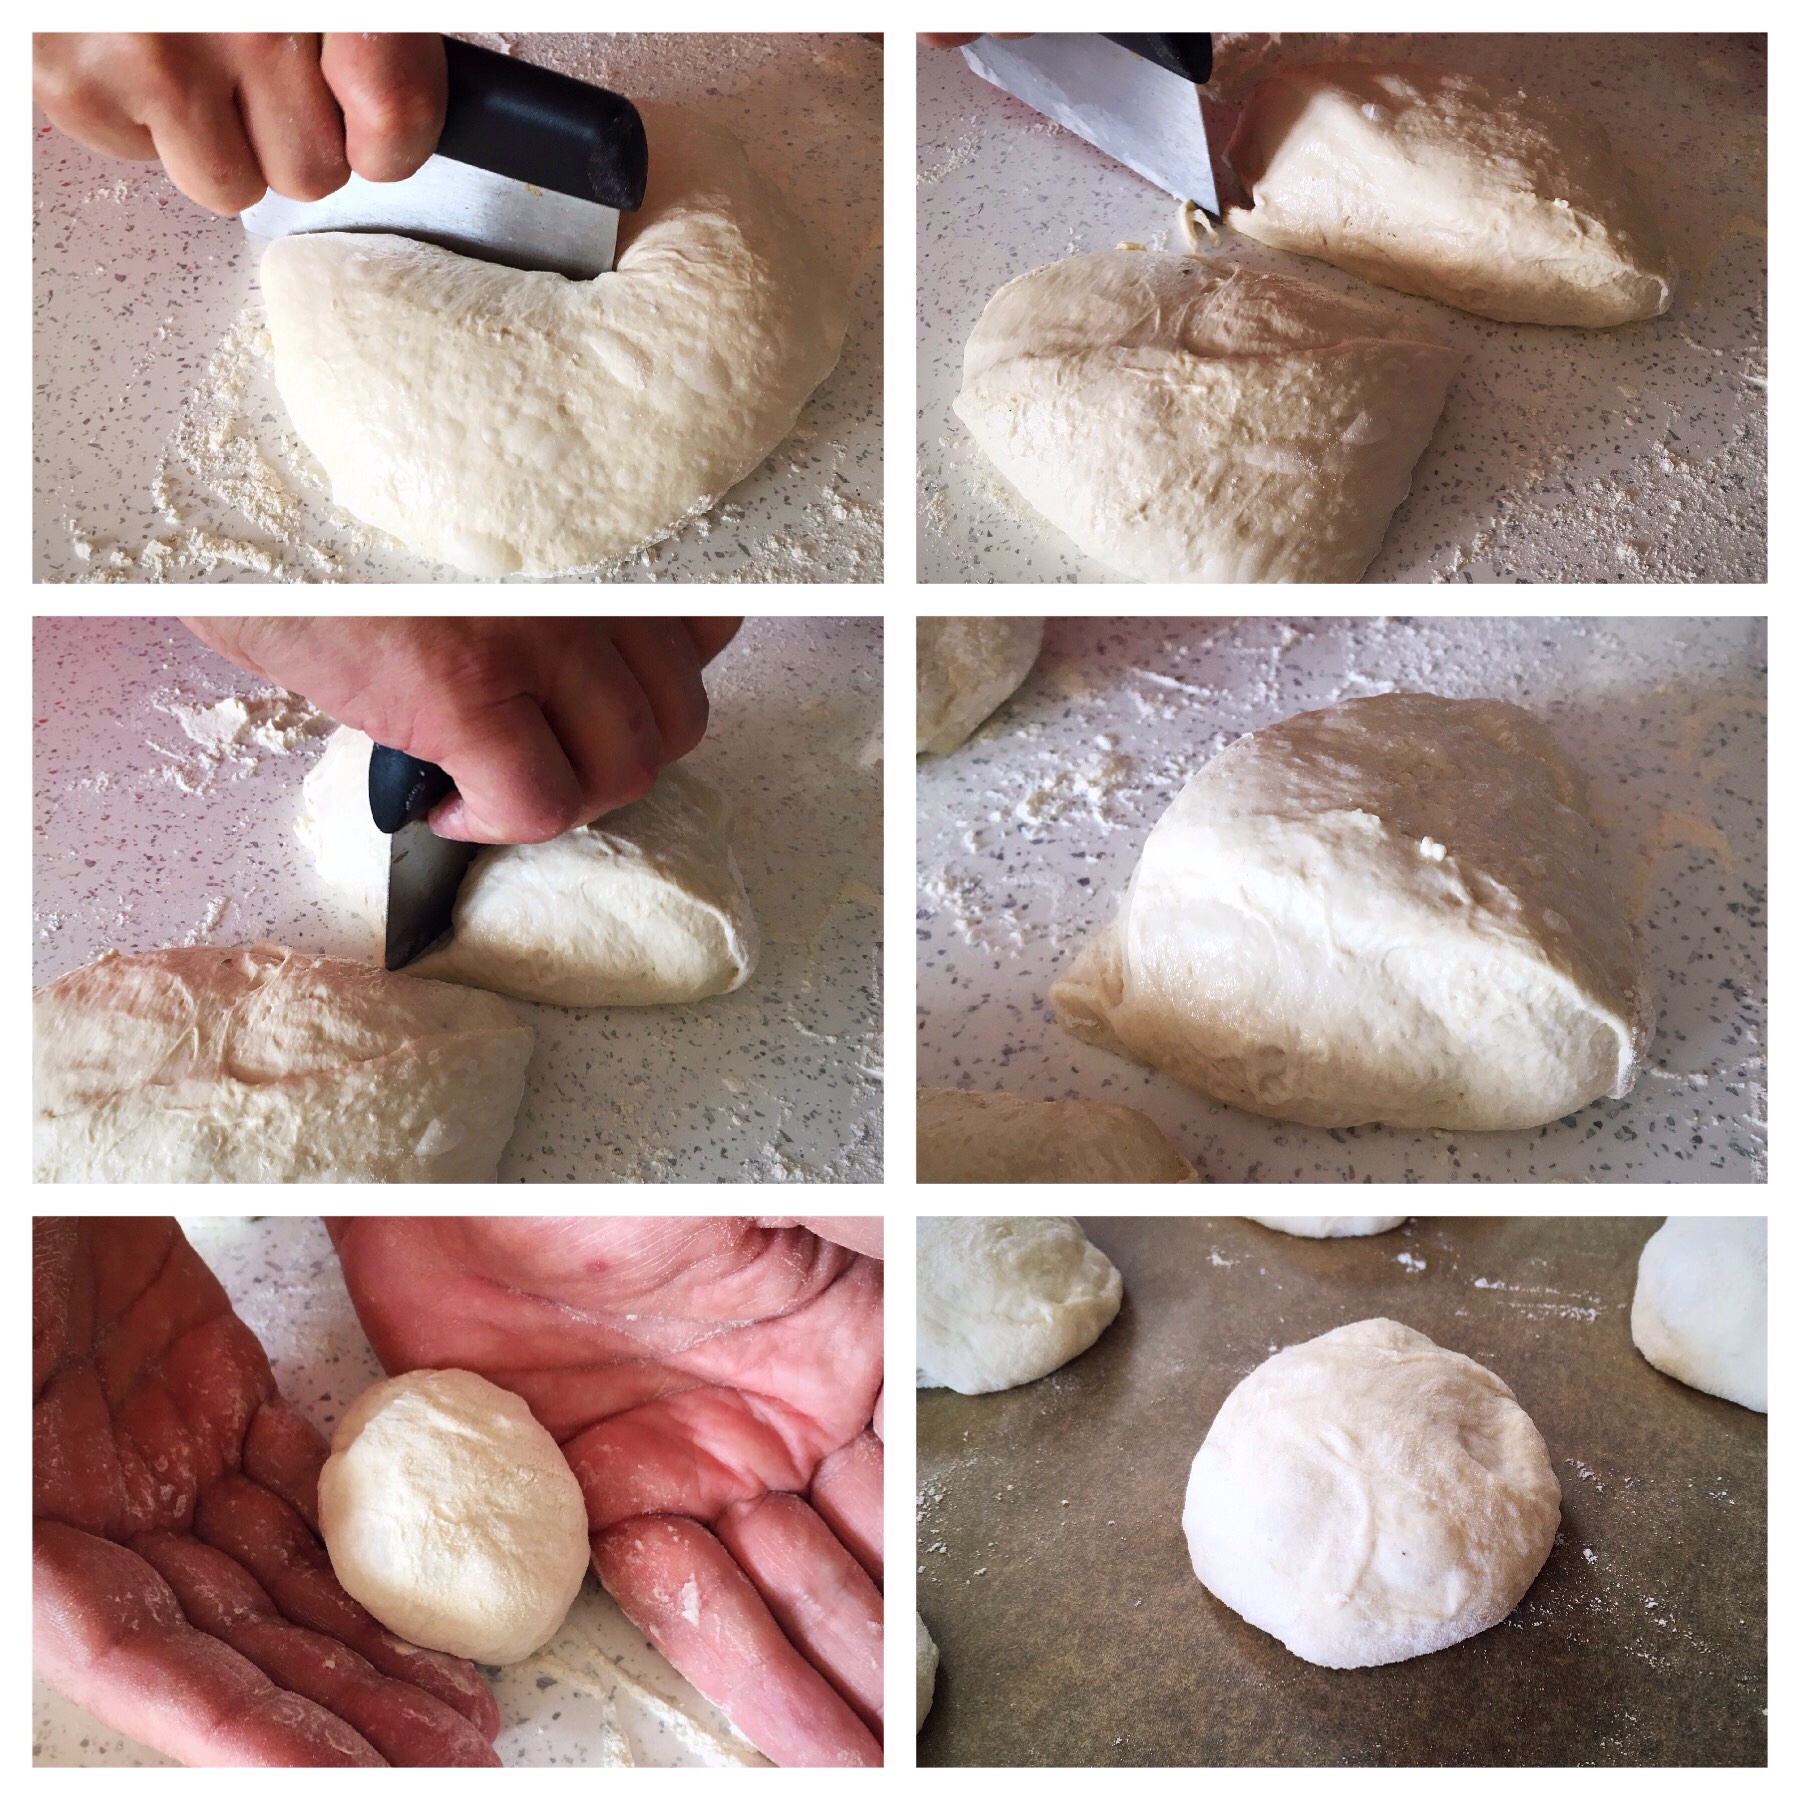 These pieces were rolled gently into rounds with the sides of our hands – very gently, the dough was very light and airy, and we wanted to preserve the bubbles – and placed onto a baking tray lined with parchment paper.
We then left them to sit for 10-15 minutes whilst preheating the oven to 200C fan (220C convection)
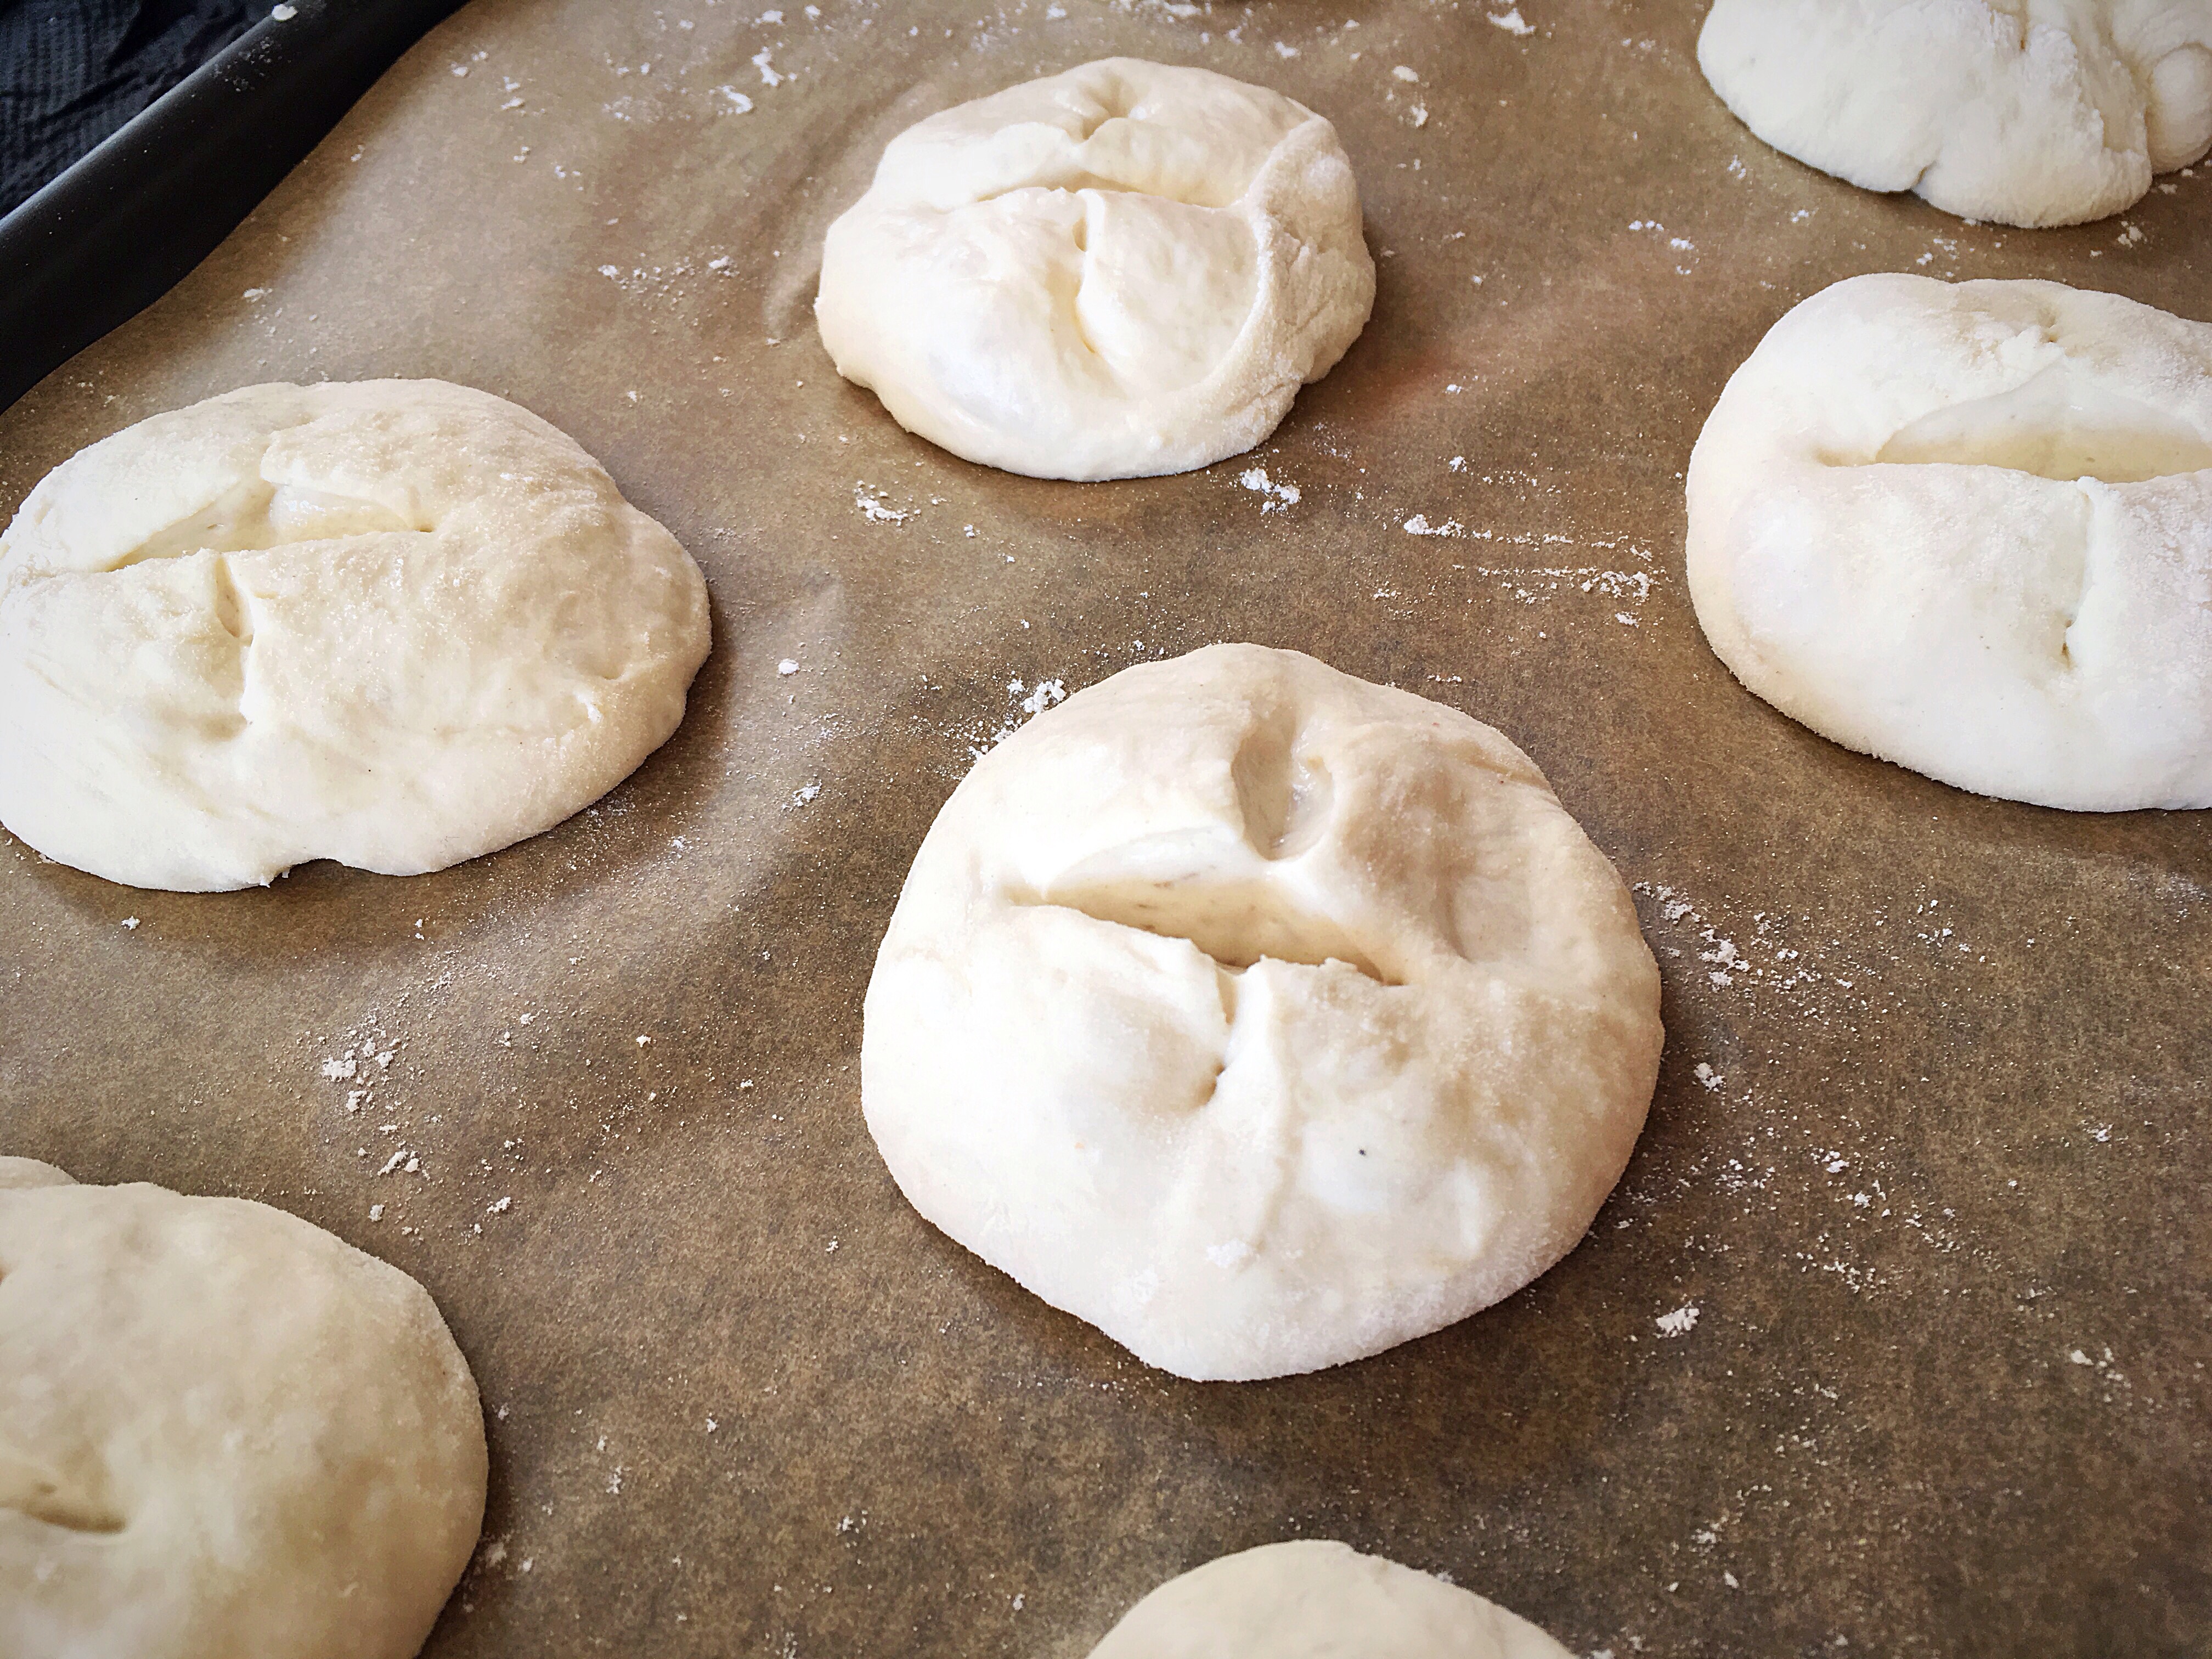
As they sat they did spread a little, and grow a little, which is good as it shows that the starter is still active.
They were too soft to score so I snipped crossed in the tops with scissors..
We baked them for about 18 minutes, turning the tray around half way through so ensure an even colour across the top.
As they baked we watched them grow beautifully, up into lovely balls.
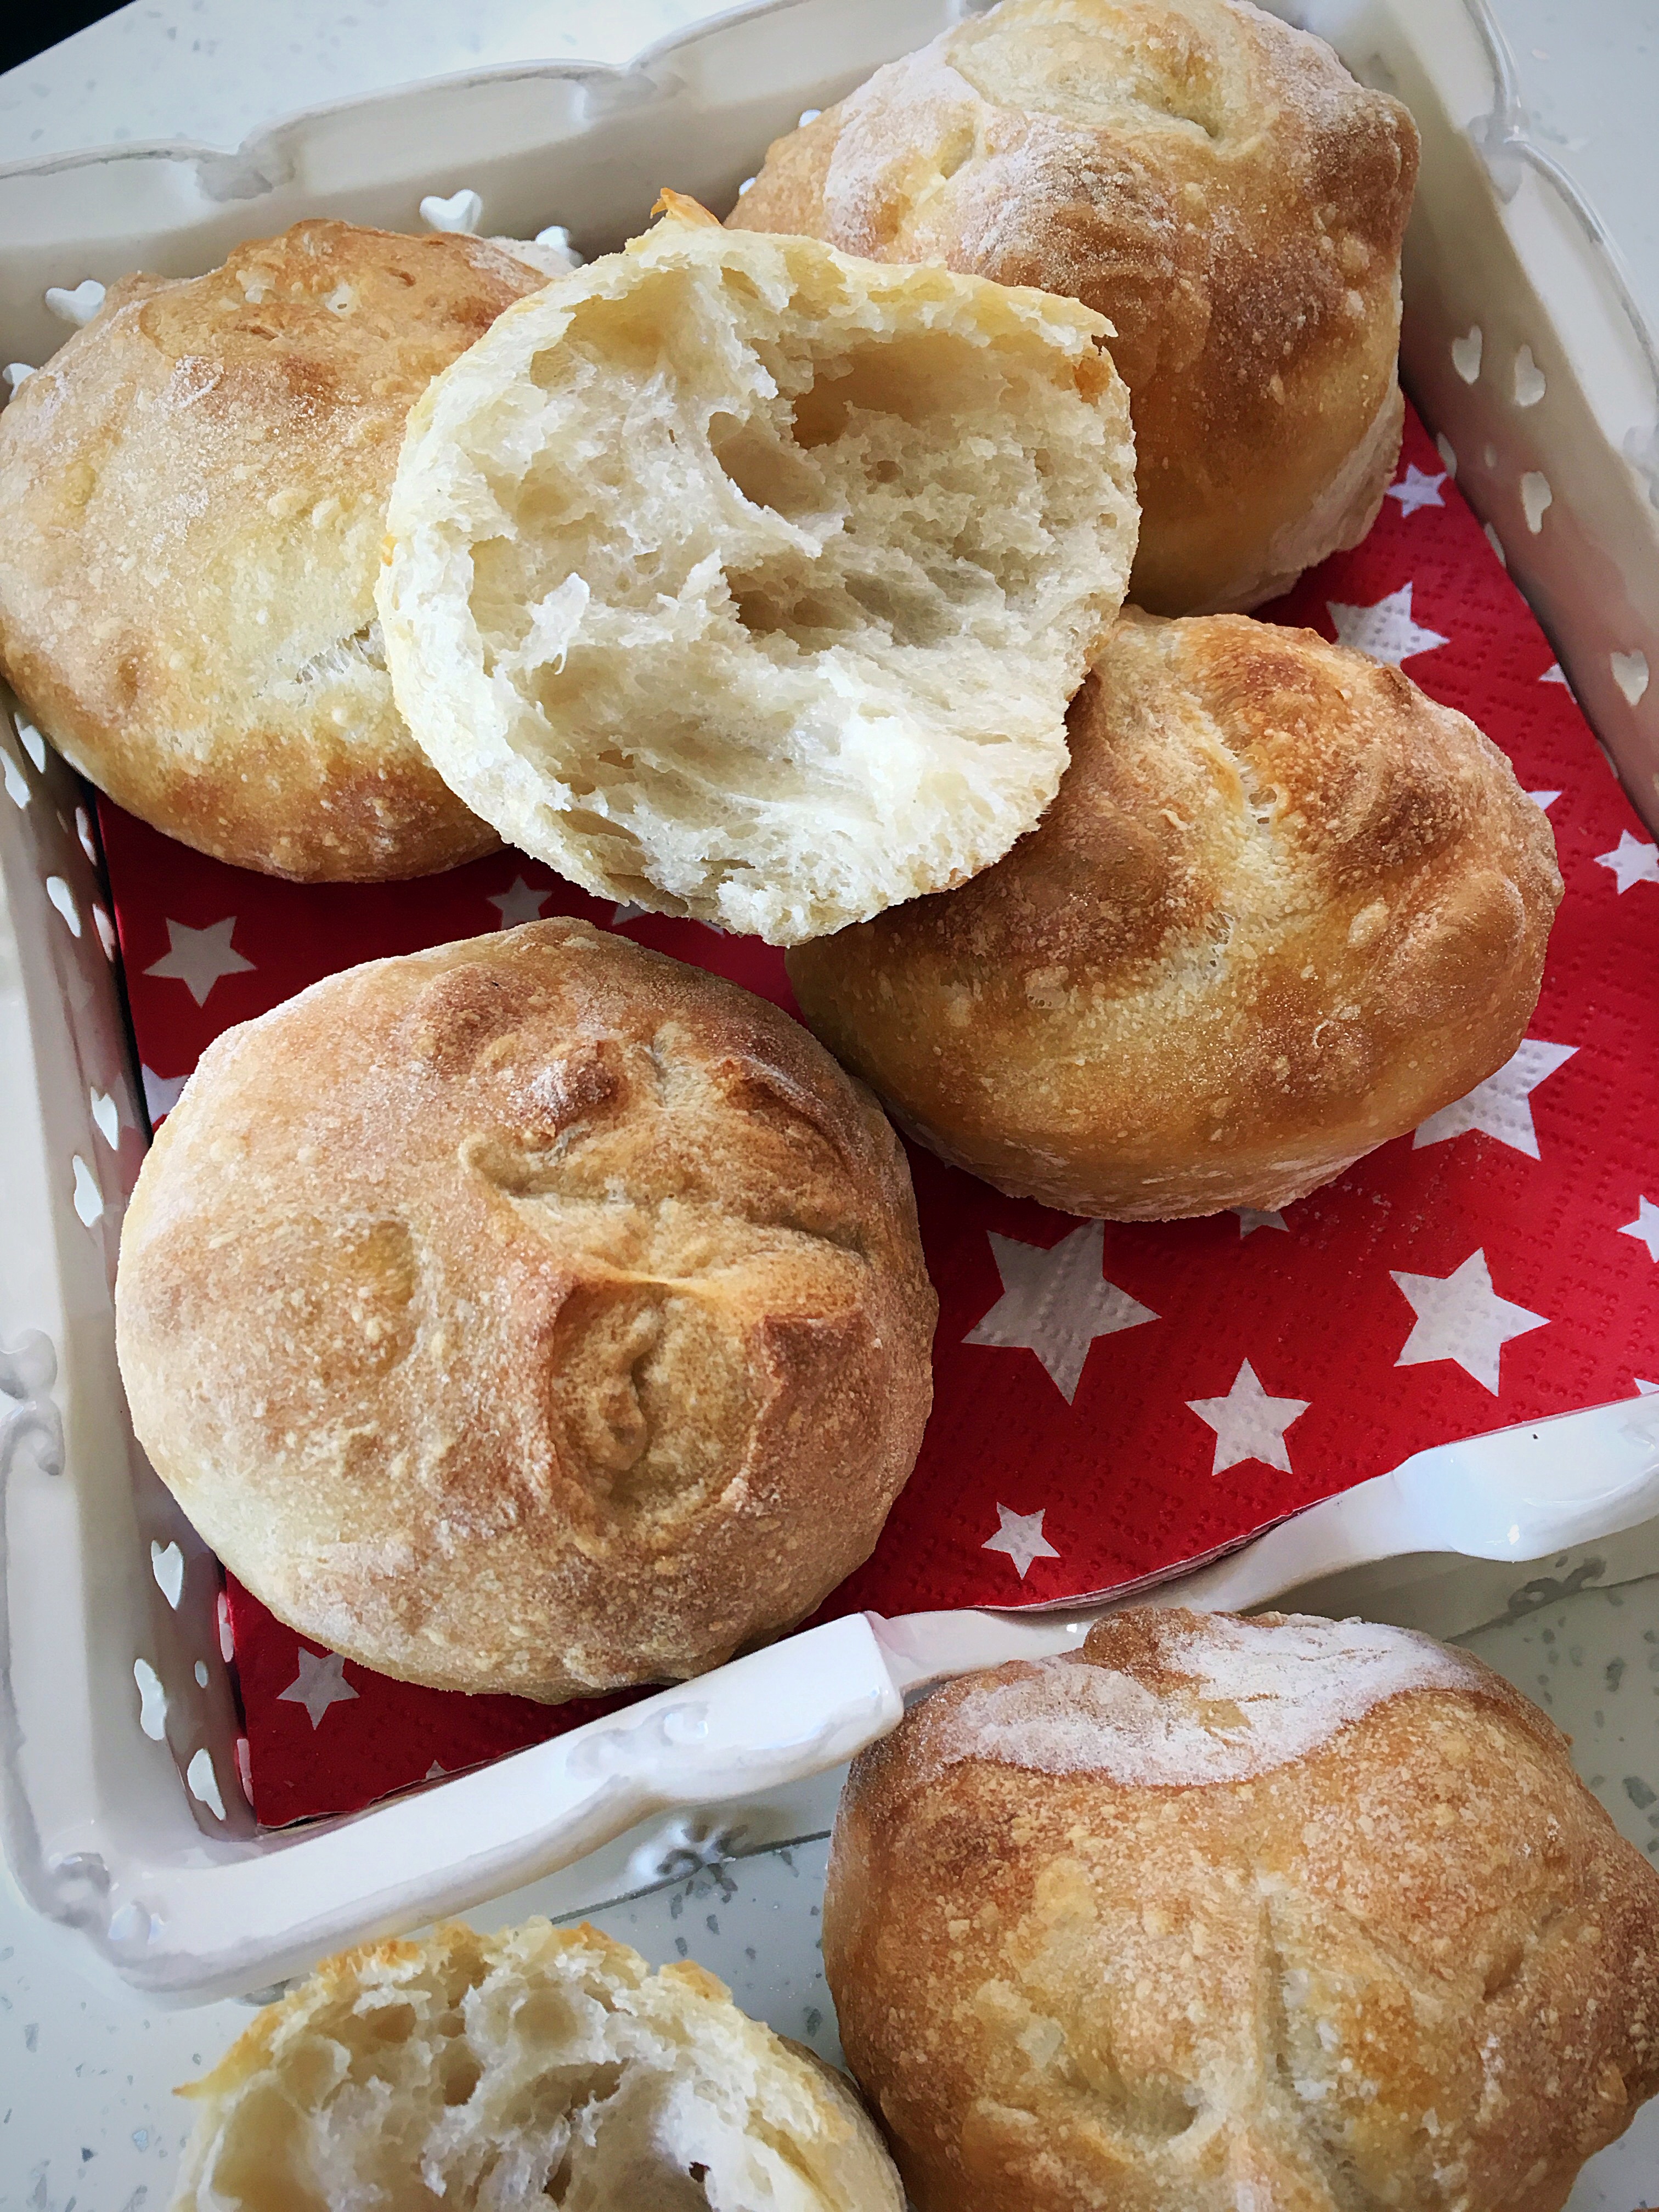
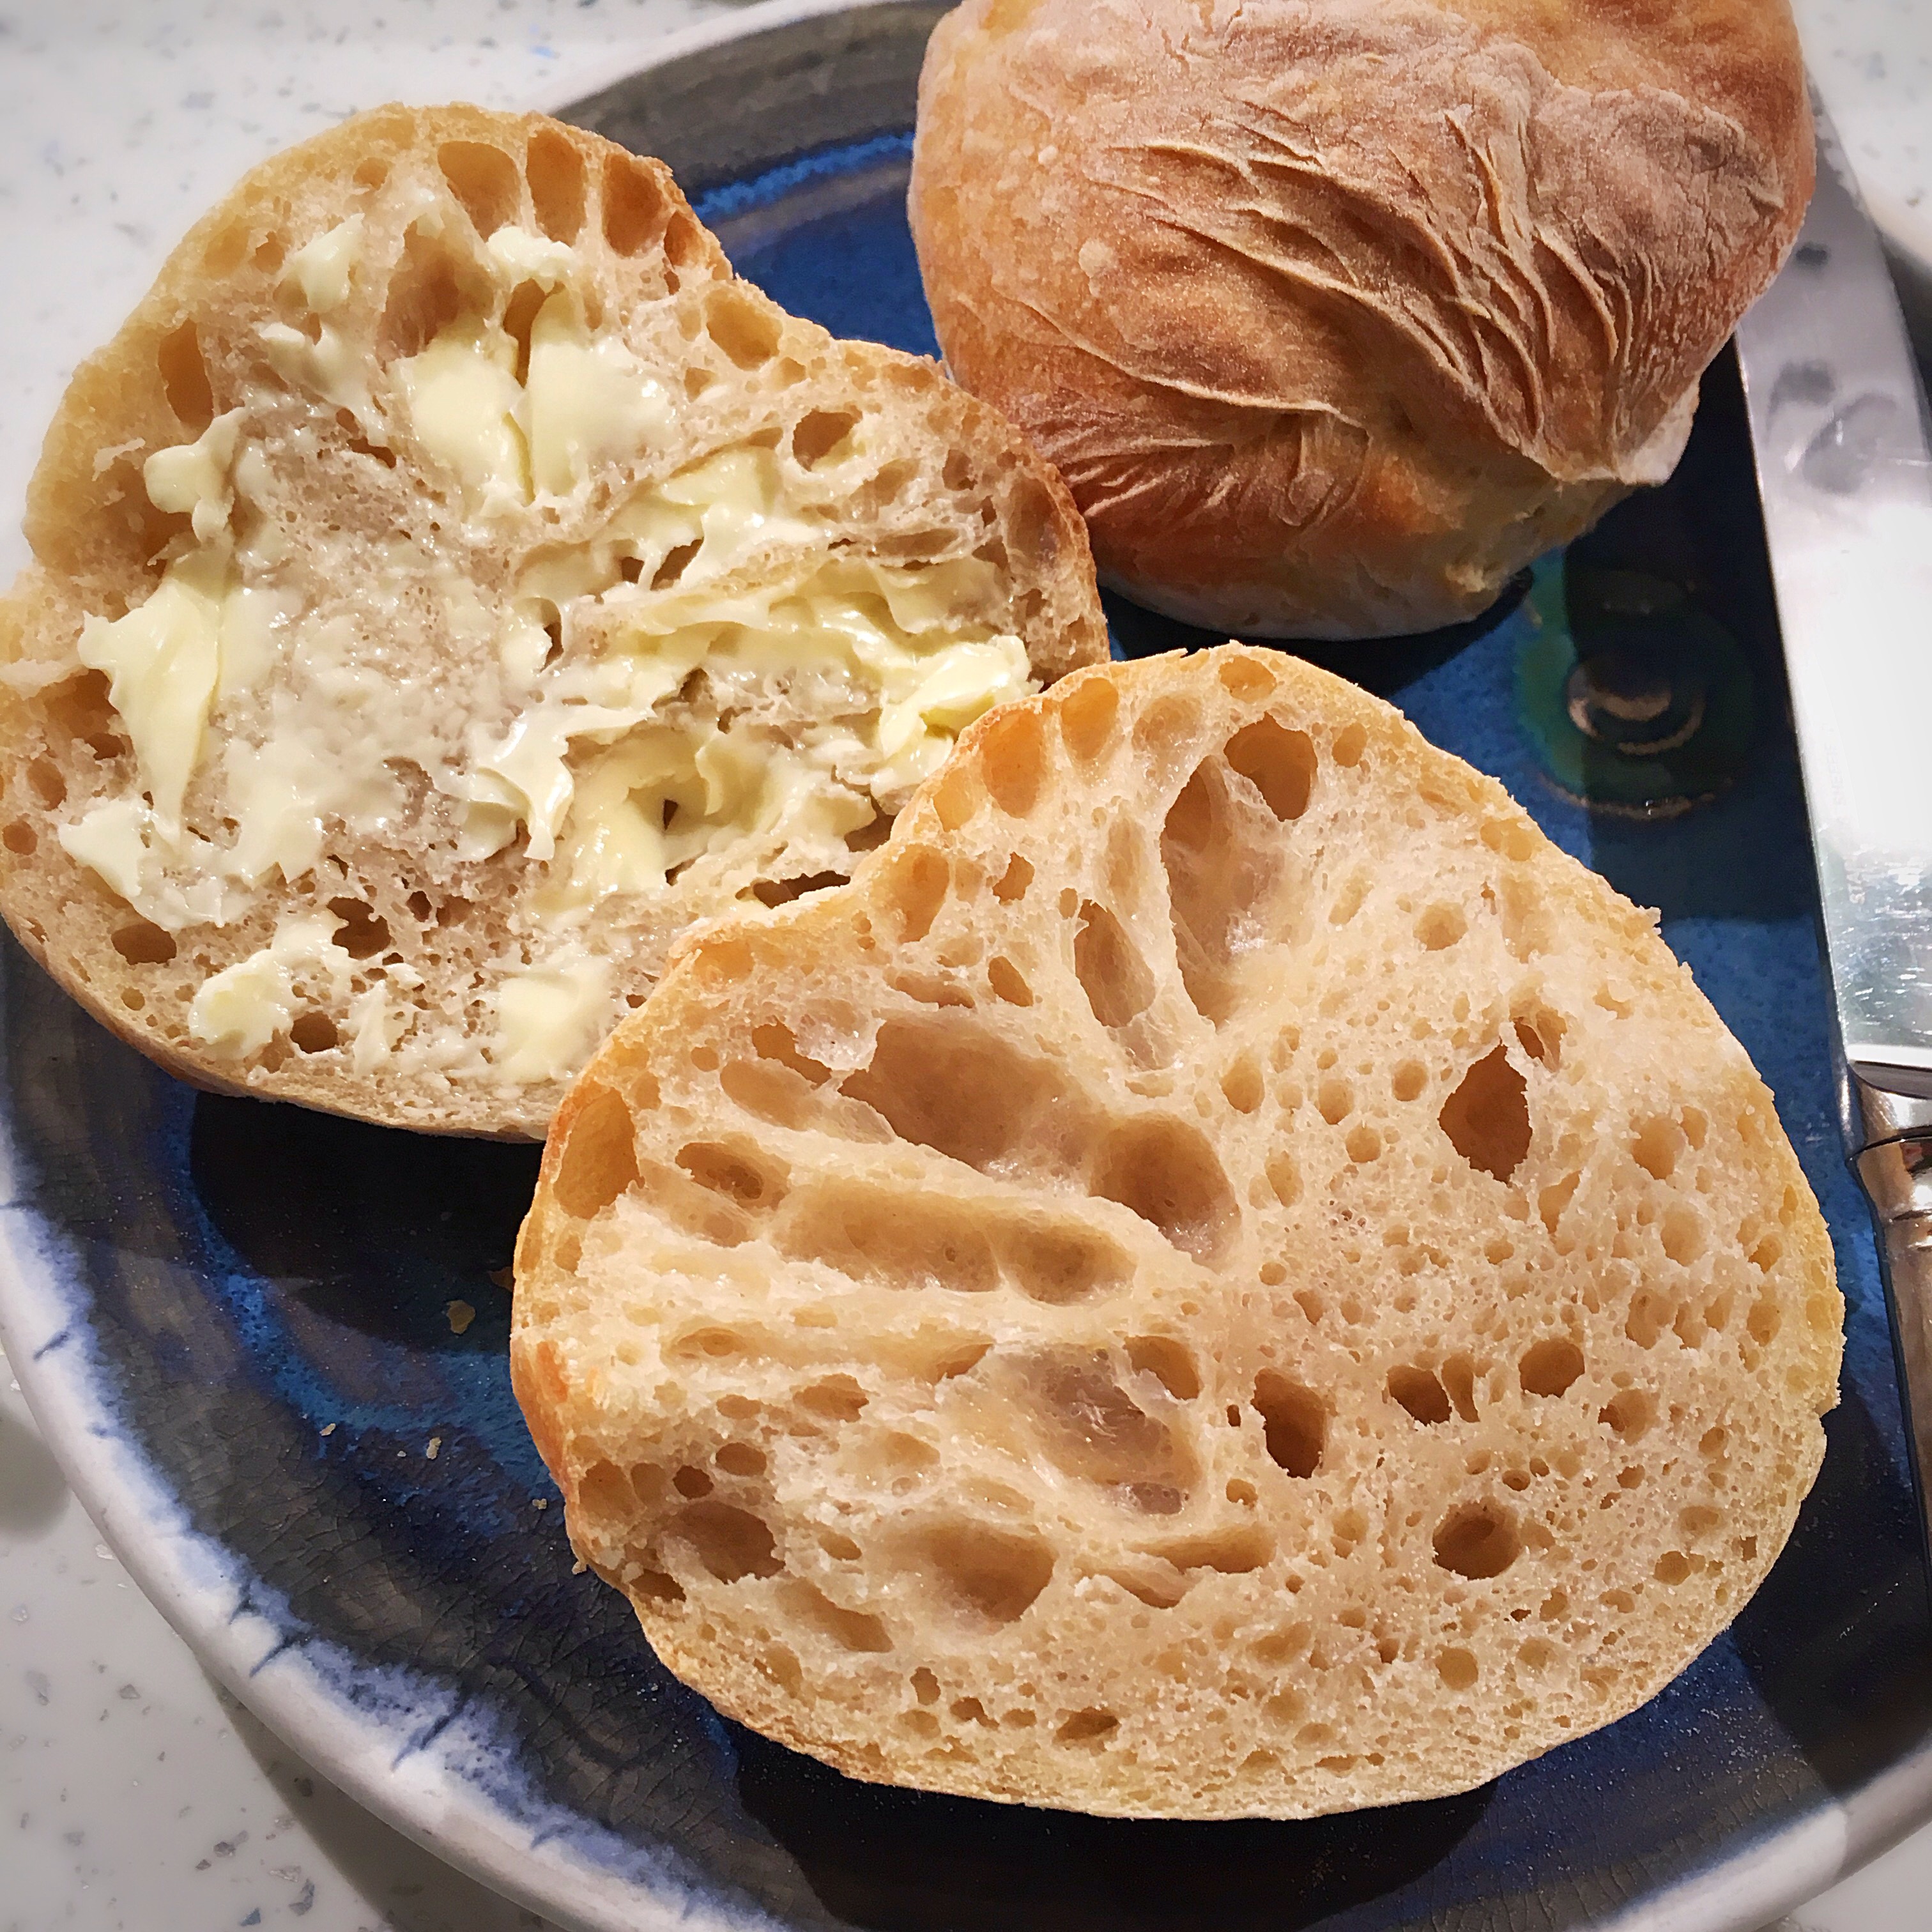
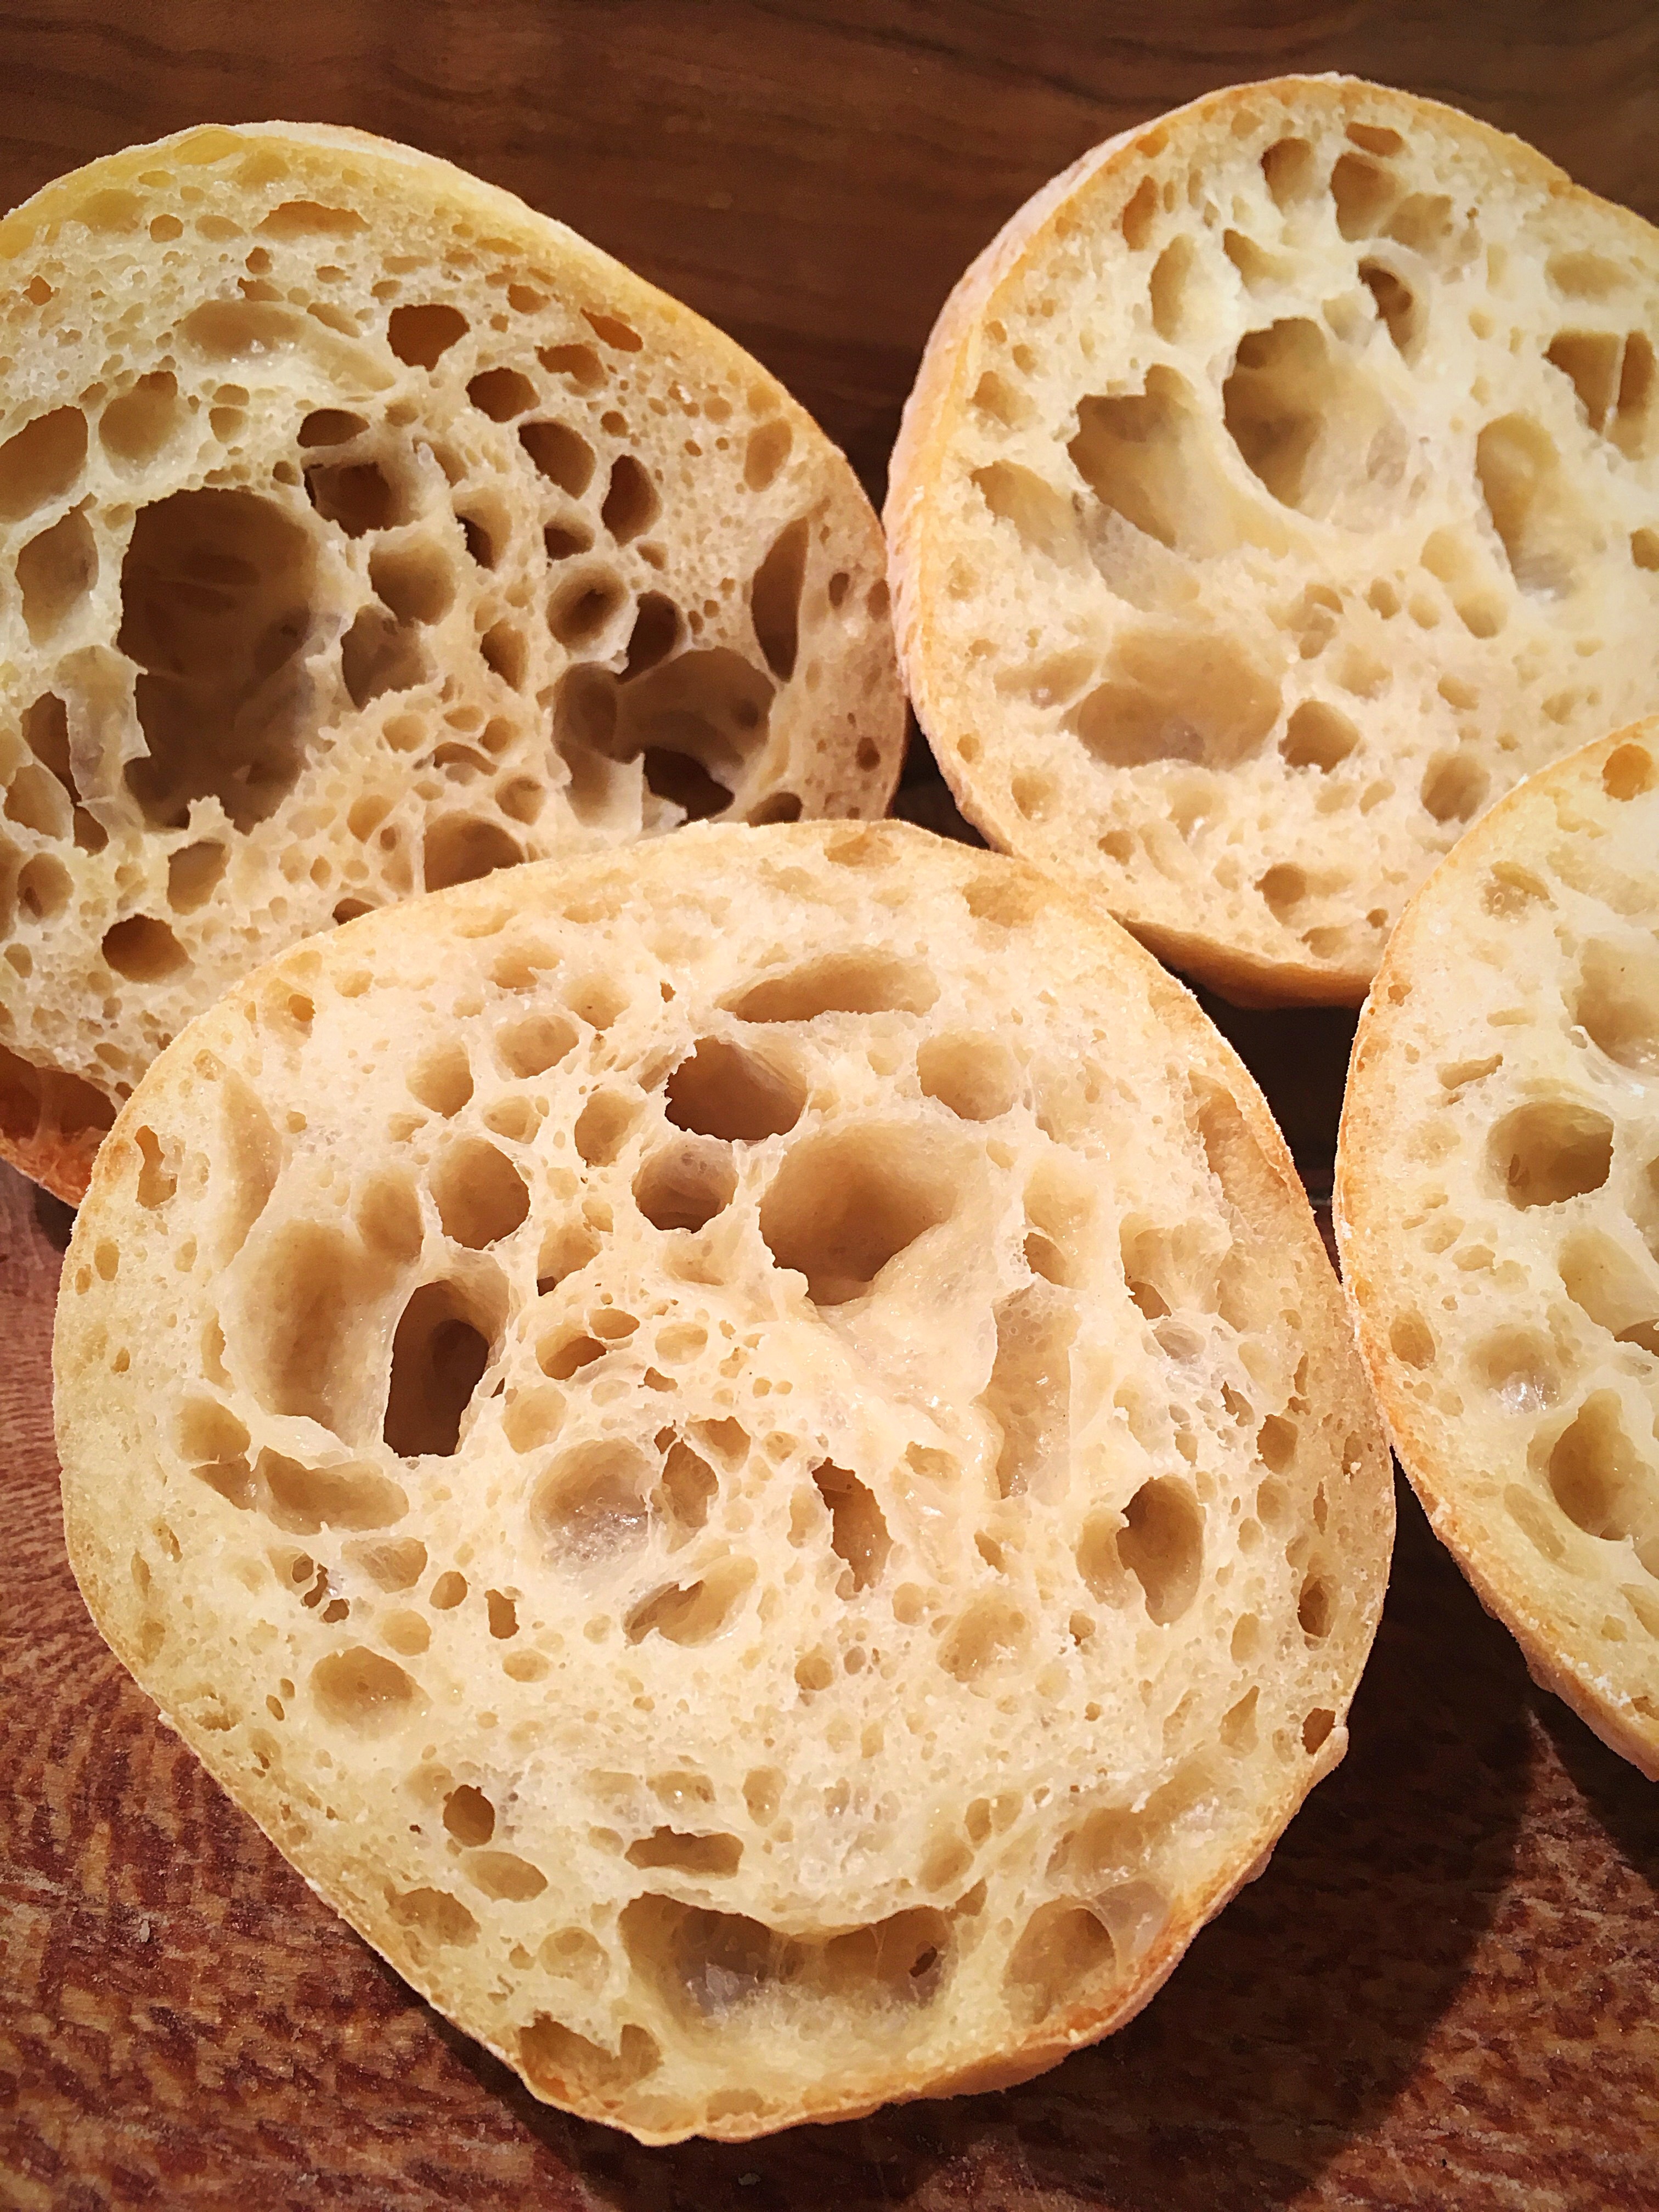
They came out lovely and crusty on the outside and soft and holey in the middle.
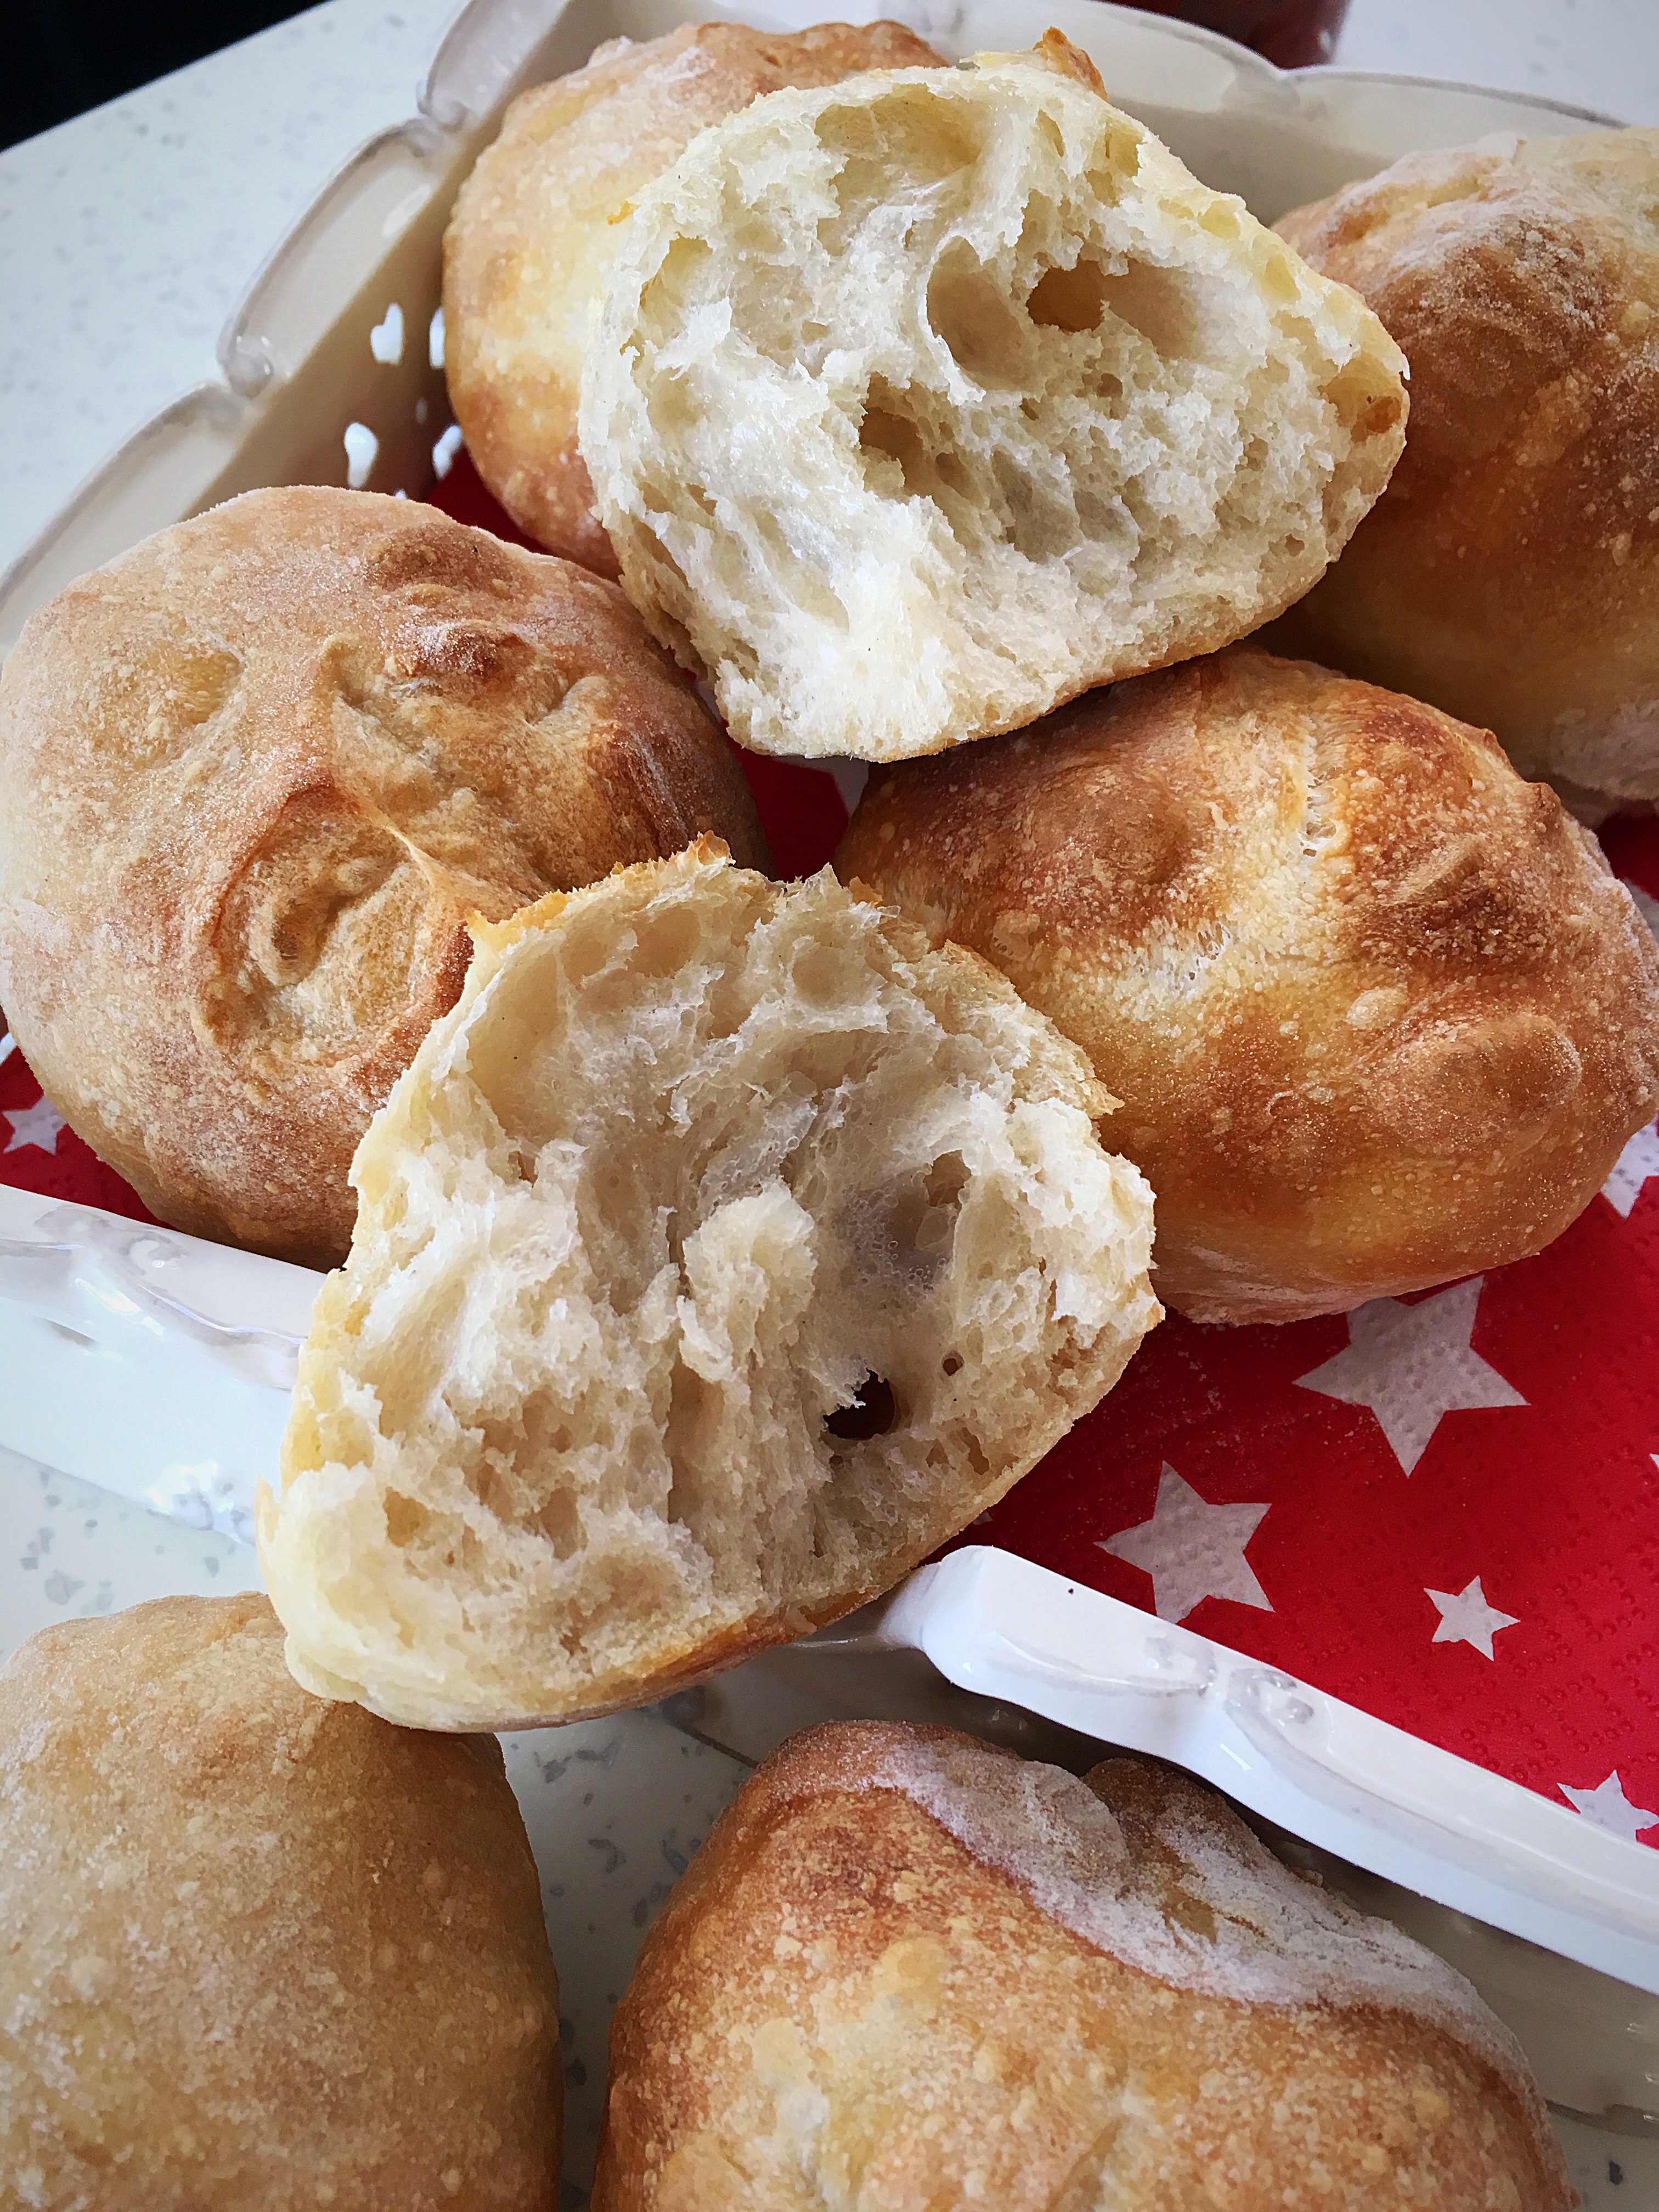
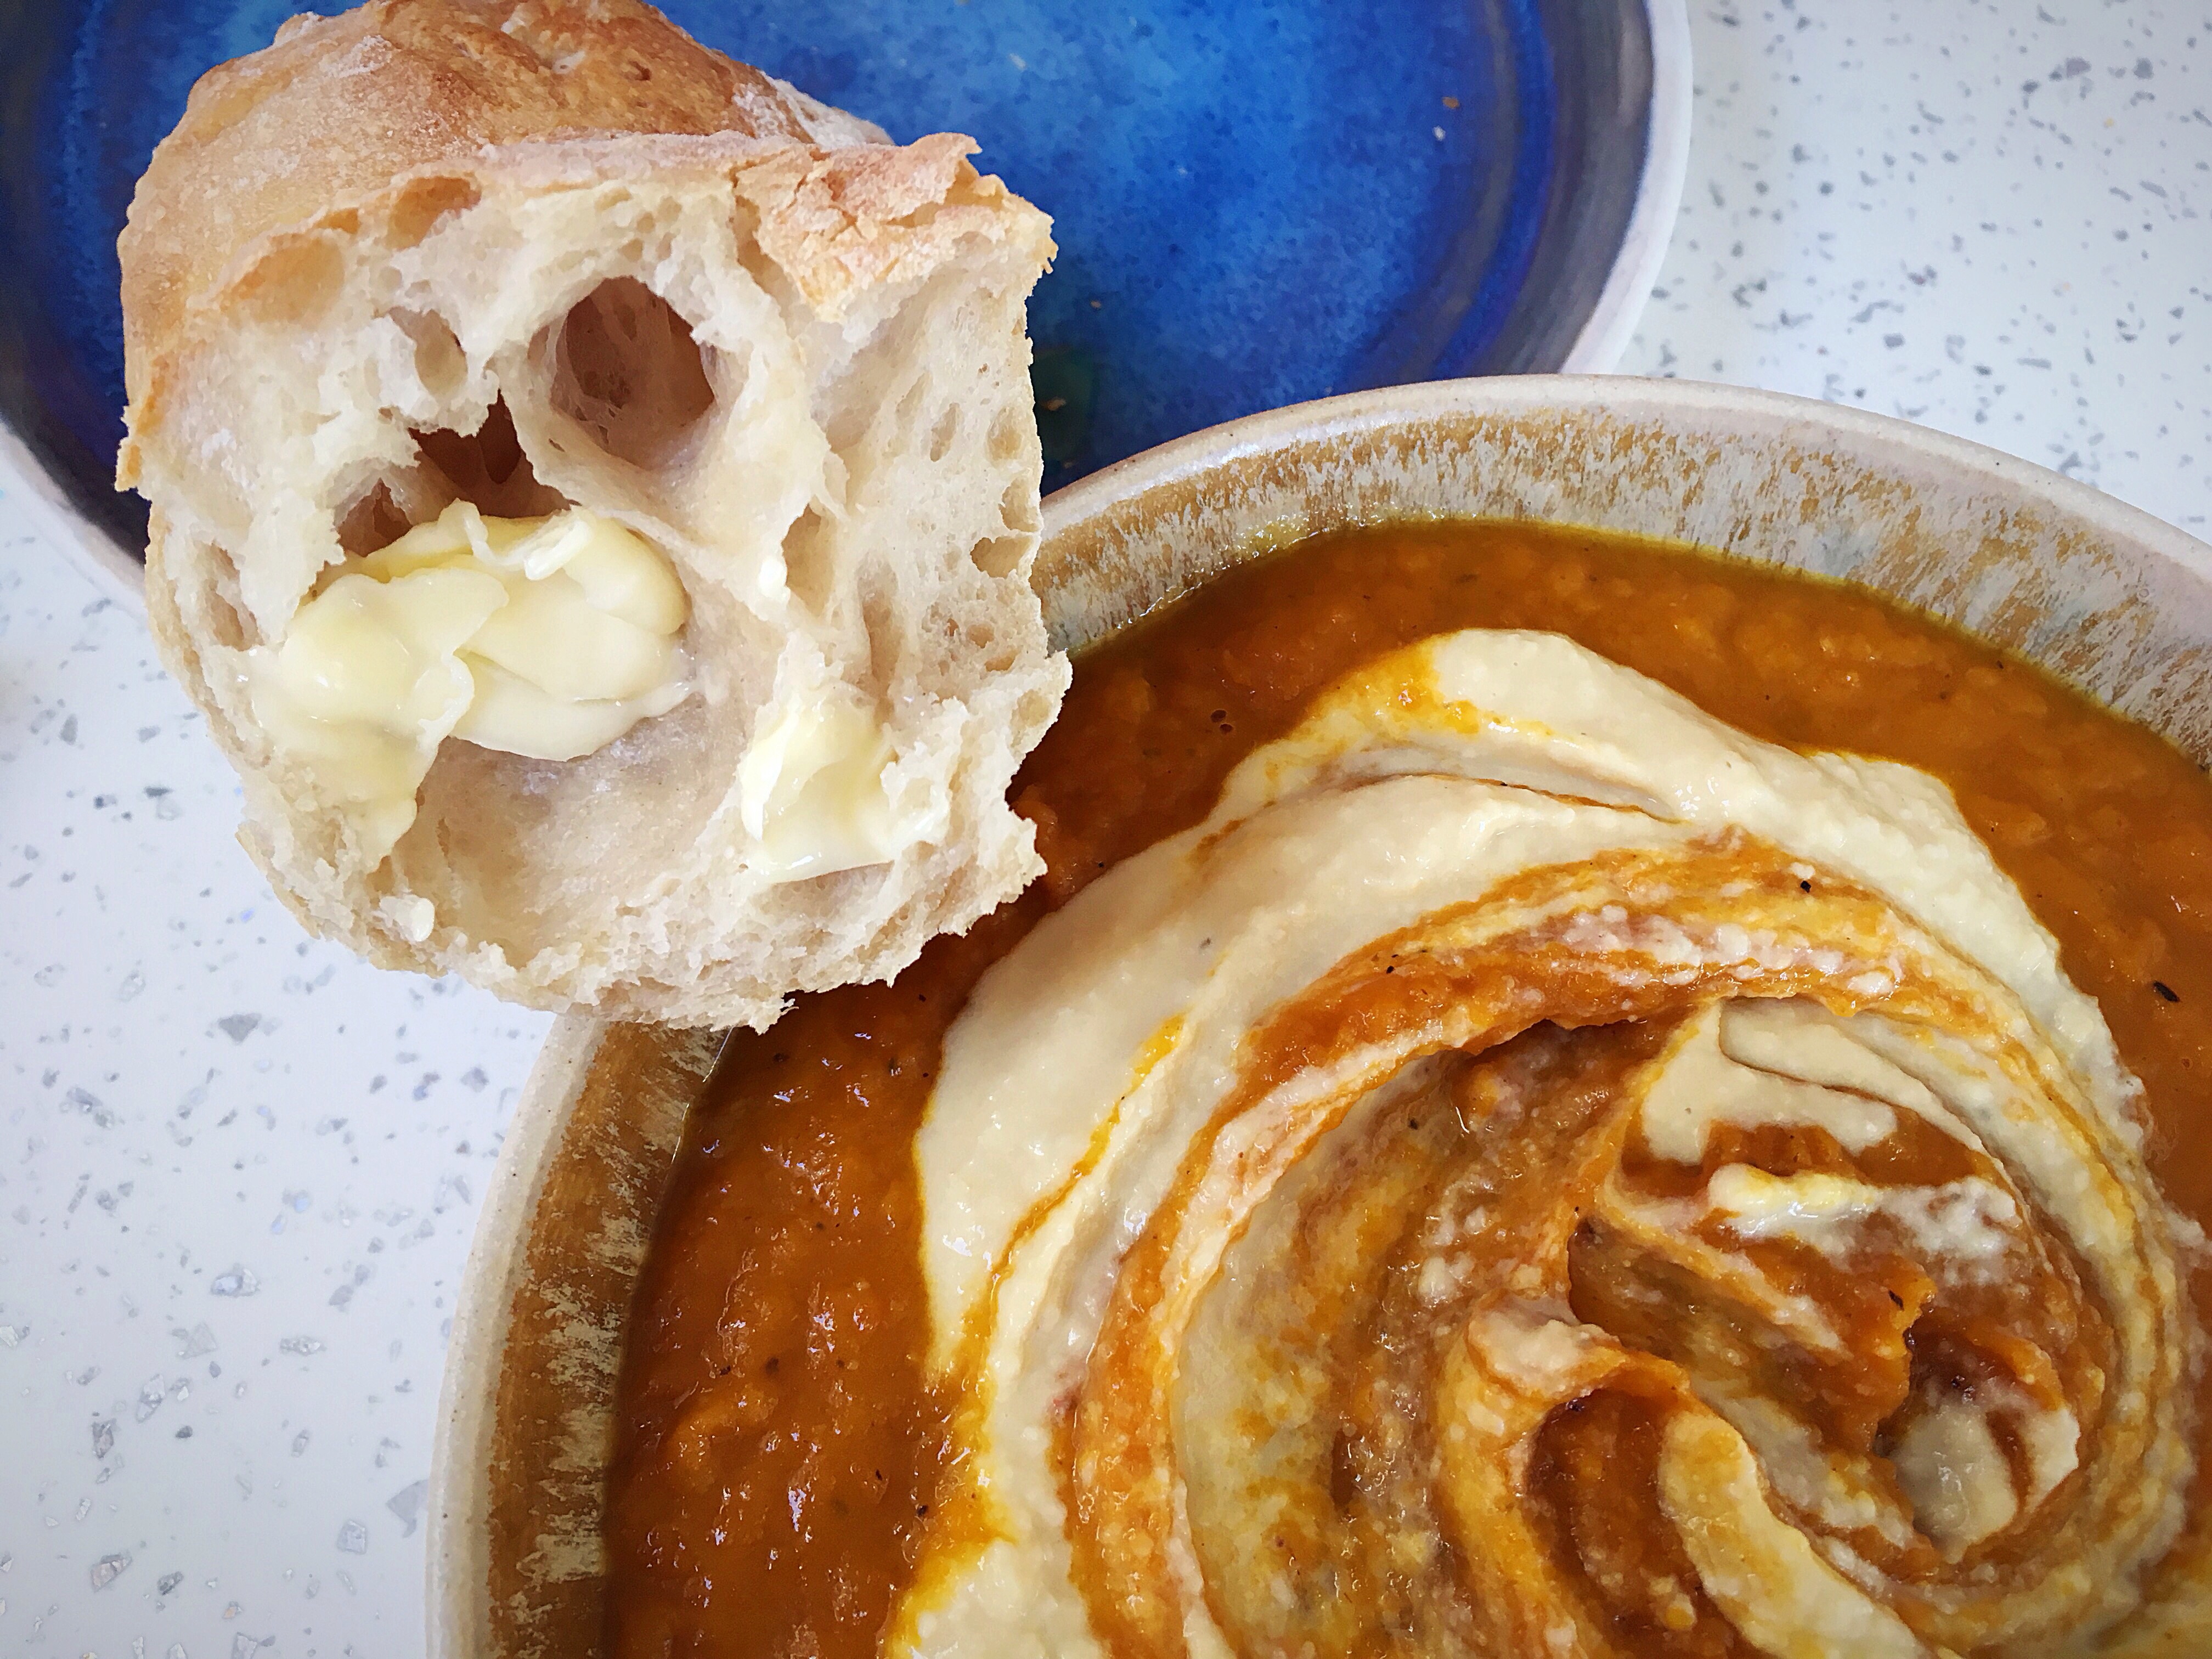
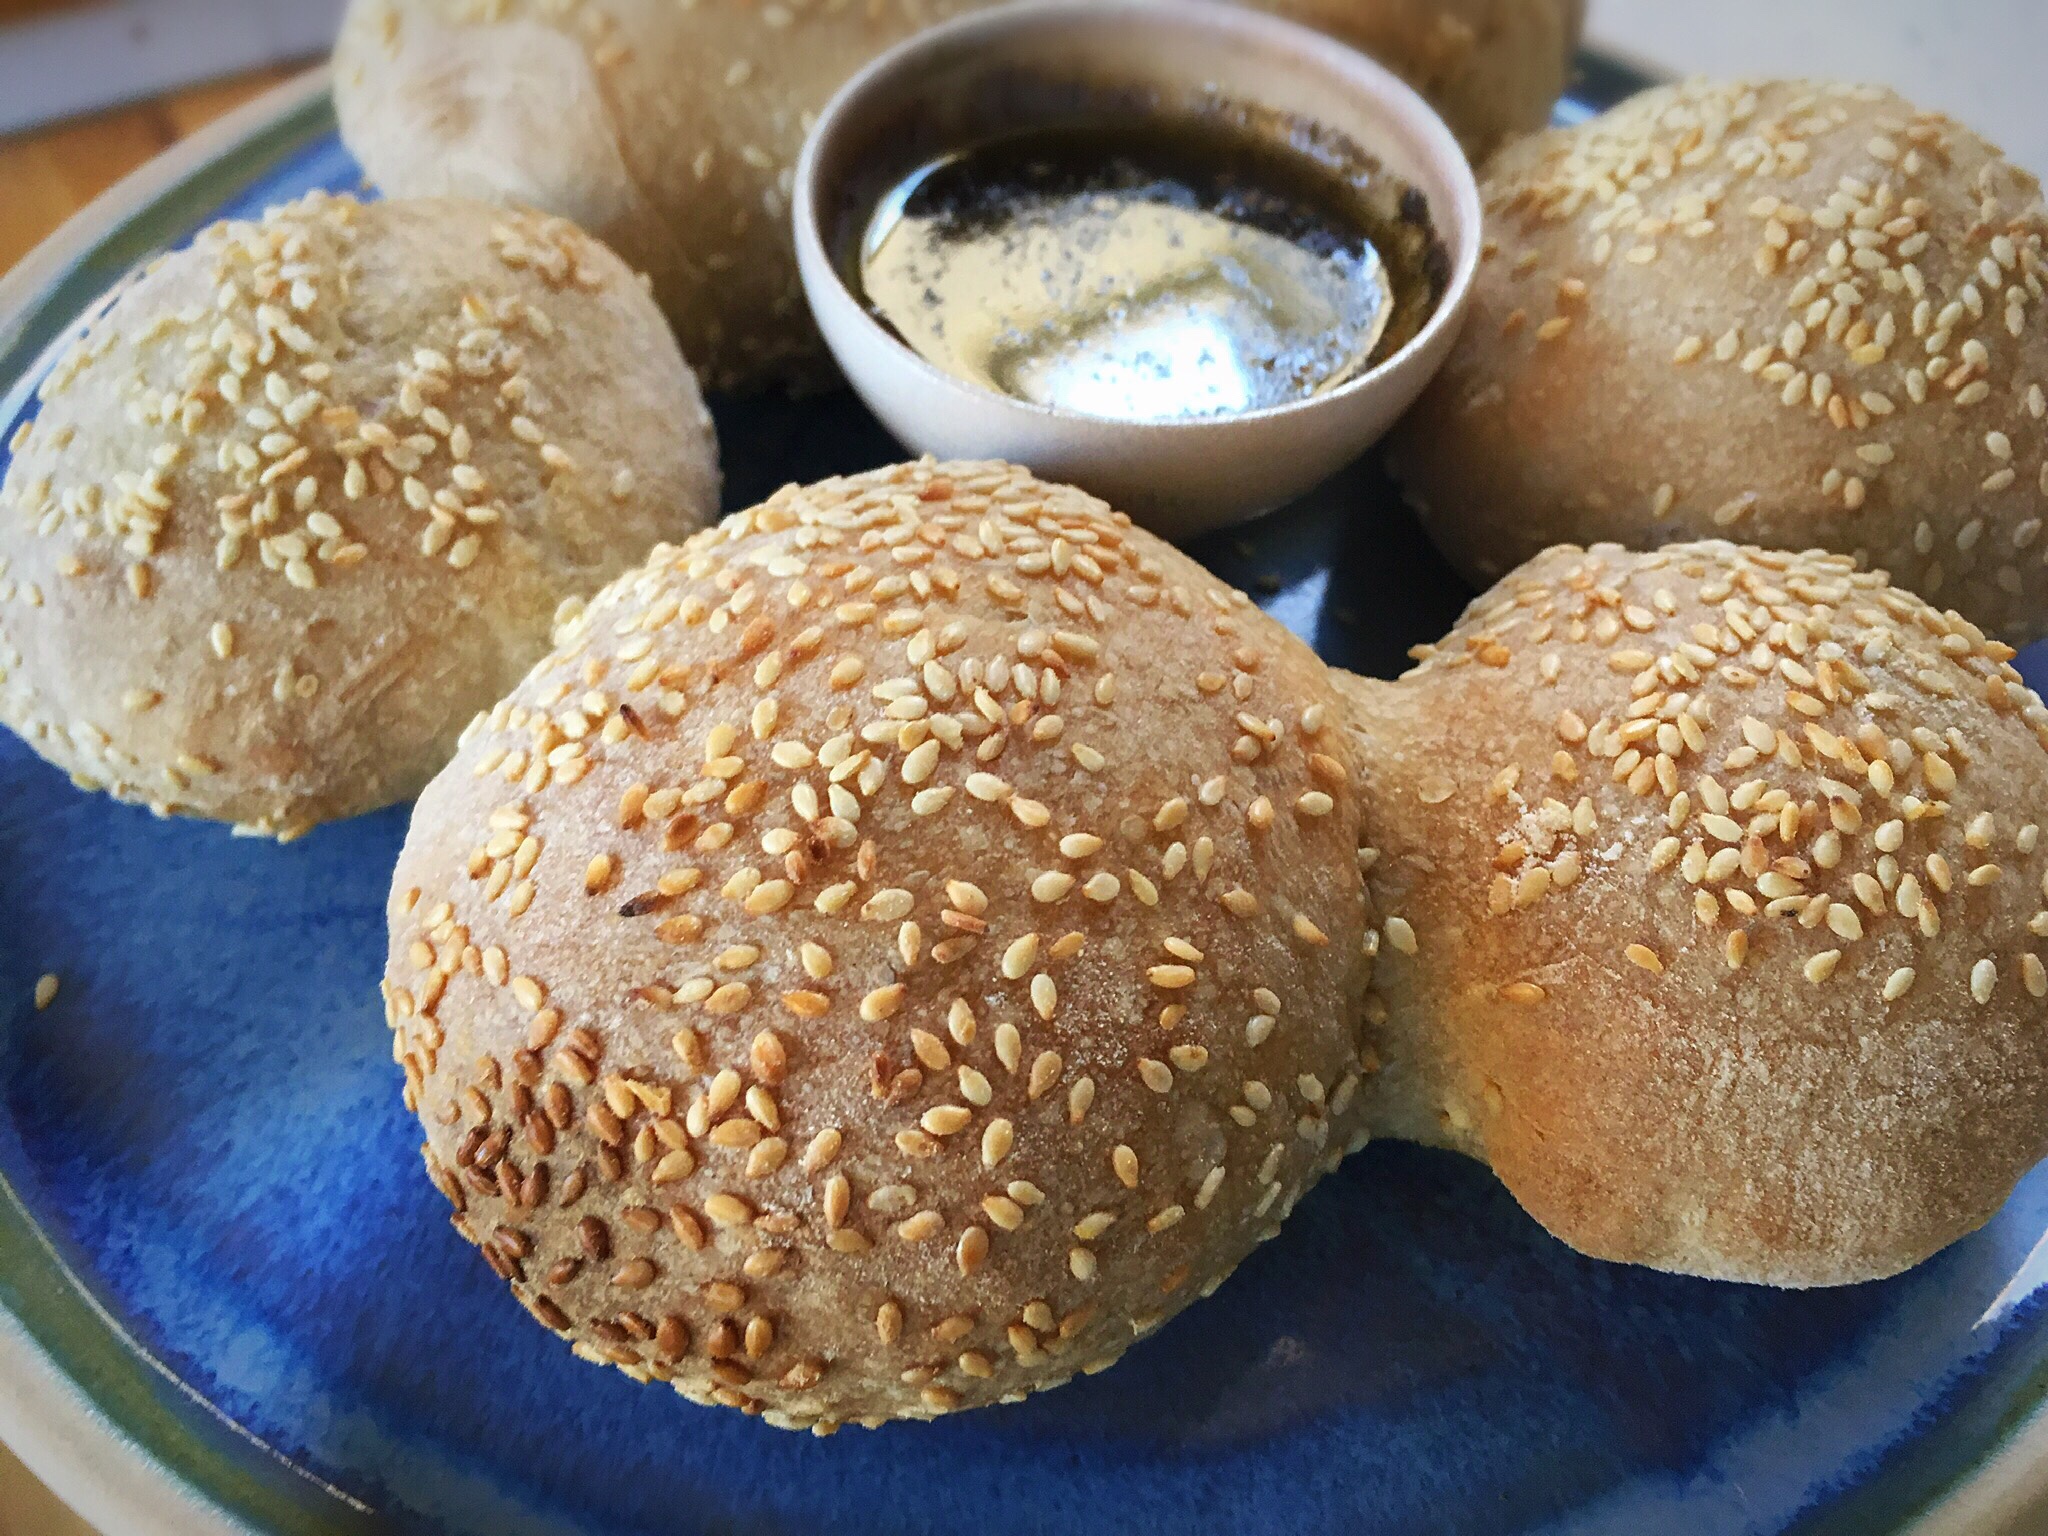
We forced ourselves to let them cool once baked whilst we made some spiced root vegetable soup (I topped my soup with my homemade homous, whilst Steve lashed piles of my homemade harissa on his) to enjoy them with…and it was worth the wait, they were so good!
We cut the dough into 16 pieces and made smaller rolls; if you want to make bigger versions, you may need to bake them for a bit longer.
Happy baking!
An update: I made rolls again (below) and these were much bigger, I split the dough into 8 this time and I baked them for about 20 mins until slightly browned on the top…

So good!!!
Another update: I baked these rolls from cold; I put the tray in the fridge for 1-2 hours after shaping them, then baked them from a cold start…
Once I put the tray into the oven, I turned the oven on and up to 200C fan assisted, and left them for 25 mins total. Perfectly baked!
It was a great day on our “Baking Date” Learnt more and Elaine never fails to impress. Face to face taught me so much… Can’t wait for our next one!
Me too! Thank you xx
Looks so good have to make them
I hope you like them!
Elaine I am a struggling new sourdough baker. I had what I consider my first loaf success last week with your Master Recipe. I’m still adjusting the ratios a bit and baking time to adjust to my climate in Hawaii. I made the rolls this morning and they were wonderful. Yet I felt the flavor was not quite as good as the loaf.
Is there a reason you go straight to baking after the overnight prove vs. baking the rolls after the all-day in the refrigerator time?
Would that long time in the refrigerator help enhance the flavor?
Thanksgiving is coming up and I plan to bake a double batch to take with us to share with friends. Thank you for a recipe and a process that let me make my sourdough adventure a success!
David
Hi David, thank you for your message, I’m glad the rolls worked well for you!
I tend to bake them directly after the overnight prove as much because there isn’t room in my fridge for a large baking tray, plus I wanted it to be a faster recipe to be able to make in the morning.
Please do try giving them some time in the fridge and see how it affects the final bake and flavour, I’d be very interested to know how it goes…:)
Hello Elaine, as no lid is used, do you create steam in the oven when baking the rolls ?
Hi, no, I haven’t added steam when I’ve baked them 🙂 x
I just tried these this morning from my overnight prove. Got 8 lovely big rolls. I baked at 425 F with fan. They started to brown a bit too quickly in my crazy oven, so with about 5 minutes of bake time left I reduced to 400F with fan. Mine came out a couple of minutes early and I checked the interior temp – it was 205F – I think that is good! I did slather on a bit of good Irish butter on top.
And they look so good!!!!
can I know for the rolls do u still do the normal SNF and are these proofed in the banetton before turning to cut it?tks
Yes to both, please read my master recipe for making the dough
Would you be able to freeze these before baking? Trying to make a large batch before the holidays! Love your master recipe!!
I would make and bake them then freeze them, they defrost perfectly! Even easier too
Thank you!
I made these rolls last week an I was not disappointed they turn out very good. I would like to make them again but make the outter crust a little softer. What would be good for that Melted butter prior to baking?
I am in the middle of making the pitas now. Love the master recipe as I can use it for multiple things.
Thanks.
Hi Greg, thank you so much 🙏🏻🙏🏻
You could soften the rolls with different flours, leave them for a few hours, or try placing a clean tea towel over them when they come out of the oven and let the steam soften the crusts. Or yes, try melted butter over the top…let me know how it goes xx
I’ve just put my rolls in the fridge and they’ve gone flat! Will they inflate again in the oven or should I try to reshape them before baking?
If the dough is strong enough they will bounce right back up when you bake them. If it was too wet or at all over proved it might be an issue
Thank you, that’s useful to know. I’ll find out in an hour when I bake them.
Good luck!
I’ve sent you a message from Facebook but I’m not sure if you’ve received it. Do you have an email address I can send it to? The question is related to cakes
Made your recipe and loved the flavor of the rolls. My problem was the crust, it was so hard it was almost impossible to cut and eat. I was looking forward to a nice crust but mine were like hockey pucks. What did I do wrong?
Hi, maybe they needed baking for a little less time?
I want to try making mini pumpkins out of these rolls you said there soft and sticky do you have a digestion I’m making a double batch
Hi, I do actually have a post on here about making baby pumpkin loaves if you’d like to have a look?